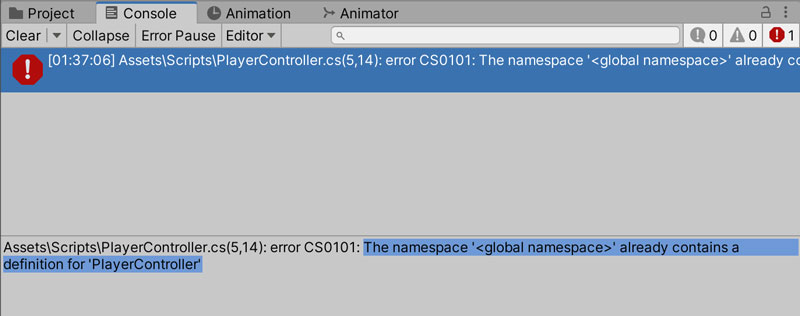
Recently, I came across an error that was quite the head-scratcher while grading some Unity scripts. Here’s what the error says:
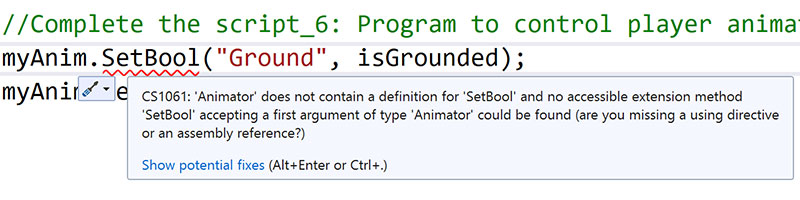
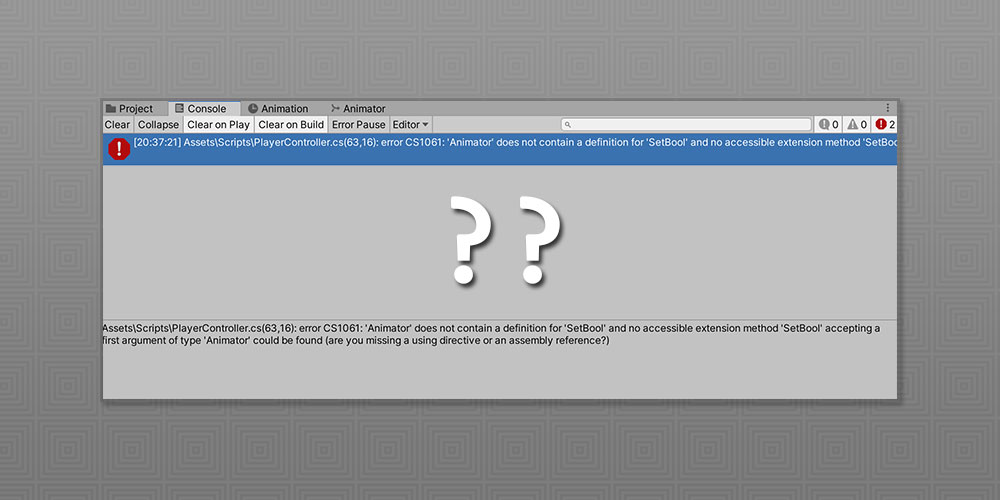
myAnim variable was set with myAnim = GetComponent<Animator>() earlier on. But SetBool() is a valid method in the Animator component from Unity, so what exactly is going on here?