Update 22 January 2024: There was a bug in our Virtual Joystick Pack that we’ve fixed. If you were having problems getting the joystick to work after exiting the game and restarting it, please redownload the pack and reimport it into your project.
Implementing Mobile Compatibility is a short series of articles that will complement our main Vampire Survivors series. As the name suggests, in this series of articles, we will be exploring how to bring mobile compatibility to the game that we have been building in our main series.
Specifically, in this article (and the accompanying video that will be released soon), I will be covering — in general — the things to consider when introducing mobile compatibility to a game, as well as how to port the movement controls (the only mode of control in the game) to a mobile interface.
1. Mobile compatibility — things to consider
When porting a game to mobile, there are generally 2 things that we need to work on:
- Porting the controls onto a mobile interface
- Adapting the UI to the mobile screen
In this article, we will only be covering the porting of the controls to a mobile interface, as the Vampire Survivors project has a lot of UI elements, and all of them have to be rebuilt (in a sense) to fit into a mobile device; so we will need a longer article (and / or video) to address them.
If you’d like to take a stab at doing (b) yourself, you can check out this video to get started:
2. Setting up the Device Simulator
To begin making the game mobile compatible, you first have to ensure that your Unity Editor has the Device Simulator set up. To do that, go to the Game window, and check if there is a dropdown that you can use to toggle the Simulator window:
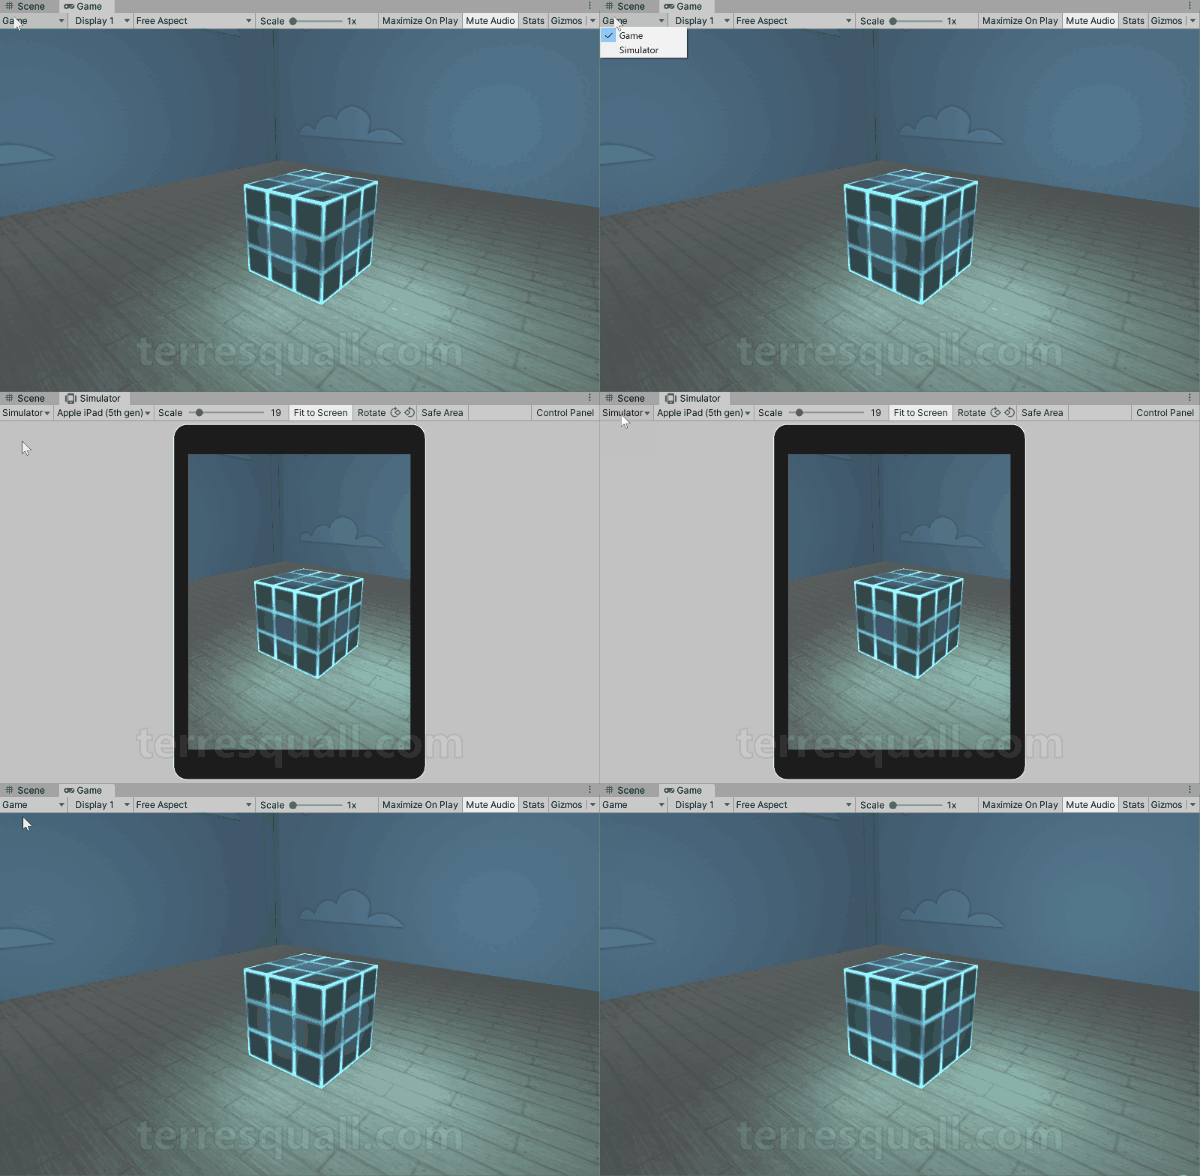
If you are using Unity version 2020 and below, you will likely not have the Device Simulator installed by default. In this case, you will need to follow this guide to set it up:
3. Introducing mobile controls
As Vampire Survivors is a relatively simple game, introducing mobile controls is a relatively simple task.
a. What we need to do
You will just need to change the following part of your PlayerMovement.cs code:
void InputManagement()
{
    if(GameManager.instance.isGameOver)
    {
        return;
    }

    float moveX = Input.GetAxisRaw("Horizontal");
    float moveY = Input.GetAxisRaw("Vertical");

    moveDir = new Vector2(moveX, moveY).normalized;

    if (moveDir.x != 0)
    {
        lastHorizontalVector = moveDir.x;
        lastMovedVector = new Vector2(lastHorizontalVector, 0f);    //Last moved X
    }

    if (moveDir.y != 0)
    {
        lastVerticalVector = moveDir.y;
        lastMovedVector = new Vector2(0f, lastVerticalVector);  //Last moved Y
    }

    if (moveDir.x != 0 && moveDir.y != 0)
    {
        lastMovedVector = new Vector2(lastHorizontalVector, lastVerticalVector);    //While moving
    }
}
What do you need to change? Well, you just need to have a way to detect when the game is running on a mobile platform, and to have an alternate way of receiving input.
float moveX, moveY;
if (/* we are on a mobile platform */)
{
    // Process input from a mobile interface
}
else
{
    moveX = Input.GetAxisRaw("Horizontal");
    moveY = Input.GetAxisRaw("Vertical");
}
b. The Virtual Joystick
Most mobile games use virtual joysticks (i.e. joysticks on the screen) to do so. This is a virtual joystick.
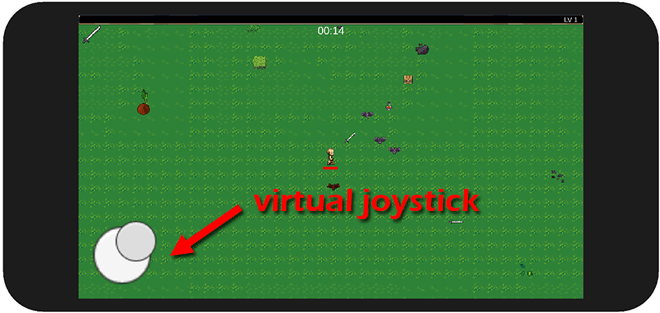
Coding a virtual joystick, however, is quite a difficult task. The good thing, however, is that we’ve developed an asset pack for it called the Virtual Joystick Pack on the Unity Asset Store.
In the meantime, you can download the package here using the link above, and import it into your project. This will add the VirtualJoystick folder into your project.
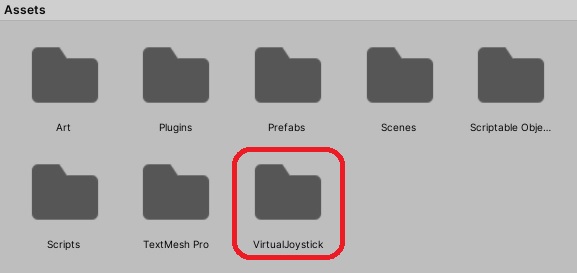
VirtualJoystick folder.c. Setting up the Virtual Joystick
To start using a virtual joystick, simply drag and drop a joystick from the VirtualJoystick/Prefabs folder onto the Canvas in the Game scene, and you should be able to start interacting with it
However, the player character will not respond to it. To bind it to the player’s movement, you will need to modify the InputManagement() function in PlayerMovement.cs, as mentioned before.
PlayerMovement.cs
void InputManagement()
{
    if(GameManager.instance.isGameOver)
    {
        return;
    }

    // If a joystick is active on the scene, always use
    // the joystick input for player movement.
    float moveX, moveY;
    if (VirtualJoystick.CountActiveInstances() > 0)
    {
        moveX = VirtualJoystick.GetAxisRaw("Horizontal");
        moveY = VirtualJoystick.GetAxisRaw("Vertical");
    }
    else
    {
        moveX = Input.GetAxisRaw("Horizontal");
        moveY = Input.GetAxisRaw("Vertical");
    }

    moveDir = new Vector2(moveX, moveY).normalized;

    if (moveDir.x != 0)
    {
        lastHorizontalVector = moveDir.x;
        lastMovedVector = new Vector2(lastHorizontalVector, 0f);    //Last moved X
    }

    if (moveDir.y != 0)
    {
        lastVerticalVector = moveDir.y;
        lastMovedVector = new Vector2(0f, lastVerticalVector);  //Last moved Y
    }

    if (moveDir.x != 0 && moveDir.y != 0)
    {
        lastMovedVector = new Vector2(lastHorizontalVector, lastVerticalVector);    //While moving
    }
}
You will also need to add the following namespace at the top of your PlayerMovement.cs file.
using UnityEngine;
using Terresquall;
To access input from the virtual joystick, we use VirtualJoystick.GetAxisRaw(), similar to how we usually use Input.GetAxisRaw(). If you would like to find out more about how to use the virtual joystick, you can check out our guide for it.
d. Customising the Virtual Joystick
If you select the virtual joystick prefab on the Canvas, you will find that there is a component that you can modify:
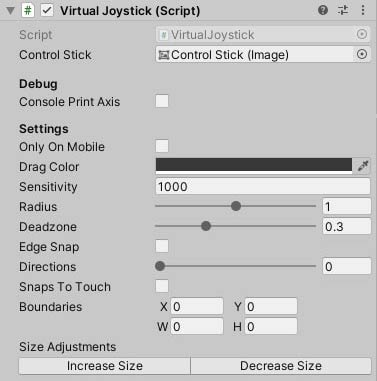
While you don’t need to change anything to get it to work, I recommend:
- Checking Edge Snap and setting Directions to 8. What this does is restrict the joystick to only 8 directions of movement, making the game a lot easier to control on mobiles.
- If you are placing the joystick on the bottom left corner of the screen, you might also want to check Snaps To Touch and setting Boundaries to
W: 0.5andH: 0.5. This will make the joystick move to the player’s finger whenever they tap on the bottom left corner of the screen.
If you want the joystick to only appear when on a mobile device, or when the Device Simulator is on (Unity 2020 and above only; doesn’t work on 2019 and below), you can also check Only On Mobile. Outside of mobile devices.
To read more about the other properties of the component, check out this part of the guide.
e. Landscape mode only
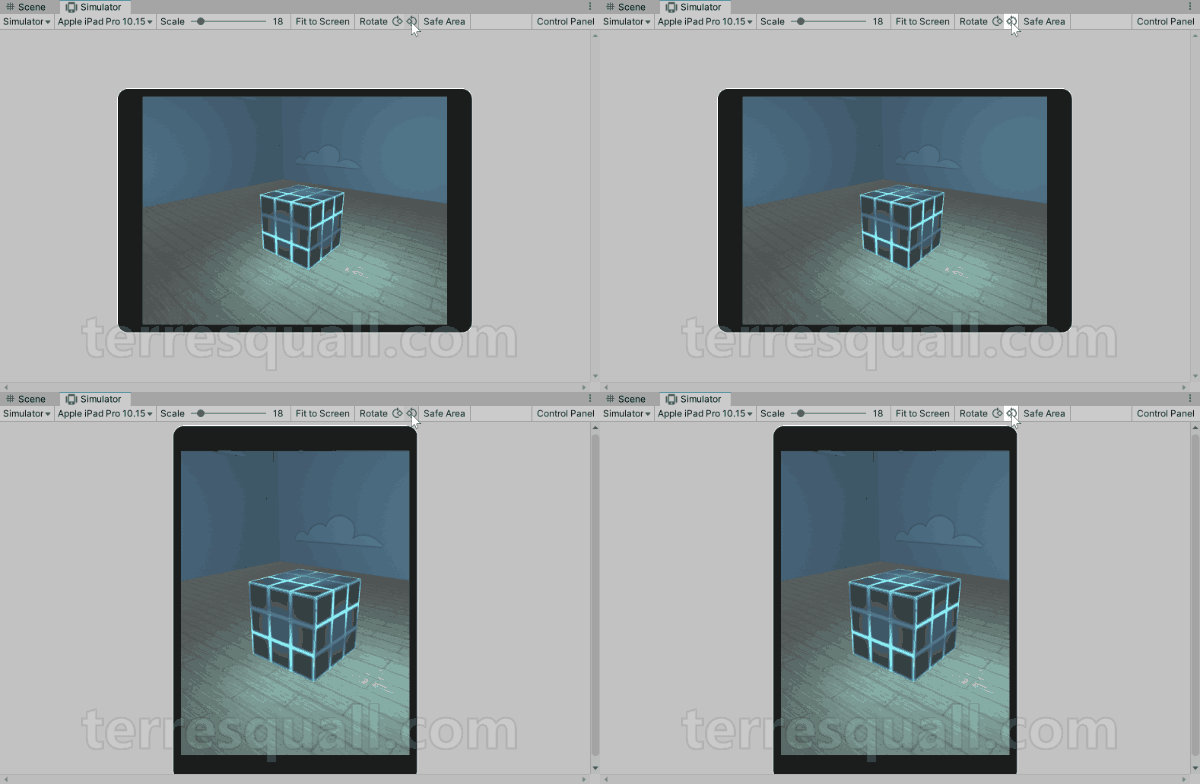
Since most of our UI is designed for a horizontal screen, I will highly-recommend making the game play only in Landscape mode for mobiles, as the UI breaks on Portrait mode. To flip the screen on the Device Simulator:
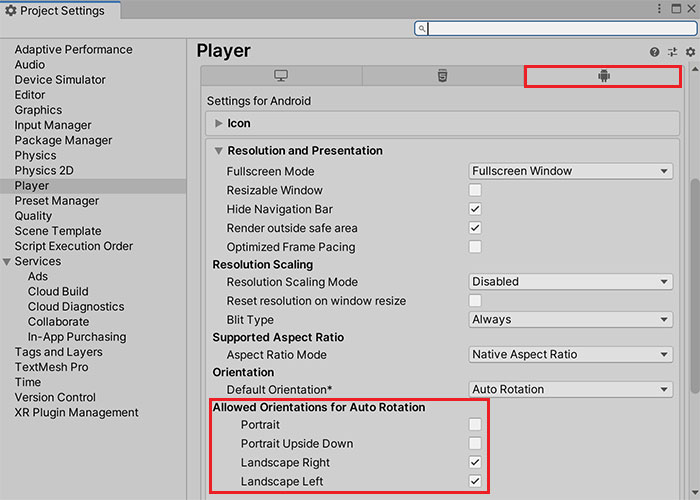
If you are planning to export the game into an APK, however, you will also need to go to the File > Build Settings and make sure that the Landscape orientations are the only ones allowed.
4. Conclusion
As usual, silver-tier Patrons get to download the project files for this — and as usual too, let us know in the comments below if you find any issues or errors with our code!