Unity’s Device Simulator is a very nice extension in Unity that allows users to quickly and easily test out their games on a mobile platform. It extends the Game window by adding a dropdown that allows the user to switch between the Game view and a newly-added Simulator view.
Note: The Device Simulator will be available by default in Unity 2021.1 and above. If you are using those versions of Unity, you will not need to install Device Simulator. Just check your Game window (see the image above) to see if there is an option to switch to the mobile device view.
1. Installing the Device Simulator
To install the Device Simulator, head to Window > Package Manager to open Unity’s Package Manager. Then:
- Make sure that the Packages dropdown has Unity Registry selected.
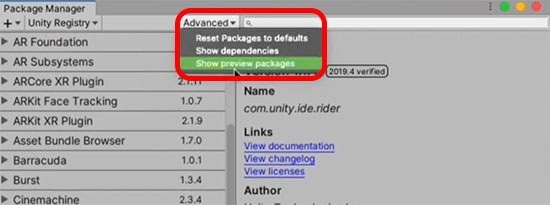
- Make sure that preview packages are enabled in the Package Manager. If it is not enabled, you will have to access Advanced Project Settings, and turn on Enable Preview Packages from there.
- With Preview Packages turned on, you should be able to find the Device Simulator package.
Refer to the animated image below, demonstrating how to perform the 3 steps listed above:
Note that for earlier versions of Unity, the toggle for preview packages is under Advanced > Show Preview Packages.
2. Using the Device Simulator
The Device Simulator — as its name implies — is window that simulates how your Unity project will look on different mobile devices and tablets.
It’s interface is also very simple. Besides switching between different devices, you can also do the following:
a. Scale the simulated device
Toggling the Scale slider allows you to adjust the zoom of the simulated device.
b. Fit the device to your Simulator window
If you can’t get the simulated device to appear with the right scale, you can use the Fit to Screen button to automatically resize it to fit your window.
Note that the Fit to Screen button is a toggle. If you turn it on and rotate the device, or change a device, the new simulated device view will always fit the screen until you untoggle the button.
c. Rotate the simulated device
You can also rotate the device to view it at different orientations.
d. Toggle Safe Area for UI
The Safe Area button outlines the screen area of the device where it is safe to place UI. For most phones, this will be the borders of the screen, but some phones with buttons or cameras on the screen area will have slightly different safe areas.
e. The Control Panel
Finally, the Control Panel tab on the top-right corner of the screen toggles a panel that allows us to simulate a few settings on the device:
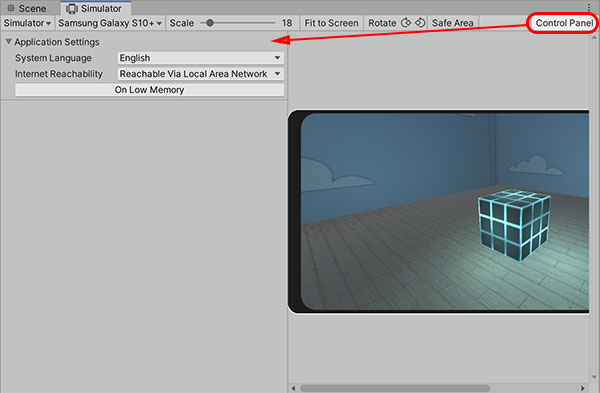
- System Language: Change the language that is set on the simulated device. This can be useful if your app supports multiple languages.
- Internet Reachability: You can simulate 3 kinds of internet connectivity conditions on the device. These simulations are often used to test notifications on your app for specific situations (e.g. notifying a user when they are playing on mobile data, so that they don’t blow their quota).
- Not Reachable: Which is when the device has no internet connectivity.
- Reachable Via Carrier Data Network: Which is when the device is connected by mobile data.
- Reachable Via Local Area Network: Which is when the device is connected to WiFi.
- On Low Memory: This button simulates the app of having low memory. Again, this simulation is often used to test notifications on your app.
3. Conclusion
The Device Simulator is a really convenient extension for the Unity Editor that makes it a lot easier to develop mobile applications. If you find that it doesn’t fit your needs, you can also look at using Unity Remote to test your game in the editor instead, using one of the 2 guides below.