Ever wanted to create a rogue-like shoot ’em up game like Vampire Survivors? In Part 3 of our guide, we will go through how to create our first weapons and basic enemy AI. You can also find Part 2 of our guide here, where we went through how to create infinite map generation.
A link to a package containing the project files up to Part 3 of this tutorial series can also be found at the end of this article.
- Introduction
- Our first projectile weapon
- Orientation and direction fixes
- Our first melee weapon
- Basic enemy AI
- Conclusion
1. Introduction
Vampire Survivors boasts a wide variety of weapons for the player to choose from, each one possessing their own unique abilities, similarly, the game also has many different types of enemies. So in Part 3 of this series I thought it would be a good idea to combine the two together within a single part. We will be taking a look at how to create projectile and melee weapons and also some basic enemy AI.
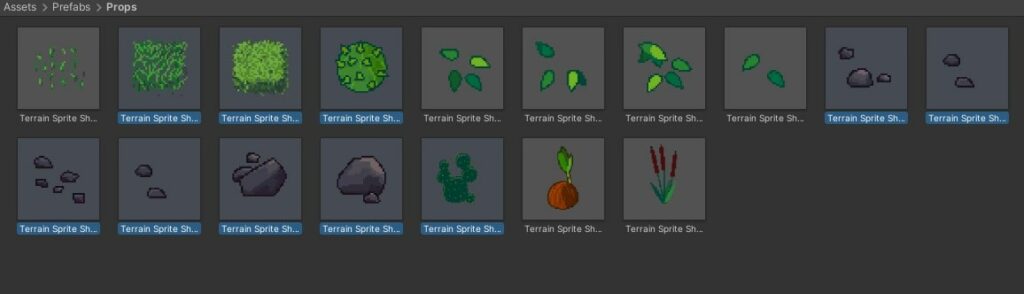
However before we begin, there’s one think that we forgot to do in the last part, and that is adding colliders to our prop prefabs. So head on over to our Props folder and in here, let’s select which of these props need colliders. These are the props I have chosen to add colliders on as they feel the most needed.
2. Our first projectile weapon
Let’s start with creating our first projectile weapon, we’ll be trying to replicate the knife from Vampire Survivors that flies in the direction the player faces.
a. Projectile weapon set-up
Download the Pixelarmory sprite sheet that I found on OpenGameArt.org, it provides a wide assortment of weapons and armors to choose from so you can spice up your game later on. Drag and drop it into your Art folder and rename it to Weapon Sprite Sheet.
By now you should already be very familiar with the process. Make sure to slice the sheet by using the Automatic preset and set the pixels per unit to be 32×32. Here is a quick refresher from a previous part if you forgot how to do so.
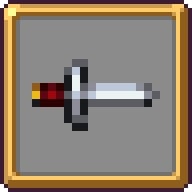
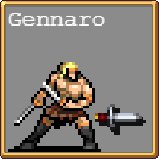
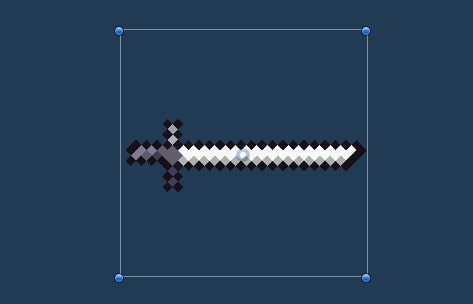
Drag and drop Weapon Sprite Sheet_20 into the scene view and reset its Transform, this is the sprite we are going to be using for our first projectile weapon. The weapon will basically just be a knife that shoots forward, damaging enemies. It is the exact same as the knife as in Vampire Survivors used by Gennaro.
Create a new subfolder under Prefabs and name it Weapons. Afterwards, rename the sprite in the scene to be Knife Weapon and move it into the folder to make it a prefab. You can delete the existing knife in the scene now.
So the reason this sprite has to be made into a prefab is simply because we are going to be spawning it with instantiate later on.
b. Weapon base script
Let’s now create a base script for all weapons to inherit from. If this is your first time working with inheritance I’ll give you a basic run down on what exactly it is.
In essence, C#, the programming language that Unity supports allows classes to inherit from one another. When a class (child class) inherits from a class (parent class), it gains the features of the class it inherits from.
This is extremely useful for us because it helps us in reducing the amount of repetitive code we have to write for the specific weapons. We want a script that controls all the base features of a weapon then a specific script for the weapon we are trying to create that expands upon the script with their own individual features.
But before we create the script, let’s start dividing our scripts into different subfolders since its getting crowded. I created 2 new subfolders called Player and Map and dragged the scripts into their respective folders.
With that said, create another subfolder called Weapons and a script called WeaponController and open it up.
Let’s create some variables corresponding to the weapon stats:
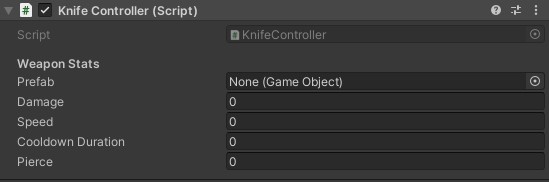
publicGameObjectcalledprefabto store the weapon prefab.publicfloatcalleddamageto store the base damage of the weapon.publicfloatcalledspeedto store the base speed of the weapon.publicfloatcalledcooldownDurationto store the cooldown duration of the weapon.floatcalledcurrentCooldownto store the current cooldown duration of the weapon.publicintcalledpierceto store the base pierce of the weapon. (pierce is the maximum amount of times a weapon can hit before it gets destroyed) We won’t use this for now, but it’ll come in handy in the future.
WeaponController.cs
using System.Collections;
using System.Collections.Generic;
using UnityEngine;

/// <summary>
/// Base script for all weapon controllers
/// </summary>
public class WeaponController : MonoBehaviour
{
    [Header("Weapon Stats")]
    public GameObject prefab;
    public float damage;
    public float speed;
    public float cooldownDuration;
    float currentCooldown;
    public int pierce;


    void Start()
    {

    }

    void Update()
    {

    }
}
In the Start() function, set the currentCooldown to be the cooldownDuration. Doing this will ensure that the weapon starts with the intended cooldown.
Then in our Update() function, all we want to do is to continuously reduce the currentCooldown until it reaches 0 and then attack.
Create a new function called Attack() and within it, set the currentCooldown to be cooldownDuration once again. This is because if this function runs, it means that the player has attacked and the weapon cooldown should be reset.
WeaponController.cs
using System.Collections;
using System.Collections.Generic;
using UnityEngine;

/// <summary>
/// Base script for all weapon controllers
/// </summary>
public class WeaponController : MonoBehaviour
{
    [Header("Weapon Stats")]
    public GameObject prefab;
    public float damage;
    public float speed;
    public float cooldownDuration;
    float currentCooldown;
    public int pierce;


    void Start()
    {
        currentCooldown = cooldownDuration; //At the start set the current cooldown to be cooldown duration
    }

    void Update()
    {
        currentCooldown -= Time.deltaTime;
        if (currentCooldown <= 0f)   //Once the cooldown becomes 0, attack
        {
            Attack();
        }
    }

    void Attack()
    {
        currentCooldown = cooldownDuration;
    }
}
Alright great! Now we have the basic features of a weapon set-up. This parent class will make sure the projectile is fired at the correct time after the cooldown is over and reset the cooldown as well.
c. Knife controller script
Head back into your Editor and under your Player object create a new empty game object called Knife Controller, make sure its Transform is reset. Next up, let’s create a new script called KnifeController and add it onto the Knife Controller object.
Now inside this script we are going to want to change the derived class from Monobehaviour to WeaponController, this way our KnifeController script has access to all features of the weapon base script.
Now let’s override the 3 functions of the parent class. Overriding is basically changing the parent class function in a child class such that when we call the function, the newest or most recent function is called. This is extremely helpful because it allows us to use slightly different functions unique to the weapon while keeping the base features intact.
To do so, head into the WeaponController and let’s apply the virtual keyword to all functions. The virtual keyword tells the function that we are trying to override it. Without this keyword, you will get a warning when trying to override.
You should then see an error telling you that virtual functions cannot be private. So let’s set them to be protected. By now you should already know what public and private are, you can think of protected as a combination of the 2. The protected keyword allows us to access features of the parent class inside the child class just like public, but they will not be accessible outside the child class just like private. Meaning you won’t be able to call any of these functions outside of a child class.
WeaponController.cs
using System.Collections;
using System.Collections.Generic;
using UnityEngine;

/// <summary>
/// Base script for all weapon controllers
/// </summary>
public class WeaponController : MonoBehaviour
{
    [Header("Weapon Stats")]
    public GameObject prefab;
    public float damage;
    public float speed;
    public float cooldownDuration;
    float currentCooldown;
    public int pierce;


    protected virtual void Start()
    {
        currentCooldown = cooldownDuration; //At the start set the current cooldown to be cooldown duration
    }

    protected virtual void Update()
    {
        currentCooldown -= Time.deltaTime;
        if (currentCooldown <= 0f)   //Once the cooldown becomes 0, attack
        {
            Attack();
        }
    }

    protected virtual void Attack()
    {
        currentCooldown = cooldownDuration;
    }
}
Inside the KnifeController script you should see some green squiggly lines under the Start() and Update() functions:
- Delete the
Update()function because we are not going to modify it for the knife. - Create a new function called
Attack()as we want to modify theAttack()function later in the future. - To fix these warnings just add the
protectedandoverridekeywords similar to how we did so above.
KnifeController.cs
using System.Collections;
using System.Collections.Generic;
using UnityEngine;

public class KnifeController : WeaponController
{
    protected override void Start()
    {

    }

    protected override void Attack()
    {

    }
}

Next we have to:
- Call the original of the overridden function within itself using the
basecall functions. - Spawn the
prefabof the knife as an object calledspawnedKnife. - Set the
spawnedKnife‘s position to be the same as theKnifeControllerobject that is parented to the player.
KnifeController.cs
using System.Collections;
using System.Collections.Generic;
using UnityEngine;

public class KnifeController : WeaponController
{
    protected override void Start()
    {
        base.Start();
    }

    protected override void Attack()
    {
        base.Attack();
        GameObject spawnedKnife = Instantiate(prefab);
        spawnedKnife.transform.position = transform.position; //Assign the position to be the same as this object which is parented to the player
    }
}
We’ll leave this script be for now and come back to it later.
Now if you head back into the Editor you can see that the KnifeController script has all the parameters of the WeaponController script!
d. Projectile weapon behaviour script
Up next, we are going to want to create a base script for projectile weapons behaviours, similar to how we did so for the weapon controllers. This script is not to be confused with weapon controllers, it is meant to be the parent script of the script put on the instantiated prefab since it is easier to define movement and other behaviours if it is placed on the game object itself.
With that said, create a new script called ProjectileWeaponBehaviour.
Inside here we want to create a few things:
protectedVector3called direction which will be used to track the direction that the weapon should face.publicfloatcalleddestroyAfterSecondsused to delete the object after a set amount of time has passed.publicfunction calledDirectionChecker()used to check the direction the weapon should face and set it.
ProjectileWeaponBehaviour.cs
using System.Collections;
using System.Collections.Generic;
using UnityEngine;

/// <summary>
/// Base script of all projectile behaviours [To be placed on a prefab of a weapon that is a projectile]
/// </summary>
public class ProjectileWeaponBehaviour : MonoBehaviour
{
    protected Vector3 direction;

    public float destroyAfterSeconds;

    void Start()
    {

    }

    public void DirectionChecker()
    {

    }
}
Now in the Start() function set the object to destroy after destroyAfterSeconds and then inside the DirectionChecker() create an argument with the type Vector3 and name it dir. Simply set the direction variable to have the same value as the argument.
We should also set the Start() function to be protected virtual so that we can utilize overrides in child classes later on.
ProjectileWeaponBehaviour.cs
using System.Collections;
using System.Collections.Generic;
using UnityEngine;

/// <summary>
/// Base script of all projectile behaviours [To be placed on a prefab of a weapon that is a projectile]
/// </summary>
public class ProjectileWeaponBehaviour : MonoBehaviour
{
    protected Vector3 direction;

    public float destroyAfterSeconds;

    protected virtual void Start()
    {
        Destroy(gameObject, destroyAfterSeconds);
    }

    public void DirectionChecker(Vector3 dir)
    {
        direction = dir;
    }
}
e. Knife behaviour script
Now let’s a script for our knife projectile called KnifeBehaviour and place it on the knife prefab. In here let’s do a couple of things:
- Set the parent class to
ProjectileWeaponBehaviour. - Add a reference to the
KnifeController. - Set the
Start()function to beprotectedoverrideand call the base function within it. - Inside the
Update()function set the position of the object to constantly move by multiplying thedirectionwith the setspeedand time.
KnifeBehaviour.cs
using System.Collections;
using System.Collections.Generic;
using UnityEngine;

public class KnifeBehaviour : ProjectileWeaponBehaviour
{

    KnifeController kc;

    protected override void Start()
    {
        base.Start();
        kc = FindObjectOfType<KnifeController>();
    }

    void Update()
    {
        transform.position += direction * kc.speed * Time.deltaTime;    //Set the movement of the knife
    }
}
Head back into the Editor and set the destroyAfterSeconds and cooldownDuration on the KnifeBehaviour on the knife prefab to be something like 3 and 2 respectively. Make sure to drag the prefab into the parameter slot as well.
If you now hit Play, you will see that nothing really happens except for the knife spawning on top of the player object and getting destroyed shortly after. This is because we haven’t yet set the direction which is used to defined the movement of the knife.
Within the KnifeController script, right after the spawned knife’s position has been set, we need to reference the DirectionChecker() and set the parameter to be our movement vector in our PlayerMovement script.
To do so, we must first reference the PlayerMovement within the base class of WeaponController such that future child classes can have access to it.
WeaponController.cs
using System.Collections;
using System.Collections.Generic;
using UnityEngine;

/// <summary>
/// Base script for all weapon controllers
/// </summary>
public class WeaponController : MonoBehaviour
{
    [Header("Weapon Stats")]
    public GameObject prefab;
    public float damage;
    public float speed;
    public float cooldownDuration;
    float currentCooldown;
    public int pierce;

    protected PlayerMovement pm;


    protected virtual void Start()
    {
        pm = FindObjectOfType<PlayerMovement>();
        currentCooldown = cooldownDuration; //At the start set the current cooldown to be cooldown duration
    }

    protected virtual void Update()
    {
        currentCooldown -= Time.deltaTime;
        if (currentCooldown <= 0f)   //Once the cooldown becomes 0, attack
        {
            Attack();
        }
    }

    protected virtual void Attack()
    {
        currentCooldown = cooldownDuration;
    }
}
Afterwards all we have to do now is to call the function by referencing the KnifeBehaviour script on the projectile.
KnifeController.cs
using System.Collections;
using System.Collections.Generic;
using UnityEngine;

public class KnifeController : WeaponController
{
    protected override void Start()
    {
        base.Start();
    }

    protected override void Attack()
    {
        base.Attack();
        GameObject spawnedKnife = Instantiate(prefab);
        spawnedKnife.transform.position = transform.position; //Assign the position to be the same as this object which is parented to the player
        spawnedKnife.GetComponent<KnifeBehaviour>().DirectionChecker(pm.moveDir);   //Reference and set the direction
    }
}
Head back into the Editor afterwards and set the speed, I’ll set mine to be 10.
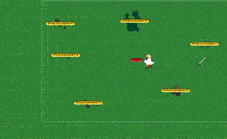
Now when you hit Play and begin moving around, you should see that the knife flies in the direction the player walks.
Awesome!
3. Orientation and direction fixes
However, as you might have been able to tell already, there are several issues with what we currently have.
- First off, the direction in which the knife is facing is completely wrong and isn’t even rotated properly.
- Secondly, the spawned knife doesn’t save the last direction in which the player was facing and thus doesn’t move if the player stands still, this is because we are referencing the
moveDirvector which can be 0.
a. Projectile orientation fix
We should begin with the first issue. Open up the knife prefab and set the rotation of the Z axis to be -45 such that it is pointing towards the right. This way, we’ll be able to work with a knife facing a cardinal direction (right) instead of one that is diagonal. This will help us in determining the scale and rotation to change later on.
Now remember the DirectionChecker() function that we created in the ProjectileWeaponBehaviour script? It’s now time for us to expand on it:
- Create 2 local
floats calleddirxanddiryand set them to be thedirectionvalues of their respective axes. - Create 2 local
Vector3s calledscaleandrotationand set them to be thelocalScaleandrotation.eulerAnglesrespectively.
ProjectileWeaponBehaviour.cs
using System.Collections;
using System.Collections.Generic;
using UnityEngine;

/// <summary>
/// Base script of all projectile behaviours [To be placed on a prefab of a weapon that is a projectile]
/// </summary>
public class ProjectileWeaponBehaviour : MonoBehaviour
{
    protected Vector3 direction;

    public float destroyAfterSeconds;

    protected virtual void Start()
    {
        Destroy(gameObject, destroyAfterSeconds);
    }

    public void DirectionChecker(Vector3 dir)
    {
        direction = dir;

        float dirx = direction.x;
        float diry = direction.y;

        Vector3 scale = transform.localScale;
        Vector3 rotation = transform.rotation.eulerAngles;
    }
}
Now let’s use these to fix the orientation. Since we changed the default state of the knife to face right, we can start with the left.
Currently if you move left, wait for the knife to shoot and pause the Editor, you can see that the knife faces the right instead of the left.
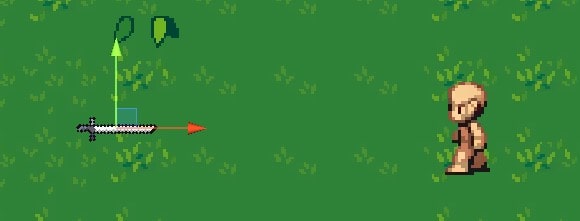
To fix this we need to figure out what sort of scale the knife needs to face the left. Look towards the Transform component of the knife and change the scale of the X and Y axis to be -1. The knife should now be facing left.
Great!
Now that we know what has to be changed, head back into the script and start creating an if statement. Since this is only for the left, the conditions must check if the X axis is below 0 and Y axis is 0. Inside we just have to set the scale of the X and Y axes to be equal to their current scale multiplied by -1 to give us our desired result.
We then have to set the localScale to be the scale we just defined at the bottom of the function. Let’s also set the rotation now so that we don’t forget it later.
Take note for rotation you have to use Quaternion.Euler(rotation) as you can’t convert a Quaternion to a Vector3.
ProjectileWeaponBehaviour.cs
using System.Collections;
using System.Collections.Generic;
using UnityEngine;

/// <summary>
/// Base script of all projectile behaviours [To be placed on a prefab of a weapon that is a projectile]
/// </summary>
public class ProjectileWeaponBehaviour : MonoBehaviour
{
    protected Vector3 direction;

    public float destroyAfterSeconds;

    protected virtual void Start()
    {
        Destroy(gameObject, destroyAfterSeconds);
    }

    public void DirectionChecker(Vector3 dir)
    {
        direction = dir;

        float dirx = direction.x;
        float diry = direction.y;

        Vector3 scale = transform.localScale;
        Vector3 rotation = transform.rotation.eulerAngles;

        if (dirx < 0 && diry == 0) //left
        {
            scale.x = scale.x * -1;
            scale.y = scale.y * -1;
        }

        transform.localScale = scale;
        transform.rotation = Quaternion.Euler(rotation);    //Can't simply set the vector because cannot convert
    }
}
Now when you play the game and move left, the knife should now be facing the correct direction!
However, you might have guessed it but this is where the tedious part comes in once again. Similar to how we made the reference to the static points in the last part, we now have to do the same for each of the directions the projectile can face. As I’ve said before, since the default state of the knife has been set to right only left, up, down, right up, right down, left up and left down are needed.
Head back into the Editor and do some trial and error for each of the directions mentioned above. Some of them may only need a change of scale or rotation while others might need both.
If you are using a different weapon sprite from mine that has a different starting orientation, you may need to do some more trial and error to get the correct results so please don’t blindly follow along if that’s the case.
And once all is said and done, you should have something like this.
ProjectileWeaponBehaviour.cs
using System.Collections;
using System.Collections.Generic;
using UnityEngine;

/// <summary>
/// Base script of all projectile behaviours [To be placed on a prefab of a weapon that is a projectile]
/// </summary>
public class ProjectileWeaponBehaviour : MonoBehaviour
{
    protected Vector3 direction;

    public float destroyAfterSeconds;

    protected virtual void Start()
    {
        Destroy(gameObject, destroyAfterSeconds);
    }

    public void DirectionChecker(Vector3 dir)
    {
        direction = dir;

        float dirx = direction.x;
        float diry = direction.y;

        Vector3 scale = transform.localScale;
        Vector3 rotation = transform.rotation.eulerAngles;

        if (dirx < 0 && diry == 0) //left
        {
            scale.x = scale.x * -1;
            scale.y = scale.y * -1;
        }
        else if (dirx == 0 && diry < 0) //down
        {
            scale.y = scale.y * -1;
        }
        else if (dirx == 0 && diry > 0) //up
        {
            scale.x = scale.x * -1;
        }
        else if (dirx > 0 && diry > 0) //right up
        {
            rotation.z = 0f;
        }
        else if (dirx > 0 && diry < 0) //right down
        {
            rotation.z = -90f;
        }
        else if (dirx < 0 && diry > 0) //left up
        {
            scale.x = scale.x * -1;
            scale.y = scale.y * -1;
            rotation.z = -90f;
        }
        else if (dirx < 0 && diry < 0) //left down
        {
            scale.x = scale.x * -1;
            scale.y = scale.y * -1;
            rotation.z = 0f;
        }

        transform.localScale = scale;
        transform.rotation = Quaternion.Euler(rotation);    //Can't simply set the vector because cannot convert
    }
}
Back in the Editor, hit Play and you should now see that no matter which direction you move, the knife will have the correct orientation.
b. Saving the last vector
Now comes the second issue: the knife doesn’t move when the player stands still. To fix this we must have a clear understanding of what we are trying to achieve.
In Vampire Survivors, when the player stands still, the knife shoots at the last cardinal direction (right, left, up, down) that the player faces. Which means that in this case we need to find a way to track which direction came last.
If you recall previously, while creating the movement in previous parts, we created lastHorizontalVector and lastVerticalVector to determine the last values of their respective axes. Now we need to track which of these two was set later if that makes sense.
Open up your PlayerMovement script and once inside:
- Create a
publicVector2calledlastMovedVectorand add the[HideInInspector]attribute to it. - Within
InputManagement()all we have to do is to set thelastMovedVectorunder the setting of thelastHorizontalVectorandlastVerticalVector. - Create a new
ifstatement checking if bothmoveDirvalues are not 0 and if they aren’t set thelastMovedVectorto have the values of both thelastHorizontalVectorandlastVerticalVector. This is to check for when the player is moving on both the X and Y axes to make sure that we aren’t storing values that allow the player to shoot diagonally when they stand still. - Lastly, in the
Start()function, set thelastMovedVectorto be(1, 0f)because if we don’t the knife will not move if the player doesn’t move first. We essentially need to set the default direction of where to shoot the projectile.
PlayerMovement.cs
using System.Collections;
using System.Collections.Generic;
using UnityEngine;

/// <summary>
/// Controls all player movement
/// </summary>
public class PlayerMovement : MonoBehaviour
{
    public float moveSpeed;
    Rigidbody2D rb;

    [HideInInspector]
    public Vector2 moveDir;

    //To preserve states
    [HideInInspector]
    public float lastHorizontalVector;
    [HideInInspector]
    public float lastVerticalVector;
    [HideInInspector]
    public Vector2 lastMovedVector;

    void Start()
    {
        rb = GetComponent<Rigidbody2D>();
        lastMovedVector = new Vector2(1, 0f); //If we don't do this and game starts up and don't move, the projectile weapon will have no momentum
    }

    void Update()
    {
        InputManagement();
    }

    void FixedUpdate() //Always calculate physics in fixed update
    {
        Move();
    }

    void InputManagement()
    {
        float moveX = Input.GetAxisRaw("Horizontal");
        float moveY = Input.GetAxisRaw("Vertical");

        moveDir = new Vector2(moveX, moveY).normalized; //Use normalize as moving in diagonal generates a value > 1 so cap it to 1

        if(moveDir.x != 0)
        {
            lastHorizontalVector = moveDir.x;
            lastMovedVector = new Vector2(lastHorizontalVector, 0f);    //Last moved X
        }

        if(moveDir.y != 0)
        {
            lastVerticalVector = moveDir.y;
            lastMovedVector = new Vector2(0f, lastVerticalVector);  //Last moved Y
        }

        if(moveDir.x != 0 && moveDir.y != 0)
        {
            lastMovedVector = new Vector2(lastHorizontalVector, lastVerticalVector);    //While moving
        }
    }

    void Move()
    {
        rb.velocity = new Vector2(moveDir.x * moveSpeed, moveDir.y * moveSpeed);    //Apply velocity
    }
}
Now, in the KnifeController pass in pm.lastMovedVector.
KnifeController.cs
using System.Collections;
using System.Collections.Generic;
using UnityEngine;

public class KnifeController : WeaponController
{
    protected override void Start()
    {
        base.Start();
    }

    protected override void Attack()
    {
        base.Attack();
        GameObject spawnedKnife = Instantiate(prefab);
        spawnedKnife.transform.position = transform.position; //Assign the position to be the same as this object which is parented to the player
        spawnedKnife.GetComponent<KnifeBehaviour>().DirectionChecker(pm.lastMovedVector);   //Reference and set the direction
    }
}
And now your projectile should be firing based on the most recent direction even when standing still.
4. Our first melee weapon
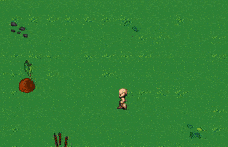
Alright! Let’s start creating our first melee weapon. For this, we are going to be replicating the garlic from Vampire Survivors that creates a ring around the player and damages enemies within it.

a. Garlic controller script
Create a new empty game object called Garlic Controller and place it under the Player. Then create a new script called GarlicController and add it to the game object.
Before we move on, let’s also organize the Weapon subfolder in the scripts folder for better clarity. We’ll create 3 new subfolders called Weapon Controllers, Weapon Behaviours and Weapon Base. Drag and drop the respective scripts into their folders and open our newly made GarlicController script.
Inside here, we are just going to the something similar as what we did for the KnifeController script.
- Set the parent class to be
WeaponController. - Remove the
Update()function and set theStart()andAttack()functions to be override and call their base. - Spawned the
prefabas a game object.
GarlicController.cs
using System.Collections;
using System.Collections.Generic;
using UnityEngine;

public class GarlicController : WeaponController
{
    protected override void Start()
    {
        base.Start();
    }

    protected override void Attack()
    {
        base.Attack();
        GameObject spawnedGarlic = Instantiate(prefab);
    }
}
Now we have to set the position of the spawned prefab to be the same as the player’s and change their parent to be the player as well, such that when spawned, it will follow the player around.
GarlicController.cs
using System.Collections;
using System.Collections.Generic;
using UnityEngine;

public class GarlicController : WeaponController
{
    protected override void Start()
    {
        base.Start();
    }

    protected override void Attack()
    {
        base.Attack();
        GameObject spawnedGarlic = Instantiate(prefab);
        spawnedGarlic.transform.position = transform.position; //Assign the position to be the same as this object which is parented to the player
        spawnedGarlic.transform.parent = transform;
    }
}
b. Melee behaviour script
Create a new C# script called MeleeWeaponBehaviour and open it up. Just like the ProjectileWeaponBehaviour let’s give it a time to destroy itself.
MeleeWeaponBehaviour.cs
using System.Collections;
using System.Collections.Generic;
using UnityEngine;

/// <summary>
/// Base script of all melee behaviours [To be placed on a prefab of a weapon that is melee]
/// </summary>
public class MeleeWeaponBehaviour : MonoBehaviour
{

    public float destroyAfterSeconds;

    protected virtual void Start()
    {
        Destroy(gameObject, destroyAfterSeconds);
    }

}
c. Garlic behaviour script
Create a new script called GarlicBehaviour and all we have to do for this script is to set the parent class to be MeleeWeaponBehaviour and override the Start() function.
GarlicBehaviour.cs
using System.Collections;
using System.Collections.Generic;
using UnityEngine;

public class GarlicBehaviour : MeleeWeaponBehaviour
{
    protected override void Start()
    {
        base.Start();
    }
}
Alright! Now that we’re done, head back into the Editor and inside our Weapon Sprite Sheet choose a shield sprite to drag and drop into the Scene view. I’ll be using Weapon Sprite Sheet_33 as it seems the most rounded and I just like the look of it.
Reset its Transform and name it Garlic Weapon. Size it to be a bit bigger player than the player, so I’ll size mine to have a 2 scale across all axes.
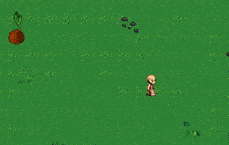
Before we move on there’s just one issue, as you can see the sprite is actually above the player. So this is the perfect time to sort our sorting layers before it gets too messy.
Click on the Sorting Layer dropdown under Additional Settings of the SpriteRenderer component and hit Add Sorting Layer.
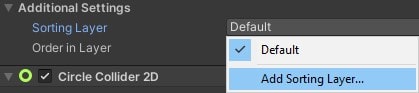
Our goal for this is to add different sorting layers such that objects don’t overlap one another. With that said, create 3 different layers called Background, Midground and Foreground and arrange them like so. That way Foreground will always appear before everything else and Midground will always appear before Background and Default, and so on and so forth.
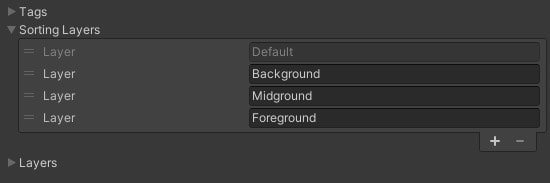
Change the sorting layer of the Player and Garlic Weapon to be Foreground. Now change the Player’s order in layer to be something like 20, just to make sure it appears over everything else. Now your weapon should appear behind the player.
Let’s do the same for the other prefabs as well, but before that, make the Garlic Weapon a prefab and remove it from the scene.
Afterwards let’s:
- Change the Knife Weapon to be Foreground.
- Change all props to be Midground.
- Change all Terrain Chunks’ Background Tilemaps to be Background.
Drag and drop the GarlicBehaviour script onto the prefab and set the destroyAfterSeconds parameter to be something like 2.
Add all the relevant parameters onto the GarlicController script. The only stuff we have to fill in for now is the prefab and cooldownDuration. I’ll set the latter to be 3.
Now if you hit Play, you can see that the garlic spawns, follows you around and destroys itself afterwards.
Awesome!
5. Basic enemy AI
We’ve come to the last section of part 3, which is creating some basic enemy AI.
a. Bat enemy set-up
For our first enemy, let’s go with the bat as it is the first enemy one will encounter when first starting Vampire Survivors. We’ll use this Pixel bat sprite sheet that I found on OpenGameArt.org.
Drag and drop it into the Art folder and rename it to Bat Sprite Sheet. Make sure to slice it afterwards using the Automatic preset.
Simply multiselect the Bat_Sprite_Sheets 1 to 3 of the sprite sheet and then drag it onto the scene. This should open up your explorer as a prompt to create an animation. Just navigate to your animations folder and rename it to BatMove before clicking save. You can rename the animation controller to be Bat as well.
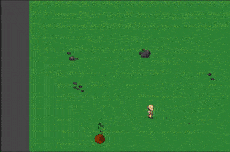
Now make sure to set the sorting layer of the newly created bat object to be Foreground and rename it to Bat. When you play the game, you can now see that the bat has animation. Before we move on, let’s add a BoxCollider2D to it for future use as well.
Reset the transform and create a new subfolder under prefabs called Enemies and make a prefab of it afterwards. You can leave the existing object on the scene as we’ll use it as a sample later.
b. Enemy movement script
In Vampire Survivors, the enemy AI is very simple to understand as it simply follows the player around. There are many different ways of doing this in Unity but I’ll be using the simplest method which is moving the enemy towards the player using the Vector2.MoveTowards() function.
Start by creating a subfolder called Enemy inside scripts then EnemyMovement inside of the folder.
Inside here, we really only need 3 things:
- Reference to the player’s transform.
- A
publicfloatcalledmoveSpeed. - Moving the position of the enemy to the position of the player.
EnemyMovement.cs
using System.Collections;
using System.Collections.Generic;
using UnityEngine;

public class EnemyMovement : MonoBehaviour
{
    Transform player;
    public float moveSpeed;


    void Start()
    {
        player = FindObjectOfType<PlayerMovement>().transform;
    }

    void Update()
    {
        transform.position = Vector2.MoveTowards(transform.position, player.transform.position, moveSpeed * Time.deltaTime);    //Constantly move the enemy towards the player
    }
}
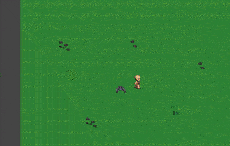
Back in the Editor, make sure to add the script onto the enemy prefab and set the speed to be something like 2. Now when you play, the enemy should be moving towards the player no matter which direction you go.
Great!
6. Conclusion
That’s all for this part! In this part we went through how to create our first weapons and basic enemy AI. If you spot any errors or typos in this article, please highlight them in the comments below.
You can also download the project files for what we have done so far. To use the files, you will have to unzip the file (7-Zip can help you do that), and open the folder with Assets and ProjectSettings as a project using Unity.
If you are unsure on how to open downloaded Unity projects, check out our article and video here where we explain how to do so.
These are the final end results of all scripts we have worked with today:
WeaponController.cs
using System.Collections;
using System.Collections.Generic;
using UnityEngine;

/// <summary>
/// Base script for all weapon controllers
/// </summary>
public class WeaponController : MonoBehaviour
{
    [Header("Weapon Stats")]
    public GameObject prefab;
    public float damage;
    public float speed;
    public float cooldownDuration;
    float currentCooldown;
    public int pierce;

    protected PlayerMovement pm;


    protected virtual void Start()
    {
        pm = FindObjectOfType<PlayerMovement>();
        currentCooldown = cooldownDuration; //At the start set the current cooldown to be cooldown duration
    }

    protected virtual void Update()
    {
        currentCooldown -= Time.deltaTime;
        if (currentCooldown <= 0f)   //Once the cooldown becomes 0, attack
        {
            Attack();
        }
    }

    protected virtual void Attack()
    {
        currentCooldown = cooldownDuration;
    }
}
KnifeController.cs
using System.Collections;
using System.Collections.Generic;
using UnityEngine;

public class KnifeController : WeaponController
{
    protected override void Start()
    {
        base.Start();
    }

    protected override void Attack()
    {
        base.Attack();
        GameObject spawnedKnife = Instantiate(prefab);
        spawnedKnife.transform.position = transform.position; //Assign the position to be the same as this object which is parented to the player
        spawnedKnife.GetComponent<KnifeBehaviour>().DirectionChecker(pm.lastMovedVector);   //Reference and set the direction
    }
}
ProjectileWeaponBehaviour.cs
using System.Collections;
using System.Collections.Generic;
using UnityEngine;

/// <summary>
/// Base script of all projectile behaviours [To be placed on a prefab of a weapon that is a projectile]
/// </summary>
public class ProjectileWeaponBehaviour : MonoBehaviour
{
    protected Vector3 direction;

    public float destroyAfterSeconds;

    protected virtual void Start()
    {
        Destroy(gameObject, destroyAfterSeconds);
    }

    public void DirectionChecker(Vector3 dir)
    {
        direction = dir;

        float dirx = direction.x;
        float diry = direction.y;

        Vector3 scale = transform.localScale;
        Vector3 rotation = transform.rotation.eulerAngles;

        if (dirx < 0 && diry == 0) //left
        {
            scale.x = scale.x * -1;
            scale.y = scale.y * -1;
        }
        else if (dirx == 0 && diry < 0) //down
        {
            scale.y = scale.y * -1;
        }
        else if (dirx == 0 && diry > 0) //up
        {
            scale.x = scale.x * -1;
        }
        else if (dirx > 0 && diry > 0) //right up
        {
            rotation.z = 0f;
        }
        else if (dirx > 0 && diry < 0) //right down
        {
            rotation.z = -90f;
        }
        else if (dirx < 0 && diry > 0) //left up
        {
            scale.x = scale.x * -1;
            scale.y = scale.y * -1;
            rotation.z = -90f;
        }
        else if (dirx < 0 && diry < 0) //left down
        {
            scale.x = scale.x * -1;
            scale.y = scale.y * -1;
            rotation.z = 0f;
        }

        transform.localScale = scale;
        transform.rotation = Quaternion.Euler(rotation);    //Can't simply set the vector because cannot convert
    }
}
KnifeBehaviour.cs
using System.Collections;
using System.Collections.Generic;
using UnityEngine;

public class KnifeBehaviour : ProjectileWeaponBehaviour
{

    KnifeController kc;

    protected override void Start()
    {
        base.Start();
        kc = FindObjectOfType<KnifeController>();
    }

    void Update()
    {
        transform.position += direction * kc.speed * Time.deltaTime;    //Set the movement of the knife
    }
}
PlayerMovement.cs
using System.Collections;
using System.Collections.Generic;
using UnityEngine;

/// <summary>
/// Controls all player movement
/// </summary>
public class PlayerMovement : MonoBehaviour
{
    public float moveSpeed;
    Rigidbody2D rb;

    [HideInInspector]
    public Vector2 moveDir;

    //To preserve states
    [HideInInspector]
    public float lastHorizontalVector;
    [HideInInspector]
    public float lastVerticalVector;
    [HideInInspector]
    public Vector2 lastMovedVector;

    void Start()
    {
        rb = GetComponent<Rigidbody2D>();
        lastMovedVector = new Vector2(1, 0f); //If we don't do this and game starts up and don't move, the projectile weapon will have no momentum
    }

    void Update()
    {
        InputManagement();
    }

    void FixedUpdate() //Always calculate physics in fixed update
    {
        Move();
    }

    void InputManagement()
    {
        float moveX = Input.GetAxisRaw("Horizontal");
        float moveY = Input.GetAxisRaw("Vertical");

        moveDir = new Vector2(moveX, moveY).normalized; //Use normalize as moving in diagonal generates a value > 1 so cap it to 1

        if(moveDir.x != 0)
        {
            lastHorizontalVector = moveDir.x;
            lastMovedVector = new Vector2(lastHorizontalVector, 0f);    //Last moved X
        }

        if(moveDir.y != 0)
        {
            lastVerticalVector = moveDir.y;
            lastMovedVector = new Vector2(0f, lastVerticalVector);  //Last moved Y
        }

        if(moveDir.x != 0 && moveDir.y != 0)
        {
            lastMovedVector = new Vector2(lastHorizontalVector, lastVerticalVector);    //While moving
        }
    }

    void Move()
    {
        rb.velocity = new Vector2(moveDir.x * moveSpeed, moveDir.y * moveSpeed);    //Apply velocity
    }
}
GarlicController.cs
using System.Collections;
using System.Collections.Generic;
using UnityEngine;

public class GarlicController : WeaponController
{
    protected override void Start()
    {
        base.Start();
    }

    protected override void Attack()
    {
        base.Attack();
        GameObject spawnedGarlic = Instantiate(prefab);
        spawnedGarlic.transform.position = transform.position; //Assign the position to be the same as this object which is parented to the player
        spawnedGarlic.transform.parent = transform;
    }
}
MeleeWeaponBehaviour.cs
using System.Collections;
using System.Collections.Generic;
using UnityEngine;

/// <summary>
/// Base script of all melee behaviours [To be placed on a prefab of a weapon that is melee]
/// </summary>
public class MeleeWeaponBehaviour : MonoBehaviour
{

    public float destroyAfterSeconds;

    protected virtual void Start()
    {
        Destroy(gameObject, destroyAfterSeconds);
    }

}
GarlicBehaviour.cs
using System.Collections;
using System.Collections.Generic;
using UnityEngine;

public class GarlicBehaviour : MeleeWeaponBehaviour
{
    protected override void Start()
    {
        base.Start();
    }
}
EnemyMovement.cs
using System.Collections;
using System.Collections.Generic;
using UnityEngine;

public class EnemyMovement : MonoBehaviour
{
    Transform player;
    public float moveSpeed;


    void Start()
    {
        player = FindObjectOfType<PlayerMovement>().transform;
    }

    void Update()
    {
        transform.position = Vector2.MoveTowards(transform.position, player.transform.position, moveSpeed * Time.deltaTime);    //Constantly move the enemy towards the player
    }
}
Anyone have an idea of why everything is above my characters head? I reset the transform of everything, including my player and no matter what I do everything targets about an inch above his head. I had to put everything at -1.75 on the Y axis to get it to line up in the middle of the player, however the mob still goes to the spot above the head and not at the player.
Screenshot:
https://ibb.co/2gHTHkK
*** Sorry, I tried posting on youtube about 10x on different accounts and it keeps deleting my comments for some reason…
EDIT* I figured it out. For those who have this problem, go to the “Art or Sprite (the sprite / animations you put into the scene)” and change the pivot from center to custom and then adjust the position to the middle(or wherever you want it) of the sprite / player / character.
Thanks for documenting everything down Enferno!
Hello, great tutorial!
I would like to ask if there will be any more creation of more weapons in the future.
Hi, glad you enjoyed this tutorial part. There could definitely be a part dedicated to creating more weapons in the future.
Hey. Thanks a lot for your tutorial, it’s really helpful!
I believe in EnemyMovement, there’s a missing variable declaration to reference PlayerMovement.
Hi, glad you liked this tutorial. We don’t actually need to declare a variable of type PlayerMovement in EnemyMovement as we are trying to reference the player’s transform. The PlayerMovement is merely meant to serve as a reference to the object we are trying to find as it will always be on the player which allows the so it does not need to be declared in the EnemyMovement script.