If you’ve been following one of our many game-making tutorials, such as the Farming RPG series, you will see that at the end of some of the tutorials, we will leave links that you can use to download the zipped source files of the project (here’s an example).
After unzipping the files, you will see these folders (give or take some of them):
1. Identifying a Unity project folder
Before we get ahead of ourselves, whenever we unzip a compressed file (i.e. zip, 7z, tar, gz, etc.) that is expected to contain a Unity project, I recommend you always unzip them into a containing folder. This is because a Unity project contains multiple folders, and some source code providers (like us) do not put these folders in a containing folder — which means that if you unzip them directly into the same folder as your compressed file, these folders will be scattered all over the place (like below):
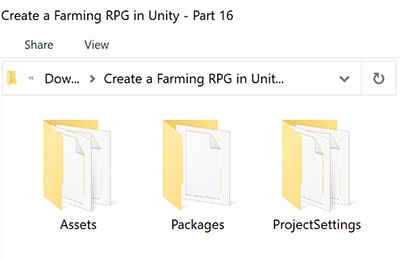
A folder that contains a Unity project will always contain the:
Assetsfolder: Which contains all the project files used to create the projects, including (but not limited to) sprites, animations, 3D models and textures.
Hence, it is the folder that you want to look out for to identify if a folder is a Unity project. It will usually also come with a:
ProjectSettingsfolder: Which contains other essential settings data for the project, like control mappings, custom tags and layers, as well as physics configurations (like the gravity vector, or the Layer Collision Matrix).
And / or a:
Packagesfolder: Which contains the package manifest, a.k.a. what packages the Unity Editor will need to download when you open the project.
There may be other project folders, like the Library, Logs or UserSettings folders; but Unity will generate these folders for you when you open the project (even if you have them, Unity will still regenerate most of these folders as they are specific to your computer, so it is pointless to include them when transferring a project).
Now that you’ve identified your Unity project, it’s time to learn…
2. How to open a downloaded project
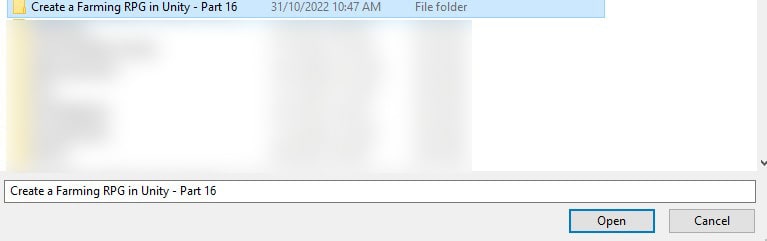
Open Unity Hub, then navigate to the top right of Unity Hub and click on Open. File explorer should appear as a pop up afterwards. If you are on a Unity Hub version that is earlier than 3.0 the button is ADD.


Now, all you have to do is navigate to the folder where the downloaded project is stored. For the sample project, I will be using the files from Part 16 of our Farming RPG tutorial series (the files are exclusive to our Patreon supporters, but you can have a look at the video guide here).
When you select your folder 1 of 2 things will happen
- Nothing happens and Unity Editor naturally boots up without an issue.
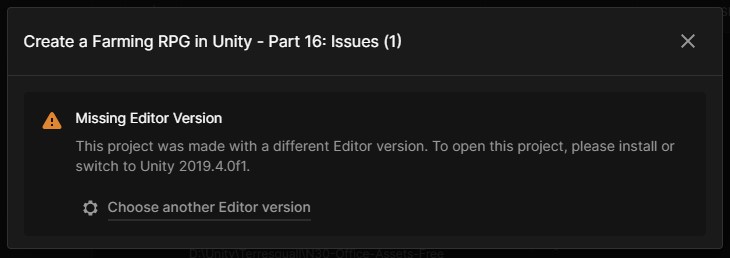
- Unity Hub missing Editor version prompt shows up.
If it is the former, great! That means you have the Editor version that was used to create the project. On the flip side, if the latter appears, it means that you do not have the Editor version that was used to create the project and either have to choose another Editor version to open the project or download the Editor version used.
If you choose to use another Editor version to open the project the following prompt will show, simply click on Continue.
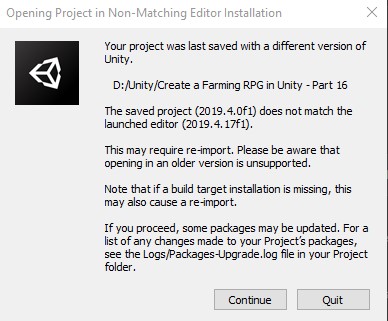
Keep in mind that using a different Editor version to open the project may result in incompatibility and file changes, for that reason it is always better to download the Unity version shown the prompt.
Now all you have to do is to wait for the Unity Editor to open up and viola! You have successfully opened a downloaded Unity project.
3. Troubleshooting
Some problems may arise during the process mentioned above, this section will be going through the most common problems.
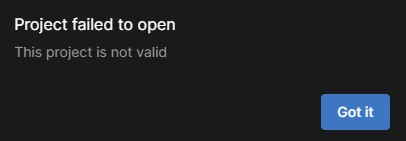
a. This project is not valid
If you receive the This project is not valid error it may be that you selected the incorrect root directory for the project.
Double-check that the folder you have selected has files similar to that of below.
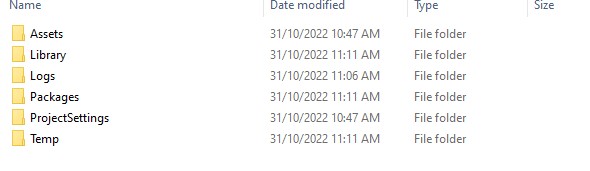
After that’s done, try again and you should find that it works perfectly.
b. Editor version incompatible
If you receive failure in opening up the Unity project it may be because the Editor version you used to open the project and the version used to create the project are vastly different.
When you open a project with a Editor version different to the one used to create the project, you essentially change its versioning. Thus, as I explained above, it is always best to install the Unity Editor version of the project you are trying to open to avoid conflicts.
c. Assets do not load up properly
If you manage to open up your downloaded Unity project and immediately hit Play without much thought, you may find that your scene doesn’t show anything.
This is because Unity automatically loads up a temporary Untitled scene during the opening/creation of a project. You can check which scene you are currently on by looking at the top left of the Editor.

All you have to do is just load into your desired scene and hit play!
If the above doesn’t work for you, the next thing you can try is deleting the Library folder within the Unity Project. Don’t worry, this won’t mess with the project in anyway so no data will be lost.
The Library folder just contains all data for Unity’s internal representation of your assets and in short can be viewed as a form of cache. So when you delete the folder and boot up your project again, you will have to wait longer while Unity creates a new Library folder.
The problem lies in where some source code providers might forget to remove this folder while zipping and passing the project which might cause some problems in Unity’s internal execution. So now all you have to do is to head into your project folder and delete the Library folder!

Once you are done, open up the project once again and everything should work just fine!
4. Afterword
I hope you managed to open up your downloaded unity project.
If we missed anything in this guide, or if you have other troubleshooting tips you want to share for people running into issues whilst opening their Unity projects, do leave us a comment below as it will help other future readers!