Ever wanted to create a game like Harvest Moon in Unity? Check out Part 2 of our guide here, where we go through how to create a camera that follows our player character around. You can also find Part 1 of our guide here, where we went through how to set up our player character.
This is a loose transcription of our accompanying video guide on Youtube. We suggest you watch the video guide instead and use this article as a supplement to it.
1. The easiest camera
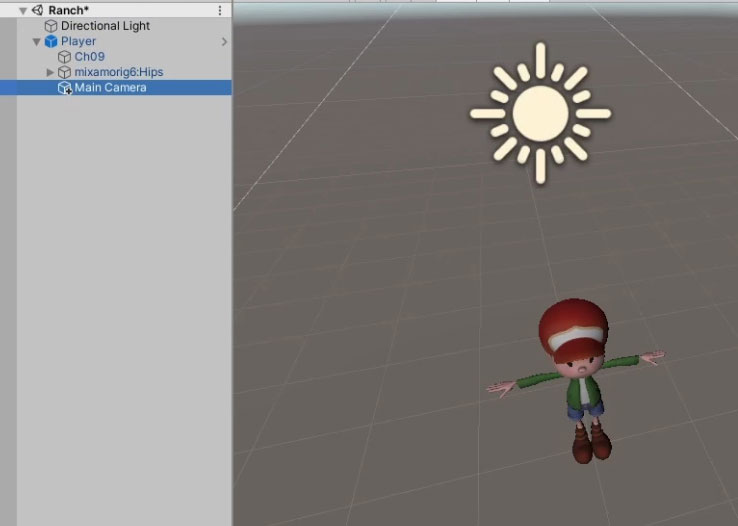
The easiest way to get a camera to follow the player is to parent it to the Player GameObject:
This method of implementing the camera is problematic for 2 reasons:
- It will be snapped to the position and rotation of the player character, which can make the camera movement feel choppy and abrupt at times.
- This method of implementation doesn’t give us any control over the camera, so we cannot, for instance, allow the player to adjust the camera view in game.
Attaching a script to the camera to control its behaviour and the way it follows the player can circumvent this issue. Hence, we will be creating a script for the camera to control its movement.
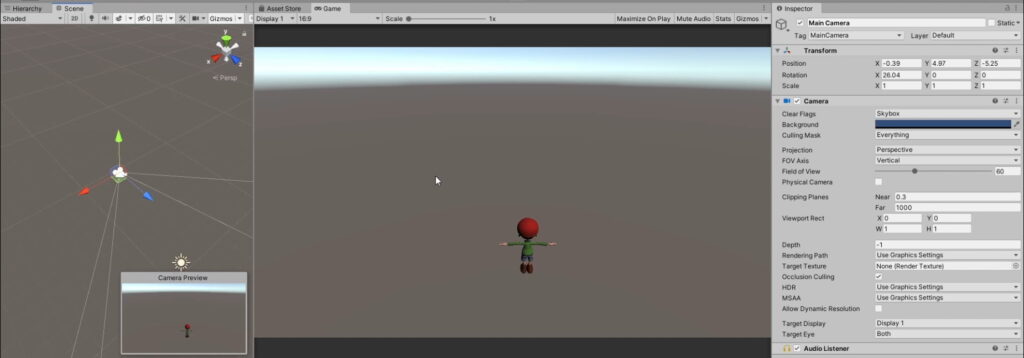
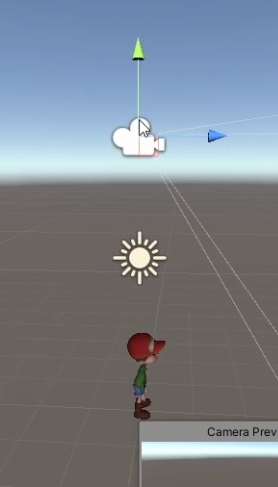
2. Setting up the desired camera position and angle
Before we get to the scripting, let’s set the camera angle and relative position to the player:
3. Setting up the camera script
Create a new script named CameraController and attach it to the Camera GameObject. Make a reference to the player’s transform attribute:
CameraController.cs
using System.Collections;
using System.Collections.Generic;
using UnityEngine;

public class CameraController : MonoBehaviour
{

    //player transform component
    Transform playerPos;
    // Start is called before the first frame update
    void Start()
    {
        //Find the player gameobject in the scene and get its transform component
        playerPos = FindObjectOfType<PlayerController>().transform;
    }

    // Update is called once per frame
    void Update()
    {

    }

}
4. Having the camera follow the Player
Fundamentally, we want the camera to follow the player about. Hence, we set the camera’s position to the player’s position on Update() by writing a FollowPlayer() method and calling it:
CameraController.cs
using System.Collections;
using System.Collections.Generic;
using UnityEngine;

public class CameraController : MonoBehaviour
{

    //player transform component
    Transform playerPos;
    // Start is called before the first frame update
    void Start()
    {
        //Find the player gameobject in the scene and get its transform component
        playerPos = FindObjectOfType<PlayerController>().transform;
    }

    // Update is called once per frame
    void Update()
    {
        FollowPlayer();
    }

    //Following the player
    void FollowPlayer()
    {
        //Set the position accordingly
        transform.position = playerPos.position;
    }
}
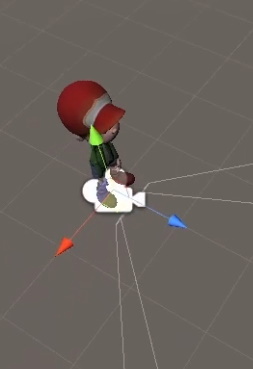
The problem with this, however, is that this causes the camera to be snapped to the player GameObject’s pivot position.
We want our camera to retain its position on the y-axis (i.e. only follow the player on the x and z-axes). This can be done by creating a separate Vector3 that takes the x and z-coordinates of our player, while retaining the y-coordinates of our camera:
CameraController.cs
using System.Collections;
using System.Collections.Generic;
using UnityEngine;

public class CameraController : MonoBehaviour
{

    //player transform component
    Transform playerPos;
    // Start is called before the first frame update
    void Start()
    {
        //Find the player gameobject in the scene and get its transform component
        playerPos = FindObjectOfType<PlayerController>().transform;
    }

    // Update is called once per frame
    void Update()
    {
        FollowPlayer();
    }

    //Following the player
    void FollowPlayer()
    {
        //Position the camera should be in
        Vector3 targetPosition = new Vector3(playerPos.position.x, transform.position.y, playerPos.position.z);

        //Set the position accordingly
        transform.position = playerPos.position targetPosition;
    }
}
Now, our camera should be right on top of the player. We will also need to offset it slightly backwards, so that the player falls into its field of vision.
The camera that we set up in the scene earlier by parenting it to the player had a lower z-coordinate relative to the player, so that it is always behind the player.
To achieve this in-game, we just need to calculate and apply that offset into our script:
CameraController.cs
using System.Collections;
using System.Collections.Generic;
using UnityEngine;

public class CameraController : MonoBehaviour
{
    public float offsetZ = 5f;

    //player transform component
    Transform playerPos;
    // Start is called before the first frame update
    void Start()
    {
        //Find the player gameobject in the scene and get its transform component
        playerPos = FindObjectOfType<PlayerController>().transform;
    }

    // Update is called once per frame
    void Update()
    {
        FollowPlayer();
    }

    //Following the player
    void FollowPlayer()
    {
        //Position the camera should be in
        Vector3 targetPosition = new Vector3(playerPos.position.x, transform.position.y, playerPos.position.z - offsetZ);

        //Set the position accordingly
        transform.position = targetPosition;
    }
}
With that, our camera follows our player at our desired offset.
5. Smoothing out the camera’s movement
Instead of just setting the transform of the camera to the target position, we can smooth out its movement by using Vector3.Lerp(). This method interpolates between the camera’s current position and its target position every time it is called on Update(), creating a smoother transition when the camera moves.
Hence, we will use it to update our position and control the speed of the camera movement with a smoothing property:
CameraController.cs
using System.Collections;
using System.Collections.Generic;
using UnityEngine;

public class CameraController : MonoBehaviour
{
    public float offsetZ = 5f;
    public float smoothing =2f;
    //player transform component
    Transform playerPos;
    // Start is called before the first frame update
    void Start()
    {
        //Find the player gameobject in the scene and get its transform component
        playerPos = FindObjectOfType<PlayerController>().transform;
    }

    // Update is called once per frame
    void Update()
    {
        FollowPlayer();
    }

    //Following the player
    void FollowPlayer()
    {
        //Position the camera should be in
        Vector3 targetPosition = new Vector3(playerPos.position.x, transform.position.y, playerPos.position.z - offsetZ);

        //Set the position accordingly
        transform.position = targetPosition Vector3.Lerp(transform.position, targetPosition, smoothing * Time.deltaTime);
    }
}
6. Conclusion
With that, the camera should follow our player character nicely. Below is the final code for our CameraController script.
CameraController.cs
using System.Collections;
using System.Collections.Generic;
using UnityEngine;

public class CameraController : MonoBehaviour
{
    public float offsetZ = 5f;
    public float smoothing =2f;
    //player transform component
    Transform playerPos;
    // Start is called before the first frame update
    void Start()
    {
        //Find the player gameobject in the scene and get its transform component
        playerPos = FindObjectOfType<PlayerController>().transform;
    }

    // Update is called once per frame
    void Update()
    {
        FollowPlayer();
    }

    //Following the player
    void FollowPlayer()
    {
        //Position the camera should be in
        Vector3 targetPosition = new Vector3(playerPos.position.x, transform.position.y, playerPos.position.z - offsetZ);

        //Set the position accordingly
        transform.position = Vector3.Lerp(transform.position, targetPosition, smoothing * Time.deltaTime);
    }
}
Thank you for the tutorial! I’m enjoying this series so far. I haven’t read past part 2 yet, but I noticed a bug–the longer I make my character run, the more the screen will start to cut them out (i.e. if I run toward the camera, it won’t offset enough and I’ll only be able to see the top of the character’s head. The camera’s position is also permanently ‘off’). Do you have a suggestion to fix this?
Hi Stephanie, glad you are enjoying the series. Do double check and see if your code for the Camera is the same as the one we have. You likely a formula (or a couple of them) slightly wrong, which is why the camera is behaving slightly different.