Ever wanted to create a game like Subnautica? Check out Part 11 of our Underwater Survival Tutorial Series! In this part, we’ll be setting up new Gear Items that the Players can use, like flippers and oxygen tanks.
- Setup
- Creating Gear
- Inventory System Updates
GearUniversalFunctions- Player Controller Speed System Tweaks
- Still Suit and Flipper Code
1. Setup
Before we get started, let’s do some housekeeping to organise our project better as well as prepare the necessary things we need to get started on Gear. Firstly, move the Terrain asset to the Terrain folder to keep things tidy.
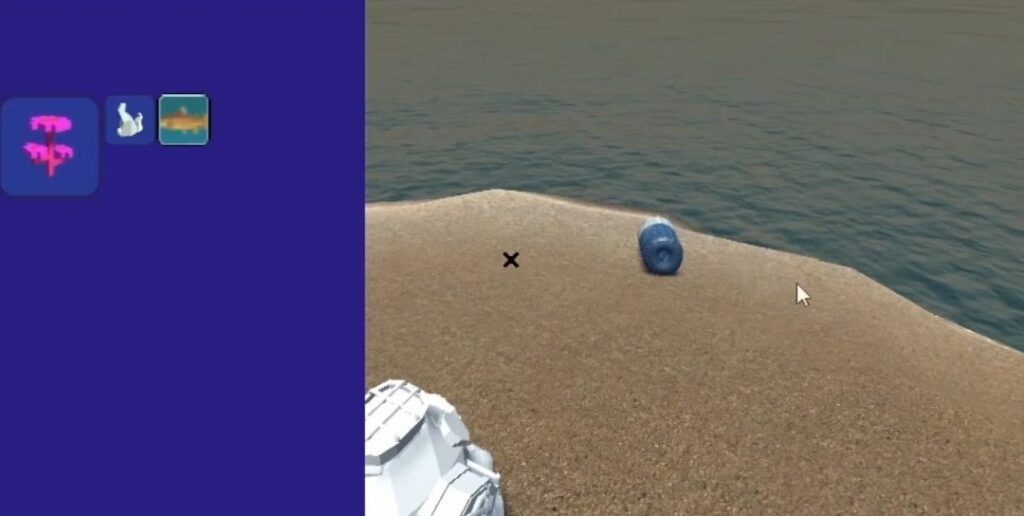
Afterwards, adjust the camera’s Field of View to be larger, such as 50. This will allow the player to have a wider field of view and thus see more things. Apply this change to the Player Prefab.
The last thing we need to do is download the assets we need for our Gear System; We’re going to need Sprites for the Gear UI, some Gear Models for the Gear GameObject, and some Sprites of the Model itself that we can use for each Gear’s ScriptableObject.
Below is the Spritesheet we’ll be using for the Gear Menu UI.
As for the Gear Sprites and Models, feel free to search for your own free assets or even create your own. In this tutorial, we only need Sprites and Models for a Flipper, an Oxygen Tank and a Diving Helmet. Once you’ve got all these, you’re good to go!
2. Creating Gear
a. Create Gear Types
To start off with our Gear, we need to make a simple change to our ItemScriptableObject. We need to add a new value Gear to the itemCategories enumeration. Just add this into the script. This will allow us to give Gear Items their very own category, which will be useful for later on in the this tutorial.
ItemScriptableObject.cs
using System.Collections;
using System.Collections.Generic;
using UnityEngine;
[CreateAssetMenu(fileName ="item", menuName ="ScriptableObject/itemScriptableObject",order = 1)]
public class ItemScriptableObject : ScriptableObject
{
    ...

    public enum itemCategories
    {
        Generic, Tool, SmallFauna, Placeable, Equiptable, Gear
    }
}
b. GearScriptableObject
Afterwards, we need to create a new script called GearScriptableObject.
- At the top of the script, add the attribute
[CreateAssetMenu(fileName = "item", menuName = "ScriptableObject/gearScriptableObject", order = 2)]so we can createGearScriptableObjects - Edit the script so it inherits from
ItemScriptableObjectinstead of Monobehaviour - Add the variable
public enum GearCategories- Add these variables to the enum:
Body,Helmet,Flipper,Tank,Upgrade. - Afterwards, add
public GearCategories gearType;
- Add these variables to the enum:
- Create a
void Reset()function- In this function, set the default value of
itemTypetoitemCategories.Gear - Since
GearScriptableObjectinherits fromItemScriptableObject, it also has the variableitemTypewhich we need to set.
- In this function, set the default value of
- Create a
private void OnValidate()function- In this function, create a
switch (gearType)case - For each possible value of
gearType, set thesizeofGearScriptableObjectaccordingly, beforebreak
- In this function, create a
GearScriptableObject.cs
using System.Collections;
using System.Collections.Generic;
using UnityEngine;

[CreateAssetMenu(fileName = "item", menuName = "ScriptableObject/gearScriptableObject", order = 2)]
public class GearScriptableObject : ItemScriptableObject
{
    public enum GearCategories
    {
        Body,
        Helmet,
        Flipper,
        Tank,
        Upgrade
    }

    public GearCategories gearType;

    private void OnValidate()
    {
        switch (gearType)
        {
            case GearCategories.Body:
                size = new Vector2(3, 3);
                break;

            case GearCategories.Helmet:
                size = new Vector2(2, 2);

                break;

            case GearCategories.Flipper:
                size = new Vector2(2, 2);

                break;

            case GearCategories.Tank:
                size = new Vector2(2, 3);

                break;

            case GearCategories.Upgrade:
                size = new Vector2(1, 1);

                break;
        }
    }

    //set default value of itemType
    void Reset()
    {
        itemType = itemCategories.Gear;

    }
}
Since we’ve created a new type of ScriptableObject, go to Assets/ScriptableObjects and create a new folder called Gear for the new GearScriptableObjects
Now that we’ve made our script, you can go ahead and create a GearScriptableObject and Prefab for each Gear Item.
b. Creating Gear UI
Next, we need to create the Gear Menu for our Gears. Our Gear Menu will be an extension of the Inventory System’s Menu, so Gear Menu will always be open when Inventory Menu is open. Therefore, all functions that manage the Gear Menu will all be written in InventorySystem.
Using the Spritesheet below, we can begin working on our Gear Menu. Go to the Menus GameObject under Player, and create a new Image GameObject called Gear Menu. Next,
- Select Anchor Presets for the Gear Menu. Set it so that Gear Menu’s Position and Pivot are on the right side, and will stretch to cover the right side of the screen.
- Adjust the Width and Color of the Gear Menu so it is identical to the Inventory Menu.
- Create a new Image GameObject, parented under Gear Menu, called GearSlot.
- Set both of this GearSlot’s Height and Width to 200.
- Set this GearSlot’s image to the Shirt from our Gear UI Spritesheet.
- Add a Button GameObject parented to GearSlot and remove its Text.
- Set the Height and Width of the Button to 200 so it matches the dimensions of GearSlot.
- Set the Image of the Button to None.
- Duplicate GearSlot five times (you should have six GearSlots)
- For the newly created GearSlots, resize and reposition them accordingly.
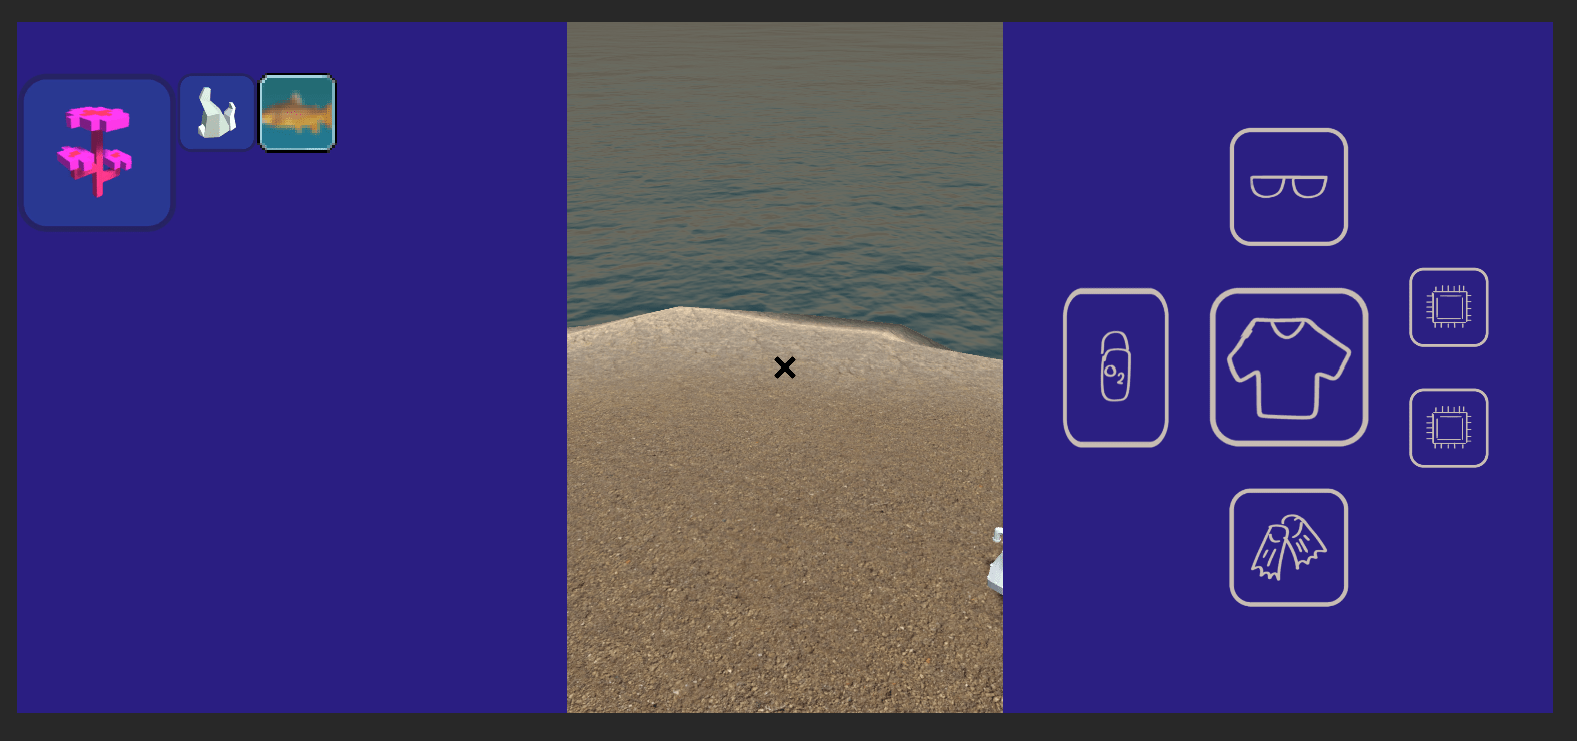
Afterwards, your Gear Menu should look something like this. Once you’re done with it, disable Gear Menu and apply it the Game Manager Prefab.
3. Inventory System Updates
Since our Gear Menu will be part of the Inventory Menu, the Gear System’s functionality will be created as a part of InventorySystem. Therefore, we e going to create a new region with new functions, then tweak some older code to accommodate the Gear System.
a. New Gear System Functions
Go to the top of the InventorySystem script where we have defined our variables. Add a new Header [Header("Gear Slots")]. Underneath this header, add these public variables:
List<GearScriptableObject> gearSlots = new List<GearScriptableObject>(5);- This will help keep track of what
GearScriptableObjectis currently being equipped, and each slot will be for a specific type of gear
- This will help keep track of what
List<Image> gearSlotUI;- This will help the
InventorySystemmanage the UI of our Gear System.
- This will help the
GameObject gearMenu;delegate void InventoryUpdated();event InventoryUpdated OnInventoryUpdated;- This
delegateandeventwill set up an event to tell scripts whenever the Inventory is sorted
- This
Afterwards, we can create a new region called Gear Equipping Functions where we’ll put all our functions related to the Gear System. Inside this region, add these functions:
public void SetGear(GearScriptableObject gear, int gearInt)public void UnequipGear(int gearInt)- This function will unequip gear from its GearSlot and return it to the Inventory.
public void EquipGear(GearScriptableObject gear)- This function will equip gear to a specific slot
For SetGear(),
- Check if the
GearScriptableObjectpassed to this method is the same as the gear in its respective slot withif(gearSlots[gearInt] == gear)- If it is the same gear,
return
- If it is the same gear,
- Next, set the Gear in the GearSlot with
gearSlots[gearInt] = gear; - Get the Image of the GearSlot we’re about to update (to display what Gear is equipped) with
Image currentGearSlot = gearSlotUI[gearInt];- If we want to unequip gear, then the value passed to the
gearargument of the function should benull. Check if we’re unequipping gear with theif (gear == null)statement - If
gear == null, then set the sprite ofcurrentGearSlotto null withcurrentGearSlot.sprite = null; - Then, disable
currentGearSlotwithcurrentGearSlot.gameObject.SetActive(false); - Lastly,
return
- If we want to unequip gear, then the value passed to the
- If we are equipping an item, set the sprite of
currentGearSlotwithcurrentGearSlot.sprite = gear.sprite; - Afterwards, enable
currentGearSlotwithcurrentGearSlot.gameObject.SetActive(true);
For UnequipGear(), check if the Inventory has space for the unequipped gear with if (AddItem(gearSlots[gearInt])). If there is space, call SetGear() to unequip this GearScriptableObject with SetGear(null, gearInt);
For EquipGear(),
- Create a
localint gearIntvariable and set its variable based on theGearScriptableObject‘sgearTypewithint gearInt = (int)gear.gearType; - Next, remove
gearfrom the Inventory withRemoveItem(gear); - Check if
gearis anUpgradewithif(gear.gearType == GearScriptableObject.GearCategories.Upgrade)- Next, check if Gear Slot 4 is not empty with an if(gearSlots[4] != null) statement
- If it is not empty,
gearInt = 5;
- Next, check if there is already a
GearScriptableObjectin the slot we are changing withif(gearSlots[gearInt] != null)- If there is, add this
GearScriptableObjectin the slot we are about to change back into the Inventory withAddItem(gearSlots[gearInt]); - Since
GearScriptableObjects of the samegearTypehave the same size, we don’t need to check if there’s space when adding Gear back into the Inventory.
- If there is, add this
- Lastly, set the
gearto the GearSlot withSetGear(gear,gearInt);
What is (int) for?
Here, we cast the value of gear.gearType to an int by writing (int) so we can use it to set the value of gearInt. This works because each value in gearType also has a corresponding, underlying int value. For example, with a gearType of Body, gearInt will be set to 0.
Then, we need to override the OpenMenuFunctions() function. Here, we just want to also enable the Gear Menu with gearMenu.SetActive(true);
Afterwards, we also need to edit the overridden CloseMenuFunctions() so it will also close the Gear Menu. To do that, simply add gearMenu.SetActive(false);
Once we put everything together, this is how the code will look like:
Note: In the code below, some functions have their contents replaced with “…”, as they have been filled in previously.
InventorySystem.cs
public class InventorySystem : UIBaseClass
{
    ...
    [Header("Gear Slots")]
    public List<GearScriptableObject> gearSlots = new List<GearScriptableObject>(5); // 0 is body, 1 is helmet, 2 is flipper, 3 is tank, 4 and 5 are upgrade slots
    public List<Image> gearSlotUI;
    public GameObject gearMenu;

    //event that tells scripts when the inventory is sorted
    public delegate void InventoryUpdated();
    public event InventoryUpdated OnInventoryUpdated;


    void Awake ...

    internal virtual void Update()...

    #region Interacting with items...

    #region Hotbar Functions...

    #region Functions to sort the inventory...

    #region Gear Equipping Functions

    public void EquipGear(GearScriptableObject gear) //logic for which slot to put a gear into
    {
        int gearInt = (int)gear.gearType;
        Debug.Log(gearInt);

        //remove gear from inventory
        RemoveItem(gear);

        //determine what kind of gear it is
        if(gear.gearType == GearScriptableObject.GearCategories.Upgrade)
        {
            //check if slot 4 is empty. If it is not, set to slot 5
            //when the code continues, if 5 is empty, it sets it as 5
            //if 5 is not empty, unequip 5 and set it as the new 5.
            //when both slots are full, it will default to swapping out the 5 slot.
            if(gearSlots[4] != null)
            {
                gearInt = 5;
            }
        }

        //if not empty, add back equipped gear into inventory
        //because all gears of the same type have the same size, there is no problem when swapping gear.
        if (gearSlots[gearInt] != null)
        {
            AddItem(gearSlots[gearInt]);
        }

        //add the gear to the gearslot
        SetGear(gear,gearInt);
    }

    //is put on each button on the gear menu ui
    public void UnequipGear(int gearInt) //function to remove a gear from gear slots
    {
        //check inventory for space, put gear back in
        if (AddItem(gearSlots[gearInt]))
        {
            SetGear(null, gearInt);
        }
    }

    public void SetGear(GearScriptableObject gear, int gearInt)
    {
        //if its already the same gear, do nothing
        if (gearSlots[gearInt] == gear)
        {
            return;
        }

        //sets the gear in the slot
        gearSlots[gearInt] = gear;

        //updates the gear ui to display whats equipped
        Image currentGearSlot = gearSlotUI[gearInt];

        if (gear == null)
        {
            currentGearSlot.sprite = null;
            currentGearSlot.gameObject.SetActive(false);
            return;
        }

        currentGearSlot.sprite = gear.sprite;
        currentGearSlot.gameObject.SetActive(true);
    }

    #endregion


    public override void OpenMenuFunctions()
    {
        gearMenu.SetActive(true);
    }


    public override void CloseMenuFunctions()
    {
        gearMenu.SetActive(false);
        //initialise hot bar items
        foreach (HotbarSlot slot in hotbar)
        {
            //Debug.Log("spawn items");
            slot.SpawnHotbarItems();
        }
    }
}
With our Gear Equipping Functions done, we can start integrating this functionality into the UI. Let’s go back to our Gear Menu Buttons. Select all of them and add the UnequipGear() function to their OnClick() event. Set the integers of the UnequipGear() function for each of the Gear Menu Buttons accordingly.
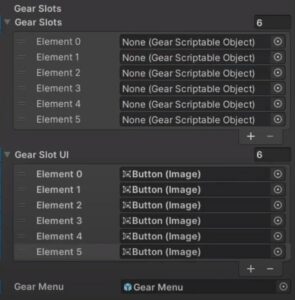
Afterwards, set the size of both gearSlots and gearSlotUI to 6. For gearSlotUI, drag in the corresponding Button’s Image component to its corresponding index in the list.
Don’t forget to also set gearMenu by dragging Gear Menu into it.
b. Tweaks Needed for Old Functions
Next, we’re gonna make some tweaks to our InventorySystem since it will also be responsible for handling the Gear System, as well as some extra functionality and bug fixes that we did not cover in previous parts of the Tutorial Series.
First off, we’re changing the code in Update(); We’ll be using left-click to move items in the Inventory instead of right-click. Therefore, change the old if statement to the if(Input.GetMouseButtonDown( statement.10) && (CurrentMenuIsThis() || CurrentMenuIsThis(sm.menu)))
Then, we’ll make a public void DropItem(ItemScriptableObject item) function. For this function,
- We remove
itemfrom the inventory withRemoveItem(item); - Spawn item in the world with
GameObject spawnedItem = Instantiate(item.worldPrefab, dropItemPoint.position, Quaternion.identity); - Unfreeze the
RigidbodyofspawnedItemwithspawnedItem.GetComponent<InteractableObject>().FreezeMovement(false); - Check if the item removed was a tool with the
if (item.itemType == ItemScriptableObject.itemCategories.Tool). If it was a tool, callCheckHotbar() return
Afterwards, we need to check if we’re right-clicking so that we can drop items with right-click. Add the if (Input.GetMouseButtonDown(1) && CurrentMenuIsThis()) statement. If we are right-clicking, drop the item with DropItem(io.item);
Then, let’s make some changes to the MoveItem() function. Firstly, we don’t need to call RemoveItem() at the very beginning of the function, so we can move it below the if(CurrentMenuIsThis()) statement.
If we’re in the Inventory Menu, we want MoveItem() to only be able to attempt to equip gear and do nothing else. Therefore, add the if (item.itemType == ItemScriptableObject.itemCategories.Gear) to check if the item we tried to move is Gear. If it is, attempt to equip it with EquipGear(item as GearScriptableObject); Afterwards, return so we do not run the rest of the code.
Beneath return, this code will run for moving items between storages. This where we put RemoveItem(item);
Afterwards, to make our code more efficient, we add the if(item.itemType == ItemScriptableObject.itemCategories.Tool) so that we only call CheckHotbar() when moving Tool items.
Next, we need to fix a bug in the CheckIfFit() code; Currently, it only checks the upper limit of the coordinates. We also want this function to return false if the item is trying to fit in coordinates that are below the lower limits. We can change the original if statement to if((x + gridCoordinate.x) >= gridWidth || (gridCoordinate.y + y) >= gridHeight || (x + gridCoordinate.x) < 0 || (gridCoordinate.y + y) < 0).
Afterwards, in AvailSpot(), we need to change the code to force set the class of the item passed to CheckIfFits() to an ItemScriptableObject. Otherwise, it may cause an error to occur if we try moving a GearScriptableObject. To fix this, we use the as keyword: CheckIfFits(item as ItemScriptableObject)
The last tweak we need to do is finish setting up the InventoryUpdated event. We want this event to be called every time we sort items. Therefore, in SortItems(), check if the event is not null with if(OnInventoryUpdated != null). If it is not null, call the event.
InventorySystem.cs
public class InventorySystem : UIBaseClass
{
    ...

    // Start is called before the first frame update
    void Awake()...

    // Update is called once per frame
    internal virtual void Update()
    {
        ...

        //movement stuff
        if(Input.GetMouseButtonDown(10) && (CurrentMenuIsThis() || CurrentMenuIsThis(sm.menu)))
        {
            //move item from one storage space to another
            io.storageBox.MoveItem(io.item);
        }

        if (Input.GetMouseButtonDown(1) && CurrentMenuIsThis())
        {
            DropItem(io.item);
        }

        //hotbar keypressing detection
        for (int key = 0; key < 5; key++)
        {
            if (Input.GetKeyDown(hotbarKeys[key]))
            {
                Debug.Log("hotbar " + key);

                //assign item to hotbar
                AssignItemToHotbar(io.item, key);
                break;
            }
        }
    }

    #region Interacting with items

    ...

    //move from the current inventory system from the other
    public virtual void MoveItem(ItemScriptableObject item)
    {
        RemoveItem(item);
        //if we are not in a storage menu
        if (CurrentMenuIsThis())
        {
            //spawn in the world
            GameObject spawnedItem = Instantiate(item.worldPrefab, dropItemPoint.position, Quaternion.identity);
            spawnedItem.GetComponent<InteractableObject>().FreezeMovement(false);
            CheckHotbar();
            //if the item is gear
            if (item.itemType == ItemScriptableObject.itemCategories.Gear)
            {
                //attempt to equip
                EquipGear(item as GearScriptableObject)
            }
            //if the item isnt gear, or cannot be equipped as gear, do nothing
            return;
        }

        //functions for if moving between storages

        RemoveItem(item);

        Debug.Log("otherside sorting");
        if (!StorageManager.Instance.AddItem(item))
        {
            Debug.Log("cannot fit in storage");
            AddItem(item);
            return;
        }

        //so the function doesnt run unessesarily
        if(item.itemType == ItemScriptableObject.itemCategories.Tool)
        {
            CheckHotbar();
        }
    }

    public void DropItem(ItemScriptableObject item)
    {
        RemoveItem(item);

        //spawn in the world
        GameObject spawnedItem = Instantiate(item.worldPrefab, dropItemPoint.position, Quaternion.identity);
        spawnedItem.GetComponent<InteractableObject>().FreezeMovement(false);

        if (item.itemType == ItemScriptableObject.itemCategories.Tool)
        {
            CheckHotbar();
        }
        return;
    }

    ...

    #endregion

    #region Hotbar Functions...

    #region Functions to sort the inventory

    ...

    bool CheckIfFits(ItemScriptableObject item, Vector2 gridCoordinate)
    {
        List<Vector2> coordsToCheck = new List<Vector2>();
        //get all the coordinates based on the size of the item
        for (int x = 0; x < item.size.x; x++)
        {
            for (int y = 0; y > -item.size.y; y--)
            {
                //if one of the coords is out of bounds, return false
                if((x + gridCoordinate.x) >= gridWidth || (gridCoordinate.y + y) >= gridHeight || (x + gridCoordinate.x) < 0 || (gridCoordinate.y + y) < 0)
                {
                    return false;
                }
                coordsToCheck.Add(new Vector2(x + gridCoordinate.x, gridCoordinate.y + y));
            }
        }
        //check all the coordinates
        foreach(Vector2 coord in coordsToCheck)
        {
            if(!grid.GetGridObject((int)coord.x, (int)coord.y).EmptyTemp())
            {
                //if there is something in one of these coordinates, return false
                return false;
            }
        }
        //return true
        AssignItemToSpot(item, coordsToCheck);
        return true;
    }

    //check through every spot to find the next available spot
    internal bool AvailSpot(ItemScriptableObject item)
    {
        for (int y = gridHeight - 1; y >= 0; y--)
        {
            for(int x = 0; x < gridWidth; x++)
            {
                //check if the spot is empty
                if (grid.GetGridObject(x, y).EmptyTemp())
                {
                    //check if size one
                    if(item.size == Vector2.one)
                    {
                        AssignItemToSpot(item, x, y);
                        return true;
                    }
                    else
                    {
                        if(CheckIfFits(item as ItemScriptableObject,new Vector2(x, y)))
                        {
                            return true;
                        }
                    }
                }

            }
        }

        //after checking every coordinate, no spots found
        return false;
    }

    //function returns true if all items can be sorted, and sorts them properly
    //returns false if items cannot be sorted and deletes all the temporary values
    internal virtual bool SortItems()
    {
        //Debug.Log("SortItems");

        //sort items by size
        var sortedList = itemsList.OrderByDescending(s => s.size.x * s.size.y);

        //place items systematically
        foreach (ItemScriptableObject item in sortedList)
        {
            bool hasSpot = AvailSpot(item);
            if (hasSpot == false)
            {
                Debug.Log("doesnt fit!");
                ResetTempValues();
                return false;
            }
        }

        foreach (GridObject obj in grid.gridArray)
        {
            obj.SetTempAsReal(Instance);
        }

        //everytime we sort items, call an event
        if(OnInventoryUpdated != null)
        {
            OnInventoryUpdated();
        }
        return true;
    }

    #endregion

    #region Gear Equipping Functions...

    ...
}
4. GearUniversalFunctions
Now, we need to add functions to our Gear so that when you equip it, it will activate its effect. Conversely, when we unequip it, we lose the effects of the gear. However, unlike Tools, we are not spawning Gear in the world. Since we’re only adding the GearScriptableObjects to a list, we can’t implement functionality in them the same way as Tools — We need a universal script that contains our Gear Functions
To begin, we need to make a new folder in Assets called Resources. The ‘R’ needs to be capitalised. Then, we move our ScriptableObjects folder into the Resources folder so we can move all of them into Resources. This will allow us to access them for this script.
Now, we create the GearUniversalFunctions script. First thing we want to do is add the using System.Linq; namespace
Then, we add these public variables:
static PlayerController pc;static InventorySystem iSystem;delegate void GearFunction(bool i);- Ensure this variable is serializable by adding the
[System.Serializable]attribute above it. - This function takes in a bool to determine if it will enable or disable the Gear Function.
- Ensure this variable is serializable by adding the
GearScriptableObject[] gearTypes;List<GearFunction> gearFunctions;
Change the Start() to Awake(). In Awake(), we access the GearScriptableObjects to set up gearTypes with gearTypes = Resources.LoadAll<GearScriptableObject>("Scriptable Objects/Gear").ToArray();
We also set gearFunctions with gearFunctions = new List<GearFunction> { ActivateFlippers, DefaultGearFunction, DefaultGearFunction, DefaultGearFunction, DefaultGearFunction};
The last thing we do in Awake() is get the reference to our InventorySystem with iSystem = InventorySystem.Instance;
Next, we create a new public void ActivateGearFunctions() function. This will be called to turn on or off the Gear’s effects. For this function,
- Create a
for (int i=0;i<gearTypes.Count();i++)loop- In the loop, deactivate all gear functions with
gearFunctions[i](false);
- In the loop, deactivate all gear functions with
- Afterwards, create a
foreach (GearScriptableObject gearScriptable in iSystem.gearSlots)loop- Check if there is no
GearScriptableObjectin the Gear Slot withif(gearScriptable == null) - If there is no
GearScriptableObject,return - Otherwise, if there is a
GearScriptableObject, activate its function withgearFunctions[System.Array.IndexOf(gearTypes,gearScriptable)](true);
- Check if there is no
As for DefaultGearFunction(), all we need it to do is return;
NOTE: If your file organisation is different from the Video Tutorial, the Resources.LoadAll() function will need a different string based on your folder arrangement. In this case, the filepath for the GearScriptableObject is Resources/Scriptable Objects/Gear.
GearUniversalFunctions.cs
using System.Collections;
using System.Collections.Generic;
using UnityEngine;
using System.Linq;

public class GearUniversalFunctions : MonoBehaviour
{
    public static PlayerController pc;
    public static InventorySystem iSystem;
    [System.Serializable]
    public delegate void GearFunction(bool i);

    public GearScriptableObject[] gearTypes;
    public List<GearFunction> gearFunctions;

    private void Awake()
    {
        //set up geartypes
        gearTypes = Resources.LoadAll<GearScriptableObject>("Scriptable Objects/Gear").ToArray();

        gearFunctions = new List<GearFunction> { ActivateFlippers, DefaultGearFunction, DefaultGearFunction, DefaultGearFunction, DefaultGearFunction};

        iSystem = InventorySystem.Instance;

    }

    //function that adds stuff to inventory event system based on whos active
    //call this function whenever we set gear to update the activated gear
    public void ActivateGearFunctions()
    {
        //deactivate all functions first
        for (int i=0;i<gearTypes.Count();i++)
        {
            gearFunctions[i](false);
        }

        foreach (GearScriptableObject gearScriptable in iSystem.gearSlots)
        {
            if(gearScriptable == null)
            {
                return;
            }

            gearFunctions[System.Array.IndexOf(gearTypes,gearScriptable)](true);
        }
    }

    private void Update()
    {

    }

    void DefaultGearFunction(bool i)
    {
        return;
    }
}
5. Player Controller Speed System Tweaks
Next, we’re gonna change how we calculate movement speed bonuses because our previous way of adding these bonuses is not the most effective method.
Create a public List<float> swimBonuses for swimming speed bonuses, and public List<float> walkBonuses for walking movement speed bonuses.
Then, in CheckSpeedBoost(), we run a foreach loop for both swimBonuses and walkBonuses. For each value in these lists, they will be added to the respective speed bonus values so that the total sum of the various bonuses will be calculated and used in our movement code.
Then, while we’re here, let’s set the reference to GearUniversalFunctions.pc here in Awake();
PlayerController.cs
    [Header("Player Movement")]
    public float baseSpeed = 1;
    float speed;
    public float swimSpeedBonus = 0;
    public float walkSpeedBonus = 0;
    public List<float> swimBonuses = new List<float>();
    public List<float> walkBonuses = new List<float>();
    float moveX;
    float moveY;
    float moveZ;

    void Awake()
    {
        Instance = this;
        rb = GetComponent<Rigidbody>();
        t = this.transform;
        Cursor.lockState = CursorLockMode.Locked;
        inWater = false;
        iSystem = InventorySystem.Instance;
        sm = StorageManager.Instance;
        cm = CraftingManager.Instance;
        iSystem.dropItemPoint = dropItemPoint;
        InteractableObject.pc = Instance;
        ToolBaseClass.pc = Instance;
        ToolBaseClass.iSystem = iSystem;
        GearUniversalFunctions.pc = Instance;

        hotbarKeys = iSystem.hotbarKeys;
        hotbar = iSystem.hotbar;
        HotbarSlot.hand = hand;
        playerAnim = GetComponent<Animator>();
    }

    public void CheckSpeedBoost()
    {
        walkSpeedBonus = 0;
        swimSpeedBonus = 0;
        //list of conditions of what gives speed boosts. add conditions here as needed.
        //swimming conditions
        if(itemHeld != -1 && hotbar[itemHeld].tool != null && hotbar[itemHeld].tool.GetType() == typeof(Seaglide))
        {
            swimSpeedBonus += Seaglide.speedBonus;
        }
        foreach(float i in swimBonuses)
        {
            swimSpeedBonus += i;
        }

        //walking conditions
        foreach (float i in walkBonuses)
        {
            walkSpeedBonus += i;
        }
    }
6. Still Suit Code and Flipper Code
Now, let’s work on the code for two Gear Items, the Still Suit and the Flipper. For the Still Suit, we’ll add its functionality to the gearFunctions and write the code for its functionality in the GearUniversalFunctions script. We don’t need to write the functionality for the Flippers here since that can be handled by the PlayerController‘s CheckSpeedBoost(), so we just need to write code to toggle the Flippers..
For the Still Suit and Flipper, we’ll create regions for both of them to keep our code nice and tidy. This will be more useful if we expand this system in the future and begin adding more GearFunctions in this script.
a. Still Suit
In the Still Suit’s region, add these variables:
public ItemScriptableObject waterItem;bool storedWater;float timer;public float waterGenerationRate;public bool stillsuitActive;
Next, we need to create three functions:
private void ProduceWater()void AddStoredWaterToInventory()void ActivateStillSuit(bool i)
ProduceWater() will produce water using the Still Suit via a timer, but only if we are not currently storing water in the Still Suit. Add this function to Update() inside an if(stillsuitActive) statement so that it runs every frame, but only if stillsuitActive is true. For this function:
- Check if we do NOT have water stored in the Still Suit with
if(!storedWater)- If no water is stored, then check if
timerexceedswaterGenerationRatewithif(timer >= waterGenerationRate)- The last thing to check is if there is space in the Inventory for
waterItem, which we check withif(iSystem.AddItem(waterItem)) - If we successfully added the water, set
timer = 0andstoredWater = falseso we can begin producing water again - Otherwise, set
storedWater = trueso we store the water and thus cannot produce MORE water
- The last thing to check is if there is space in the Inventory for
- While water is not stored, increase the value of
timerover time withtimer += Time.deltaTime;
- If no water is stored, then check if
AddStoredWaterToInventory() will, as the name implies, add one waterItem to the Inventory if the Still Suit has produced and stored one, but only if there is space in the Inventory. In Awake(), add this function to the OnInventoryUpdated event in InventorySystem with iSystem.OnInventoryUpdated += AddStoredWaterToInventory;
For this function:
- Check if we have water stored in the Still Suit with
if(storedWater)- If we do have water stored, try to add it to the Inventory with
if(iSystem.AddItem(waterItem)
- If we do have water stored, try to add it to the Inventory with
- If water was successfully added, set
timer = 0andstoredWater = falseso we can begin producing water again
The last function, ActivateStillSuit(bool i), simply lets us toggle the functionality of the Still Suit by passing a bool to it and enabling or disabling the still suit accordingly. For this function, check if i is true with if(i), and set stillsuitActive = true. Else, if i is false, set stillsuitActive to false.
b. Flippers
As for the Flippers, it needs add a float flipperSpeedBonus to the player while swimming. To accomplish this, we need to code the Flippers functionality such that when the Flippers are equipped, it will add flipperSpeedBonus to the List<float> swimBonuses on the PlayerController.
Therefore, the only function we need to write void ActivateFlippers(bool i). However, instead of triggering its own functionality via a bool, it will add or remove flipperSpeedBonus from the PlayerCharacter‘s swimBonuses.
GearUniversalFunctions.cs
using System.Collections;
using System.Collections.Generic;
using UnityEngine;
using System.Linq;

public class GearUniversalFunctions : MonoBehaviour
{
    public static PlayerController pc;
    public static InventorySystem iSystem;
    [System.Serializable]
    public delegate void GearFunction(bool i);

    public GearScriptableObject[] gearTypes;
    public List<GearFunction> gearFunctions;

    private void Awake()
    {
        //set up geartypes
        gearTypes = Resources.LoadAll<GearScriptableObject>("Scriptable Objects/Gear").ToArray();

        gearFunctions = new List<GearFunction> { ActivateFlippers, DefaultGearFunction, DefaultGearFunction, DefaultGearFunctionActivateStillSuit, DefaultGearFunctionActivateFlippers };

        iSystem = InventorySystem.Instance;

        //still suit setup
        iSystem.OnInventoryUpdated += AddStoredWaterToInventory;
    }

    //function that adds stuff to inventory event system based on whos active
    //call this function whenever we set gear to update the activated gear
    public void ActivateGearFunctions()
    {
        //deactivate all functions first
        for (int i=0;i<gearTypes.Count();i++)
        {
            gearFunctions[i](false);
        }

        foreach (GearScriptableObject gearScriptable in iSystem.gearSlots)
        {
            if(gearScriptable == null)
            {
                return;
            }

            gearFunctions[System.Array.IndexOf(gearTypes,gearScriptable)](true);
        }
    }

    private void Update()
    {
        //based on the bools activated, activate different functions
        if (stillsuitActive)
        {
            ProduceWater();

        }
    }

    void DefaultGearFunction(bool i)
    {
        return;
    }

    #region StillSuit
    [Header("Still Suit")]
    public ItemScriptableObject waterItem;
    bool storedWater;
    float timer;
    public float waterGenerationRate;
    public bool stillsuitActive;

    private void ProduceWater()
    {

        //if theres water stored, do not do timer and search for way to get rid of water
        if (!storedWater)
        {
            //timer for creating water
            if (timer >= waterGenerationRate)
            {
                if (iSystem.AddItem(waterItem))
                {
                    timer = 0;
                    storedWater = false;
                }
                else
                {
                    storedWater = true;
                }
            }

            timer += Time.deltaTime;
        }

    }

    void AddStoredWaterToInventory()
    {
        if (storedWater)
        {
            //if put in inventory, unstore water
            if (iSystem.AddItem(waterItem))
            {
                timer = 0;
                storedWater = false;
            }
        }
    }

    void ActivateStillSuit(bool i)
    {
        Debug.Log("stillsuit activated");
        if (i)
        {
            stillsuitActive = true;
        }
        else
        {
            stillsuitActive = false;
        }
    }
    #endregion

    #region Flippers

    [Header("Flippers")]
    public float flipperSpeedBonus;
    void ActivateFlippers(bool i)
    {
        if (i)
        {
            pc.swimBonuses.Add(flipperSpeedBonus);
        }
        else
        {

            if (!pc.swimBonuses.Contains(flipperSpeedBonus))
            {
                return;
            }

            pc.swimBonuses.Remove(flipperSpeedBonus);
        }
    }
    #endregion
}
The last thing we need to do is activate the GearUniversalFunctions whenever we equip gear. Therefore, we need to add a new variable public GearUniversalFunctions guf; and activate the Gear Functions in EquipGear() with guf.ActivateGearFunctions();
InventorySystem.cs
    [Header("Gear Slots")]
    public List<GearScriptableObject> gearSlots = new List<GearScriptableObject>(5); // 0 is body, 1 is helmet, 2 is flipper, 3 is tank, 4 and 5 are upgrade slots
    public List<Image> gearSlotUI;
    public GameObject gearMenu;
    public GearUniversalFunctions guf;


    public bool EquipGear(GearScriptableObject gear) //logic for which slot to put a gear into
    {
        int gearInt = (int)gear.gearType;
        Debug.Log(gearInt);

        //remove gear from inventory
        RemoveItem(gear);

        //determine what kind of gear it is
        if(gear.gearType == GearScriptableObject.GearCategories.Upgrade)
        {
            //check if slot 4 is empty. If it is not, set to slot 5
            //when the code continues, if 5 is empty, it sets it as 5
            //if 5 is not empty, unequip 5 and set it as the new 5.
            //when both slots are full, it will default to swapping out the 5 slot.
            if(gearSlots[4] != null)
            {
                gearInt = 5;
            }
        }

        //if not empty, add back equipped gear into inventory
        //because all gears of the same type have the same size, there is no problem when swapping gear.
        if (gearSlots[gearInt] != null)
        {
            AddItem(gearSlots[gearInt]);
        }
        //add the gear to the gearslot
        SetGear(gear,gearInt);

        guf.ActivateGearFunctions();

        return false;
    }
Add GearUniversalFunctions component to the Menus GameObject, and set the values for GearUniversalFunctions; Since we don’t have a Water ItemScriptableObject, we can use any other Item for testing purposes. We can set waterGenerationRate to 1 and flipperSpeedBonus to 50, as well as set InventorySystem‘s guf variable to the GearUniversalFunctions component.
Conclusion
With that, we’ve come to the end of this part of the Underwater Survival Tutorial Series. We hope you were successful in setting up Gear, and we hope to see you in the next instalment!
You can download the project files here.