Ever wanted to create a game like Harvest Moon in Unity? Check out Part 10 of our guide here, where we go through how to set up scene transitions. You can also find Part 9 of our guide here, where we went through how to improve on our current Inventory system.
A link to a package containing the project files up to Part 10 of this tutorial series can also be found at the end of this article, exclusive to Patreon supporters only.
1. Downloading new assets
We are going to start off with downloading some assets to put into our scene.
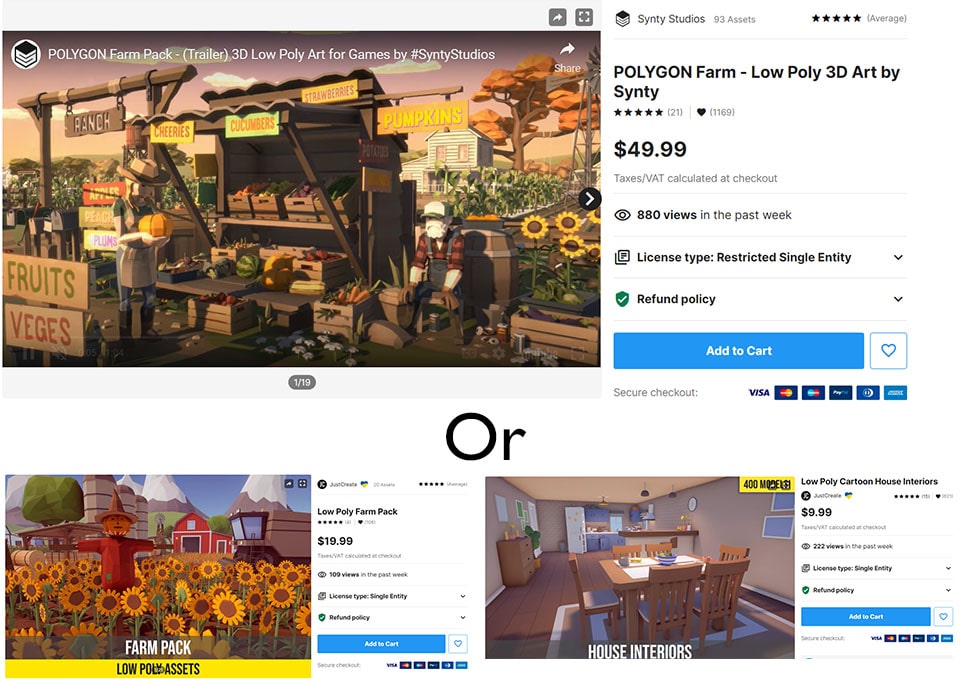
This tutorial is using POLYGON Farm – Low Poly 3D Art by Synty. Alternatively, we also recommend Low Poly Farm Pack and Low Poly Cartoon House Interiors.
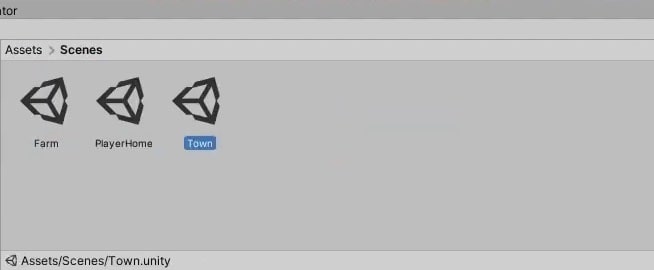
Once you have downloaded the assets, move them into the Imported Assets folder and create 3 main scenes:
- Player’s House
- Farm
- Town
Then set up these scenes with the imported assets by adding the models to your liking, or you can follow along with the time lapse of us setting up the scenes.
2. Keeping Essential GameObjects persistent
Before creating a script to for the transitions, we would first need to make some things persistent throughout all the scenes. This is to prevent losing data on anything important, such as the player’s inventory.
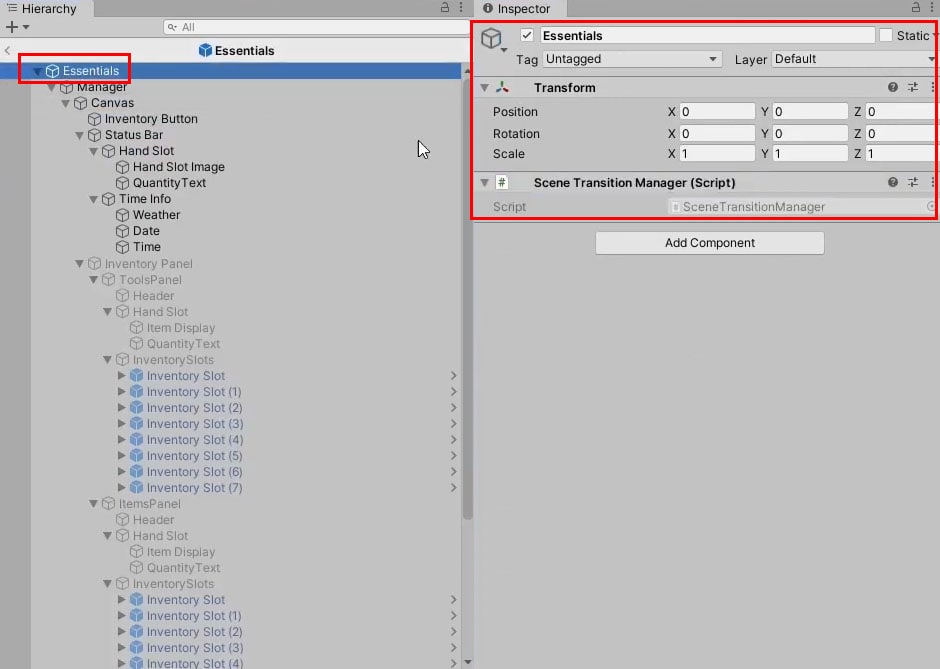
Create a new GameObject Essentials and parent the following GameObjects to it:
- Player
- Main Camera
- Directional Light
- Manager
- EventSystem
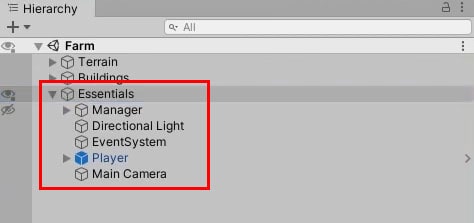
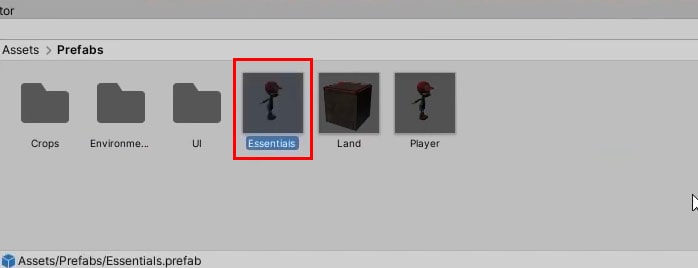
Then, make them a prefab.
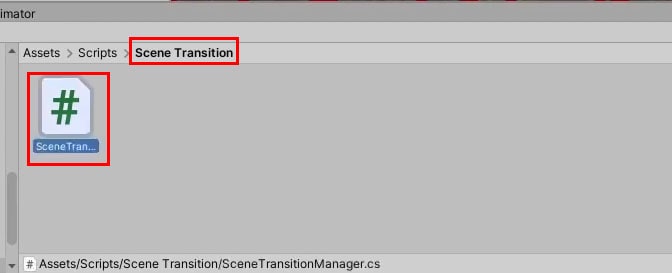
Create a new folder under Scripts called Scene Transition and before creating a class called SceneTransitionManager in the folder. Make it a singleton class.
To make the object persistent throughout the scenes, use DontDestroyOnLoad(gameObject). However, this will create clones of the GameObject when swapping scene since the previous one was not destroyed. Thus, we also need to destroy them. To do that, add the following code to SceneTransitionManager:
SceneTransitionManager.cs
using System;
using System.Collections;
using System.Collections.Generic;
using UnityEngine;

public class SceneTransitionManager : MonoBehaviour
{
    public static SceneTransitionManager Instance;

    private void Awake()
    {
        //If there is more than 1 instance, destroy GameObject
        if(Instance != null && Instance != this)
        {
            Destroy(gameObject);
        }
        else
        {
            //Set the static instance to this instance
            Instance = this;
        }

        //Make the gameobject persistent across scenes
        DontDestroyOnLoad(gameObject);

}
Put this script into the Essentials GameObject itself and not the Manager GameObject.
3. Scene Transition
Moving on to scene transitions, we would be going through how to teleport players from one scene to the next. This leads us to our next question:
How do we know which location to switch to when loading scene?
We solve this by representing all the scenes by using an enum. Call the enum “Location“, and name the elements in it exactly the same as the scene names. Then, create another variable to track the current location.
SceneTransitionManager.cs
using System;
using System.Collections;
using System.Collections.Generic;
using UnityEngine;

public class SceneTransitionManager : MonoBehaviour
{
    public static SceneTransitionManager Instance;

    //The scenes the player can enter
    public enum Location { Farm, PlayerHome, Town}
    public Location currentLocation;


    private void Awake()
    {
        ...
    }
}
a. Switch Locations
To switch scenes, first add the code using UnityEngine.SceneManagement. Then, create a function to switch locations that takes in Location as a parameter. Remember to add the top line, otherwise your code will have an error. Add the following to SceneTransitionManager:
UnityEngine.SceneManagement is the system in Unity that handles all the scenes. It is most commonly used to get and load scenes. It also allows you to handle other scenes asynchronously.
SceneTransitionManager.cs
using System;
using System.Collections;
using System.Collections.Generic;
using UnityEngine;
using UnityEngine.SceneManagement;

public class SceneTransitionManager : MonoBehaviour
{
    public static SceneTransitionManager Instance;

    //The scenes the player can enter
    public enum Location { Farm, PlayerHome, Town}
    public Location currentLocation;


    private void Awake()
    {
        ...
    }

    //Switch the player to another scene
    public void SwitchLocation(Location locationToSwitch)
    {
        SceneManager.LoadScene(locationToSwitch.ToString());
    }
}
Now that we have the code for switching scene, we also need a trigger to let the code know when to transfer the player to another scene. To do that, we are going to create a designated area that will switch scenes when entered.
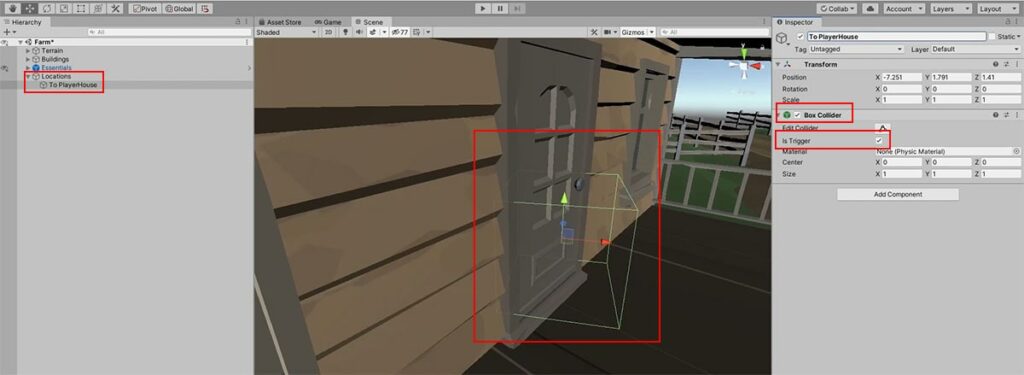
First, create a new GameObject called Locations. This will be the parent GameObject for all entry and start points in the scene.
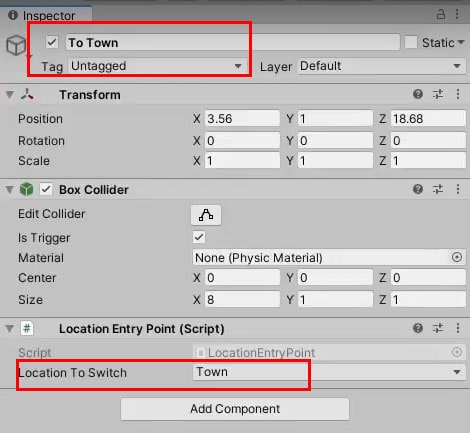
For each entry point, create a GameObject and rename it to “To [Location name]“. Then, add a box collider component to it and set it to Is Trigger. Place these GameObjects at the place where the player is going to be to switch the scenes. Remember to make these GameObjects children of the Locations GameObject.
The option Is Trigger in colliders allow any code that are related to triggers (OnTriggerEnter(), OnTriggerStay(), etc.) to run whenever another object with a collider enters the trigger zone.
Next, create a new class in Scene Transition folder and name it LocationEntryPoint.
In the script, use a Location variable to determine the scene to switch to. Thereafter, use OnTriggerEnter() to switch player over to the scene of choice if the entity entering the trigger object is the player.
LocationEntryPoint.cs
using System.Collections;
using System.Collections.Generic;
using UnityEngine;

public class LocationEntryPoint : MonoBehaviour
{
    [SerializeField]
    SceneTransitionManager.Location locationToSwitch;

    private void OnTriggerEnter(Collider other)
    {
        //Check if the collider belongs to the player
        if(other.tag == "Player")
        {
            //Switch scenes to the location of the entry point
            SceneTransitionManager.Instance.SwitchLocation(locationToSwitch);
        }
    }


}
Add this script to all of the entry points and set the corresponding location that each entry point is supposed to transfer the player to.
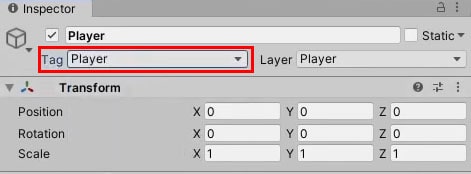
Next, open the Player prefab and check if the tag is set to “Player”. If not, assign the player tag to it. Ensure the spelling of the tag is the same as the one in the script, including capitalisation of letters.
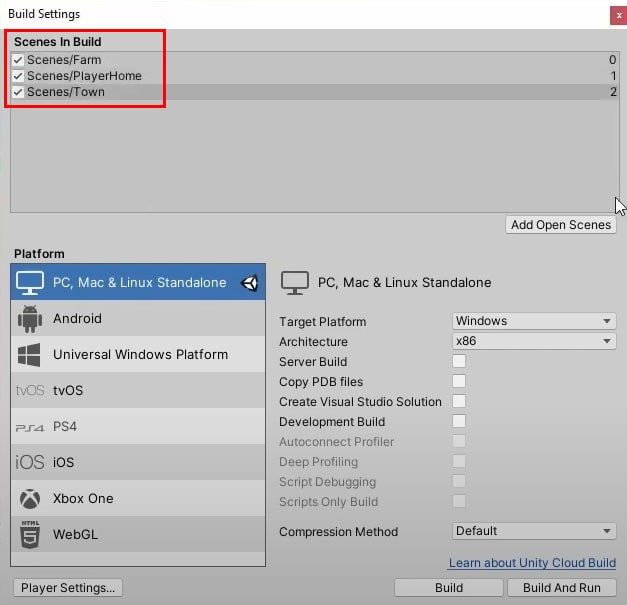
Lastly, make sure the scenes are in the build settings and we now have a basic working scene transition.
b. Start Points
Currently, the player is at the same position as in the previous scene after the scenes have been switched. We are going to fix this by keeping track of where the player should start in each scene.
Create another GameObject for the start location and rename it to “From [Location Name]“. Place this in a place where you think the player should start in each scene. Take note to not overlap this GameObject with the area that your entry point covers, else you will be continuously changing scenes.

You might notice that some scenes have multiple points of entry. For instance, the Farm scene has the start points from the town and the player’s house. To keep track of them, we will utilize a struct. Create a struct called StartPoint. It should take in the Transform that we want the player to start from, as well as the previous Location that the player had came from.
StartPoint.cs
using System.Collections;
using System.Collections.Generic;
using UnityEngine;

[System.Serializable]
public struct StartPoint
{
    //Location the player is entering from
    public SceneTransitionManager.Location enteringFrom;

    //The transform the player should start in
    public Transform playerStart;
}
Next, create a new singleton class called LocationManager. This script will manage the List of startPoints by have a function called GetPlayerStartingPosition(). This function will use the Player’s Location to retrieve the correct startingPoint from the list of startPoints. Add the following code into the script:
LocationManager.cs
using System.Collections;
using System.Collections.Generic;
using UnityEngine;

public class LocationManager : MonoBehaviour
{
    public static LocationManager Instance { get; private set; }

    public List<StartPoint> startPoints;

    private void Awake()
    {
        //If there is more than one instance, destroy the extra
        if (Instance != null && Instance != this)
        {
            Destroy(this);
        }
        else
        {
            //Set the static instance to this instance
            Instance = this;
        }
    }

    //Find the player's start position based on where he's coming from
    public Transform GetPlayerStartingPosition(SceneTransitionManager.Location enteringFrom)
    {
        //Tries to find the matching startpoint based on the Location given
        StartPoint startingPoint = startPoints.Find(x => x.enteringFrom == enteringFrom);

        //Return the transform
        return startingPoint.playerStart;
    }
}
How the GetPlayerStartingPosition() function works: It takes the list of StartPoints and goes through the array to find an entry that contains the location that we are trying to access. Since both the list and the item we are requesting are from the same enum, it will always find a match.
c. Connecting Start Points and switching location
With the StartPoints set up, we now are going to connect this with our SceneTransitionManager so that when we switch scenes, the starting points will switch.
To do this, we are making use of a callback: SceneManager.sceneLoaded += OnLocationLoad, where OnLocationLoad() is a new function. This is how the function works:
- This function will find our current location based on the scene name and check if it is the same as the old scene.
- If it is the same, it will use
returnto get out of the function so we do not set our position back to the starting position. - Otherwise, find the correct starting point and set the player’s transform and location to it; before setting the current location to our new location.
- If it is the same, it will use
SceneTransitionManager.cs
using System;
using System.Collections;
using System.Collections.Generic;
using UnityEngine;
using UnityEngine.SceneManagement;

public class SceneTransitionManager : MonoBehaviour
{
    public static SceneTransitionManager Instance;

    //The scenes the player can enter
    public enum Location { Farm, PlayerHome, Town}
    public Location currentLocation;

    //The player's transform
    Transform playerPoint;


    private void Awake()
    {
        //If there is more than 1 instance, destroy GameObject
        if(Instance != null && Instance != this)
        {
            Destroy(gameObject);
        }
        else
        {
            //Set the static instance to this instance
            Instance = this;
        }

        //Make the gameobject persistent across scenes
        DontDestroyOnLoad(gameObject);

        //OnLocationLoad will be called when the scene is loaded
        SceneManager.sceneLoaded += OnLocationLoad;

        //Find the player's transform
        playerPoint = FindObjectOfType<PlayerController>().transform;
    }

    //Switch the player to another scene
    public void SwitchLocation(Location locationToSwitch)
    {
        SceneManager.LoadScene(locationToSwitch.ToString());
    }

    //Called when a scene is loaded
    public void OnLocationLoad(Scene scene, LoadSceneMode mode)
    {
        //The location the player is coming from when the scene loads
        Location oldLocation = currentLocation;

        //Get the new location by converting the string of our current scene into a Location enum value
        Location newLocation = (Location) Enum.Parse(typeof(Location), scene.name);

        //If the player is not coming from any new place, stop executing the function
        if (currentLocation == newLocation) return;

        //Find the start point
        Transform startPoint = LocationManager.Instance.GetPlayerStartingPosition(oldLocation);

        //Change the player's position to the start poin
        playerPoint.position = startPoint.position;
        playerPoint.rotation = startPoint.rotation;

        //Save the current location that we just switched to
        currentLocation = newLocation;
    }
}
Although we have set the player’s position and rotation, we will still not teleport to the correct destination — reason being the CharacterController component works differently such that setting the Transform of a GameObject when it is enabled will not override the position that the CharacterController has set. To fix this, disable this component and change the player’s position before reenabling it in SceneTransitionManager:
SceneTransitionManager.cs
    //Called when a scene is loaded
    public void OnLocationLoad(Scene scene, LoadSceneMode mode)
    {
        //The location the player is coming from when the scene loads
        Location oldLocation = currentLocation;

        //Get the new location by converting the string of our current scene into a Location enum value
        Location newLocation = (Location) Enum.Parse(typeof(Location), scene.name);

        //If the player is not coming from any new place, stop executing the function
        if (currentLocation == newLocation) return;

        //Find the start point
        Transform startPoint = LocationManager.Instance.GetPlayerStartingPosition(oldLocation);

        //Disable the player's CharacterController component
        CharacterController playerCharacter = playerPoint.GetComponent<CharacterController>();
        playerCharacter.enabled = false;

        //Change the player's position to the start point
        playerPoint.position = startPoint.position;
        playerPoint.rotation = startPoint.rotation;

        //Re-enable player character controller so he can move
        playerCharacter.enabled = true;

        //Save the current location that we just switched to
        currentLocation = newLocation;
    }
}
We have completed allowing the player to switch locations. Remember to create all the start points and entry points in all the scenes for everything to work properly!
4. Transition UI feedback
Next, we are going to smooth out the transitions by creating a fade in and fade out effect as UI feedback.
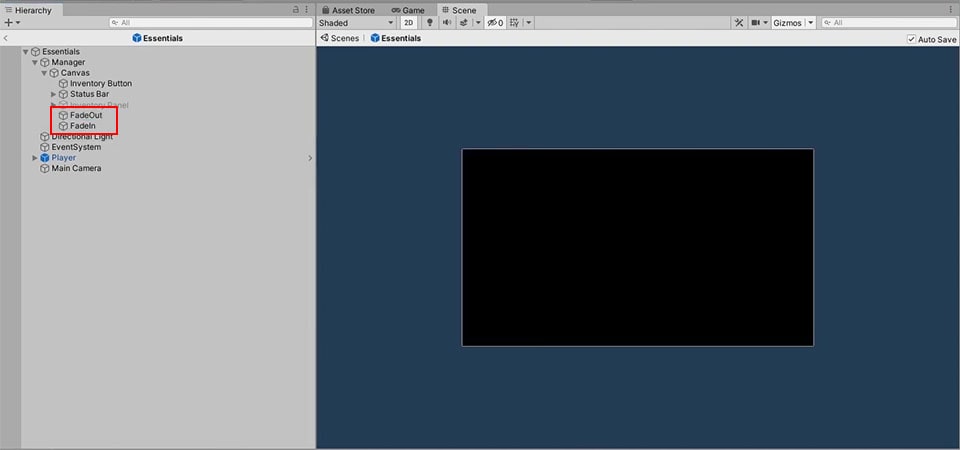
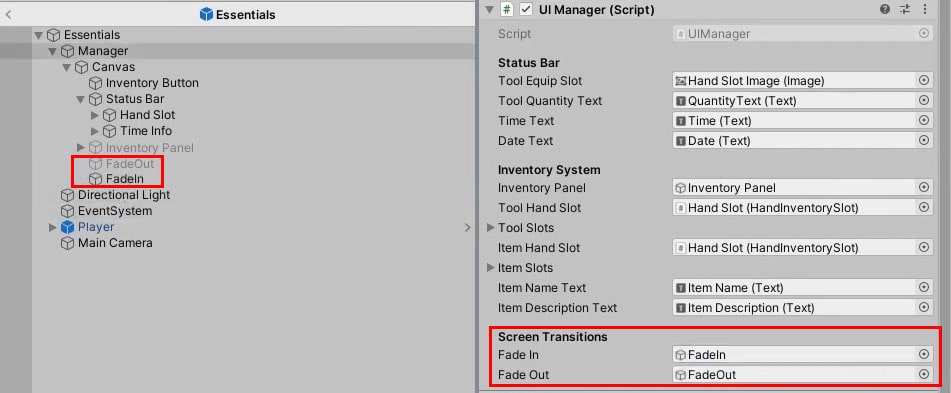
Under the canvas in Essentials, create 2 UI Images: FadeIn and FadeOut. Make these images colour black.
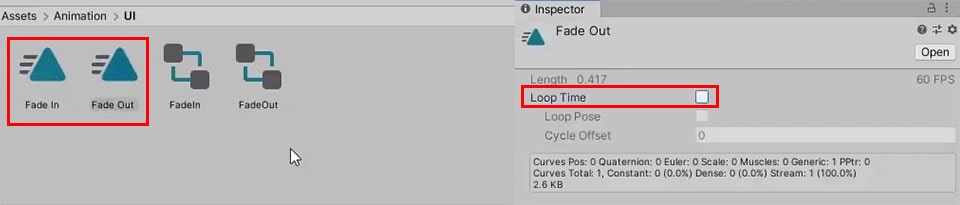
Create a new folder under Animations and name it “UI”. Create animations for both UI and name them “fade in” and “fade out” respectively.
For “fade out” animation, set the image’s alpha to 0 at 0:00 seconds and at the half second mark (0:50), set the alpha to 1. Do the opposite for the “fade in” animation to achieve the correct effect [alpha is 1 at 0:00 and alpha is 0 at 0:50]. Ensure that loop time is disabled for these 2 animations so that the animation would not replay upon completion.

Thereafter, create a new class called ParentedAnimationEvent with a function called NotifyAncestors() to use SendMessageUpwards(). This will allow the animations to send messages to their parent GameObject.
The default AnimationEvent will send message to the GameObject itself, but we want to send it upwards.
ParentedAnimationEvent.cs
using System.Collections;
using System.Collections.Generic;
using UnityEngine;

public class ParentedAnimationEvent : MonoBehaviour
{
    //Sends the message upwards
   public void NotifyAncestors(string message)
   {
        SendMessageUpwards(message);
   }
}
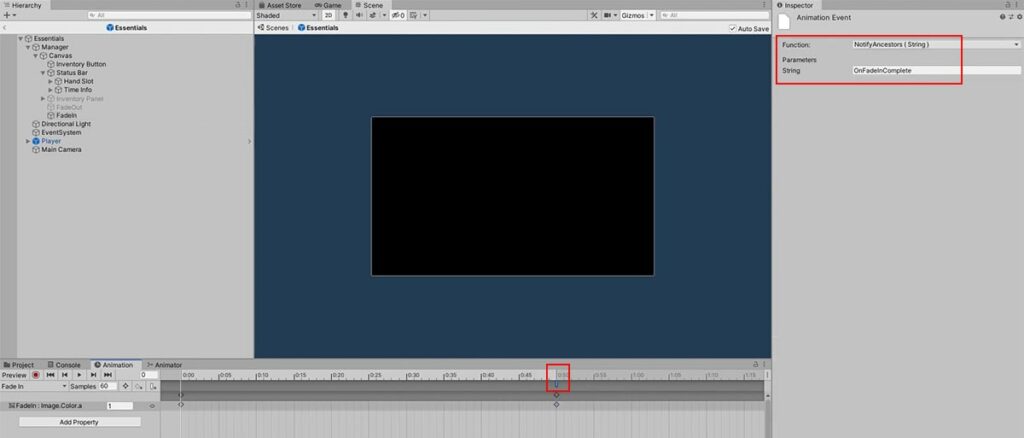
Add this script to both FadeIn and FadeOut GameObject. Now, under their animations, at the half second mark, create an animation event and call NotifyAncestor().
Under the Parameter, send OnFadeInComplete and OnFadeOutComplete for the FadeIn and FadeOut animations respectively.
In UIManager, create 2 new GameObject variables fadeIn and fadeOut for the UI images. Disable the fadeIn GameObject under OnFadeInComplete so it doesn’t interfere with the other UI elements.
UIManager.cs
using System.Collections;
using System.Collections.Generic;
using UnityEngine;
using UnityEngine.UI;

public class UIManager : MonoBehaviour, ITimeTracker
{
    public static UIManager Instance { get; private set; }
    [Header("Status Bar")]
    //Tool equip slot on the status bar
    public Image toolEquipSlot;
    //Tool Quantity text on the status bar
    public Text toolQuantityText;
    //Time UI
    public Text timeText;
    public Text dateText;


    [Header("Inventory System")]
    //The inventory panel
    public GameObject inventoryPanel;

    //The tool equip slot UI on the Inventory panel
    public HandInventorySlot toolHandSlot;

    //The tool slot UIs
    public InventorySlot[] toolSlots;

    //The item equip slot UI on the Inventory panel
    public HandInventorySlot itemHandSlot;

    //The item slot UIs
    public InventorySlot[] itemSlots;

    //Item info box
    public Text itemNameText;
    public Text itemDescriptionText;

    [Header("Screen Transitions")]
    public GameObject fadeIn;
    public GameObject fadeOut;


    private void Awake()
    {
        ...
    }

    private void Start()
    {
        ...
    }
    #region Fadein Fadeout Transitions

    public void FadeOutScreen()
    {
        fadeOut.SetActive(true);
    }

    public void FadeInScreen()
    {
        fadeIn.SetActive(true);
    }

    public void OnFadeInComplete()
    {
        //Disable Fade in Screen when animation is completed
        fadeIn.SetActive(false);
    }


    #endregion
    //Iterate through the slot UI elements and assign it its reference slot index
    public void AssignSlotIndexes()
    {
        ...
    }

    //Render the inventory screen to reflect the Player's Inventory.
    public void RenderInventory()
    {
        ...
    }

    //Iterate through a slot in a section and display them in the UI
    void RenderInventoryPanel(ItemSlotData[] slots, InventorySlot[] uiSlots)
    {
        ...
    }

    public void ToggleInventoryPanel()
    {
        ...
    }

    //Display Item info on the Item infobox
    public void DisplayItemInfo(ItemData data)
    {
        ...
    }

    //Callback to handle the UI for time
    public void ClockUpdate(GameTimestamp timestamp)
    {
        ...
    }
}
In the Unity window, under the Essentials GameObject in your scene, disable FadeOut. At the same time, assign both FadeIn and FadeOut to their respective variable under UIManager.
To play the animation before changing scenes, we are going to utilise a coroutine to delay the scene change. In the coroutine, disable the CharacterController to prevent the player from moving during the feedback and transition. Then, name a boolean screenFadedOut. This keeps track of whether the animation is playing and will turn to true once it is completed. This is when the scene will change. Add the following code to SceneTransitionManager to accomplish this:
SceneTransitionManager.cs
using System;
using System.Collections;
using System.Collections.Generic;
using UnityEngine;
using UnityEngine.SceneManagement;

public class SceneTransitionManager : MonoBehaviour
{
    public static SceneTransitionManager Instance;

    //The scenes the player can enter
    public enum Location { Farm, PlayerHome, Town}
    public Location currentLocation;

    //The player's transform
    Transform playerPoint;

    //Check if the screen has finished fading out
    bool screenFadedOut;

    private void Awake()
    {
        ...
    }

    //Switch the player to another scene
    public void SwitchLocation(Location locationToSwitch)
    {
        //Call a fadeout
        UIManager.Instance.FadeOutScreen();
        screenFadedOut = false;
        SceneManager.LoadScene(locationToSwitch.ToString());
        StartCoroutine(ChangeScene(locationToSwitch));
    }

    IEnumerator ChangeScene(Location locationToSwitch)
    {
        //Disable the player's CharacterController component
        CharacterController playerCharacter = playerPoint.GetComponent<CharacterController>();
        playerCharacter.enabled = false;
        //Wait for the scene to finish fading out before loading the next scene
        while (!screenFadedOut)
        {
            yield return new WaitForSeconds(0.1f);
        }
    }

    //Called when the screen has faded out
    public void OnFadeOutComplete()
    {
        screenFadedOut = true;

    }


    //Called when a scene is loaded
    public void OnLocationLoad(Scene scene, LoadSceneMode mode)
    {
        ...
    }
}
Thereafter, in UIManager, create a new function ResetFadeDefaults() to restore the state of which fadeIn and fadeOut GameObjects should be active at the start of a scene (fadeIn should be enabled so the scene can starts with a fade in effect).
UIManager.cs
using System.Collections;
using System.Collections.Generic;
using UnityEngine;
using UnityEngine.UI;

public class UIManager : MonoBehaviour, ITimeTracker
{
    public static UIManager Instance { get; private set; }
    [Header("Status Bar")]
    //Tool equip slot on the status bar
    public Image toolEquipSlot;
    //Tool Quantity text on the status bar
    public Text toolQuantityText;
    //Time UI
    public Text timeText;
    public Text dateText;


    [Header("Inventory System")]
    //The inventory panel
    public GameObject inventoryPanel;

    //The tool equip slot UI on the Inventory panel
    public HandInventorySlot toolHandSlot;

    //The tool slot UIs
    public InventorySlot[] toolSlots;

    //The item equip slot UI on the Inventory panel
    public HandInventorySlot itemHandSlot;

    //The item slot UIs
    public InventorySlot[] itemSlots;

    //Item info box
    public Text itemNameText;
    public Text itemDescriptionText;

    [Header("Screen Transitions")]
    public GameObject fadeIn;
    public GameObject fadeOut;


    private void Awake()
    {
        ...
    }

    private void Start()
    {
        ...
    }
    #region Fadein Fadeout Transitions

    public void FadeOutScreen()
    {
        fadeOut.SetActive(true);
    }

    public void FadeInScreen()
    {
        fadeIn.SetActive(true);
    }

    public void OnFadeInComplete()
    {
        //Disable Fade in Screen when animation is completed
        fadeIn.SetActive(false);
    }

    //Reset the fadein fadeout screens to their default positions
    public void ResetFadeDefaults()
    {
        fadeOut.SetActive(false);
        fadeIn.SetActive(true);
    }


    #endregion
    //Iterate through the slot UI elements and assign it its reference slot index
    public void AssignSlotIndexes()
    {
        ...
    }

    //Render the inventory screen to reflect the Player's Inventory.
    public void RenderInventory()
    {
        ...
    }

    //Iterate through a slot in a section and display them in the UI
    void RenderInventoryPanel(ItemSlotData[] slots, InventorySlot[] uiSlots)
    {
        ...
    }

    public void ToggleInventoryPanel()
    {
        ...
    }

    //Display Item info on the Item infobox
    public void DisplayItemInfo(ItemData data)
    {
        ...
    }

    //Callback to handle the UI for time
    public void ClockUpdate(GameTimestamp timestamp)
    {
        ...
    }
}
Lastly, go back to SceneTransitionManager and add a reset for screenFadedOut and call ResetFadeDefaults() so that the variables are reset correctly before transferring the Player to the next scene.
SceneTransitionManager.cs
    IEnumerator ChangeScene(Location locationToSwitch)
    {
        //Disable the player's CharacterController component
        CharacterController playerCharacter = playerPoint.GetComponent<CharacterController>();
        playerCharacter.enabled = false;
        //Wait for the scene to finish fading out before loading the next scene
        while (!screenFadedOut)
        {
            yield return new WaitForSeconds(0.1f);
        }

        //Reset the boolean
        screenFadedOut = false;
        UIManager.Instance.ResetFadeDefaults();
        SceneManager.LoadScene(locationToSwitch.ToString());

    }
Conclusion
Today, we have covered how to change scenes with a fading transition effect.
If you are a Patreon supporter, you can download the project files for what we have done so far. To use the files, you will have to unzip the file (7-Zip can help you do that), and open the folder with Assets and ProjectSettings as a project using Unity.
Here is the final code for all the scripts we have worked with today:
SceneTransitionManager.cs
using System;
using System.Collections;
using System.Collections.Generic;
using UnityEngine;
using UnityEngine.SceneManagement;

public class SceneTransitionManager : MonoBehaviour
{
    public static SceneTransitionManager Instance;

    //The scenes the player can enter
    public enum Location { Farm, PlayerHome, Town}
    public Location currentLocation;

    //The player's transform
    Transform playerPoint;

    //Check if the screen has finished fading out
    bool screenFadedOut;

    private void Awake()
    {
        //If there is more than 1 instance, destroy GameObject
        if(Instance != null && Instance != this)
        {
            Destroy(gameObject);
        }
        else
        {
            //Set the static instance to this instance
            Instance = this;
        }

        //Make the gameobject persistent across scenes
        DontDestroyOnLoad(gameObject);

        //OnLocationLoad will be called when the scene is loaded
        SceneManager.sceneLoaded += OnLocationLoad;

        //Find the player's transform
        playerPoint = FindObjectOfType<PlayerController>().transform;
    }

    //Switch the player to another scene
    public void SwitchLocation(Location locationToSwitch)
    {
        //Call a fadeout
        UIManager.Instance.FadeOutScreen();
        screenFadedOut = false;
        StartCoroutine(ChangeScene(locationToSwitch));
    }

    IEnumerator ChangeScene(Location locationToSwitch)
    {
        //Disable the player's CharacterController component
        CharacterController playerCharacter = playerPoint.GetComponent<CharacterController>();
        playerCharacter.enabled = false;
        //Wait for the scene to finish fading out before loading the next scene
        while (!screenFadedOut)
        {
            yield return new WaitForSeconds(0.1f);
        }

        //Reset the boolean
        screenFadedOut = false;
        UIManager.Instance.ResetFadeDefaults();
        SceneManager.LoadScene(locationToSwitch.ToString());

    }

    //Called when the screen has faded out
    public void OnFadeOutComplete()
    {
        screenFadedOut = true;

    }


    //Called when a scene is loaded
    public void OnLocationLoad(Scene scene, LoadSceneMode mode)
    {
        //The location the player is coming from when the scene loads
        Location oldLocation = currentLocation;

        //Get the new location by converting the string of our current scene into a Location enum value
        Location newLocation = (Location) Enum.Parse(typeof(Location), scene.name);

        //If the player is not coming from any new place, stop executing the function
        if (currentLocation == newLocation) return;

        //Find the start point
        Transform startPoint = LocationManager.Instance.GetPlayerStartingPosition(oldLocation);

        //Disable the player's CharacterController component
        CharacterController playerCharacter = playerPoint.GetComponent<CharacterController>();
        playerCharacter.enabled = false;

        //Change the player's position to the start point
        playerPoint.position = startPoint.position;
        playerPoint.rotation = startPoint.rotation;

        //Re-enable player character controller so he can move
        playerCharacter.enabled = true;

        //Save the current location that we just switched to
        currentLocation = newLocation;
    }
}
LocationEntryPoint.cs
using System.Collections;
using System.Collections.Generic;
using UnityEngine;

public class LocationEntryPoint : MonoBehaviour
{
    [SerializeField]
    SceneTransitionManager.Location locationToSwitch;

    private void OnTriggerEnter(Collider other)
    {
        //Check if the collider belongs to the player
        if(other.tag == "Player")
        {
            //Switch scenes to the location of the entry point
            SceneTransitionManager.Instance.SwitchLocation(locationToSwitch);
        }
    }


}
LocationManager.cs
using System.Collections;
using System.Collections.Generic;
using UnityEngine;

public class LocationManager : MonoBehaviour
{
    public static LocationManager Instance { get; private set; }

    public List<StartPoint> startPoints;

    private void Awake()
    {
        //If there is more than one instance, destroy the extra
        if (Instance != null && Instance != this)
        {
            Destroy(this);
        }
        else
        {
            //Set the static instance to this instance
            Instance = this;
        }
    }

    //Find the player's start position based on where he's coming from
    public Transform GetPlayerStartingPosition(SceneTransitionManager.Location enteringFrom)
    {
        //Tries to find the matching startpoint based on the Location given
        StartPoint startingPoint = startPoints.Find(x => x.enteringFrom == enteringFrom);

        //Return the transform
        return startingPoint.playerStart;
    }
}
StartPoint.cs
using System.Collections;
using System.Collections.Generic;
using UnityEngine;

[System.Serializable]
public struct StartPoint
{
    //Location the player is entering from
    public SceneTransitionManager.Location enteringFrom;

    //The transform the player should start in
    public Transform playerStart;
}
ParentedAnimationEvent.cs
using System.Collections;
using System.Collections.Generic;
using UnityEngine;

public class ParentedAnimationEvent : MonoBehaviour
{
    //Sends the message upwards
   public void NotifyAncestors(string message)
   {
        SendMessageUpwards(message);
   }
}
UIManager.cs
using System.Collections;
using System.Collections.Generic;
using UnityEngine;
using UnityEngine.UI;

public class UIManager : MonoBehaviour, ITimeTracker
{
    public static UIManager Instance { get; private set; }
    [Header("Status Bar")]
    //Tool equip slot on the status bar
    public Image toolEquipSlot;
    //Tool Quantity text on the status bar
    public Text toolQuantityText;
    //Time UI
    public Text timeText;
    public Text dateText;


    [Header("Inventory System")]
    //The inventory panel
    public GameObject inventoryPanel;

    //The tool equip slot UI on the Inventory panel
    public HandInventorySlot toolHandSlot;

    //The tool slot UIs
    public InventorySlot[] toolSlots;

    //The item equip slot UI on the Inventory panel
    public HandInventorySlot itemHandSlot;

    //The item slot UIs
    public InventorySlot[] itemSlots;

    //Item info box
    public Text itemNameText;
    public Text itemDescriptionText;

    [Header("Screen Transitions")]
    public GameObject fadeIn;
    public GameObject fadeOut;


    private void Awake()
    {
        //If there is more than one instance, destroy the extra
        if (Instance != null && Instance != this)
        {
            Destroy(this);
        }
        else
        {
            //Set the static instance to this instance
            Instance = this;
        }
    }

    private void Start()
    {
        RenderInventory();
        AssignSlotIndexes();

        //Add UIManager to the list of objects TimeManager will notify when the time updates
        TimeManager.Instance.RegisterTracker(this);
    }
    #region Fadein Fadeout Transitions

    public void FadeOutScreen()
    {
        fadeOut.SetActive(true);
    }

    public void FadeInScreen()
    {
        fadeIn.SetActive(true);
    }

    public void OnFadeInComplete()
    {
        //Disable Fade in Screen when animation is completed
        fadeIn.SetActive(false);
    }

    //Reset the fadein fadeout screens to their default positions
    public void ResetFadeDefaults()
    {
        fadeOut.SetActive(false);
        fadeIn.SetActive(true);
    }


    #endregion
    //Iterate through the slot UI elements and assign it its reference slot index
    public void AssignSlotIndexes()
    {
        for (int i =0; i<toolSlots.Length; i++)
        {
            toolSlots[i].AssignIndex(i);
            itemSlots[i].AssignIndex(i);
        }
    }

    //Render the inventory screen to reflect the Player's Inventory.
    public void RenderInventory()
    {
        //Get the respective slots to process
        ItemSlotData[] inventoryToolSlots = InventoryManager.Instance.GetInventorySlots(InventorySlot.InventoryType.Tool);
        ItemSlotData[] inventoryItemSlots = InventoryManager.Instance.GetInventorySlots(InventorySlot.InventoryType.Item);

        //Render the Tool section
        RenderInventoryPanel(inventoryToolSlots, toolSlots);

        //Render the Item section
        RenderInventoryPanel(inventoryItemSlots, itemSlots);

        //Render the equipped slots
        toolHandSlot.Display(InventoryManager.Instance.GetEquippedSlot(InventorySlot.InventoryType.Tool));
        itemHandSlot.Display(InventoryManager.Instance.GetEquippedSlot(InventorySlot.InventoryType.Item));

        //Get Tool Equip from InventoryManager
        ItemData equippedTool = InventoryManager.Instance.GetEquippedSlotItem(InventorySlot.InventoryType.Tool);

        //Text should be empty by default
        toolQuantityText.text = "";
        //Check if there is an item to display
        if (equippedTool != null)
        {
            //Switch the thumbnail over
            toolEquipSlot.sprite = equippedTool.thumbnail;

            toolEquipSlot.gameObject.SetActive(true);

            //Get quantity
            int quantity = InventoryManager.Instance.GetEquippedSlot(InventorySlot.InventoryType.Tool).quantity;
            if (quantity > 1)
            {
                toolQuantityText.text = quantity.ToString();
            }
            return;
        }

        toolEquipSlot.gameObject.SetActive(false);
    }

    //Iterate through a slot in a section and display them in the UI
    void RenderInventoryPanel(ItemSlotData[] slots, InventorySlot[] uiSlots)
    {
        for (int i = 0; i < uiSlots.Length; i++)
        {
            //Display them accordingly
            uiSlots[i].Display(slots[i]);
        }
    }

    public void ToggleInventoryPanel()
    {
        //If the panel is hidden, show it and vice versa
        inventoryPanel.SetActive(!inventoryPanel.activeSelf);

        RenderInventory();
    }

    //Display Item info on the Item infobox
    public void DisplayItemInfo(ItemData data)
    {
        //If data is null, reset
        if(data == null)
        {
            itemNameText.text = "";
            itemDescriptionText.text = "";

            return;
        }

        itemNameText.text = data.name;
        itemDescriptionText.text = data.description;
    }

    //Callback to handle the UI for time
    public void ClockUpdate(GameTimestamp timestamp)
    {
        //Handle the time
        //Get the hours and minutes
        int hours = timestamp.hour;
        int minutes = timestamp.minute;

        //AM or PM
        string prefix = "AM ";

        //Convert hours to 12 hour clock
        if (hours > 12)
        {
            //Time becomes PM
            prefix = "PM ";
            hours = hours - 12;
            Debug.Log(hours);
        }

        //Format it for the time text display
        timeText.text = prefix + hours + ":" + minutes.ToString("00");

        //Handle the Date
        int day = timestamp.day;
        string season = timestamp.season.ToString();
        string dayOfTheWeek = timestamp.GetDayOfTheWeek().ToString();

        //Format it for the date text display
        dateText.text = season + " " + day + " (" + dayOfTheWeek +")";

    }
}
i got this warning When I enter the player’s house and then leave the house and return to the farm:
There can be only one active Event System.
i’m usign Unity 2022.3.8f1c1.
What may be the cause?
Sorry, this is my problem. The assets I introduced have additional EventSystem. I encountered another problem. When I switched scenes for the first time, the screen became very dark, and everything in the scene became much darker. I don’t know what’s going on
To fix the event system issue, delete the extra event systems.
As for the lighting issue, look at the first answer all the way down in this topic. It should help: https://stackoverflow.com/questions/42447869/objects-in-scene-dark-after-calling-loadscene-loadlevel
i get this error:
https://im.ge/i/9QbJHy
i even copy and paste the codes from this page.
i’m usign Unity 2021.3.6
what should i do?
Hi Lara, ensure that the GameObject (FadeIn) with ParentedAnimationEvent is a child/descendant of the GameObject that has UIManager.
I’ve created a forum thread that addresses this, add to the thread if it does not solve the issue:
https://blog.terresquall.com/community/topic/part-9-onfadeincomplete-has-no-receiver/