
Unity has seen growth in leaps and bounds since its humble beginnings in 2005, having IPO-ed for a whooping US$1.3 billion in September 2020. It is also looking at releasing Unity 6 — chock with a whole bunch of new features — at the end of 2024.
Since its tremendous growth over the past 3 decades, the Unity Engine has also changed significantly over the past decade, so much so that it has become difficult to set up and use, especially for new users. If you’re just getting your toes wet with the engine for the first time, here is a guide to help you figure out how to set it up — the trouble will be worth it, because it is one of the easiest game engines to use, and also one of the most robust game engines out there.
1. Getting started: Installing Unity Hub
To begin, head to this URL and click on Download Unity Hub (to download Unity Hub):
unity3d.com/get-unity/download
This should download an installer called UnityHubSetup.exe. Run it to install Unity Hub on your computer.
What is Unity Hub?
Unity Hub is Unity’s install manager. It helps you manage, download and install different versions of Unity, and its accompanying sub-modules on your computer.
If you’re wondering why you’ll need different versions of Unity on your computer, it’s because upgrading Unity during the development of a game project can be disruptive — game projects usually involve multiple people working together, and if one person upgrades their Unity version, everyone will have to do the same to maintain compatibility with the project files. Due to this, people who work on multiple game projects simultaneously often have multiple versions of Unity installed on their computer, as each project will often use a different version of Unity.
2. Signing in with a Unity account
Once Unity Hub is installed, you’ll want to open it and sign in with a Unity account before doing anything else. This will open your browser and bring you to the login page of Unity’s official website:
If you don’t have a Unity account, you will have to create one before you can use Unity Hub. A lot of the features in Unity, such as its version control feature, need to be linked to a Unity account to work.
Upon logging in, the page will attempt to bring you back to Unity Hub, but you may get a prompt that looks like this in your browser:
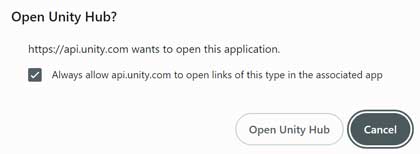
If you get a blank webpage after clicking on Sign In, you will need to clear your cookies on Unity’s website and start the whole log-in process again.
Once you have signed in, you will be able to…

3. Activate a Unity License
Without a Unity license, you won’t be able to use any of the versions of Unity you download. To activate a license, you will need to:
- Click on the Preferences icon at the top left corner of Unity Hub.
- Go to the Licenses tab, and click on Add.
- Select Get a free personal license and agree to the terms and conditions.
4. Installing Unity
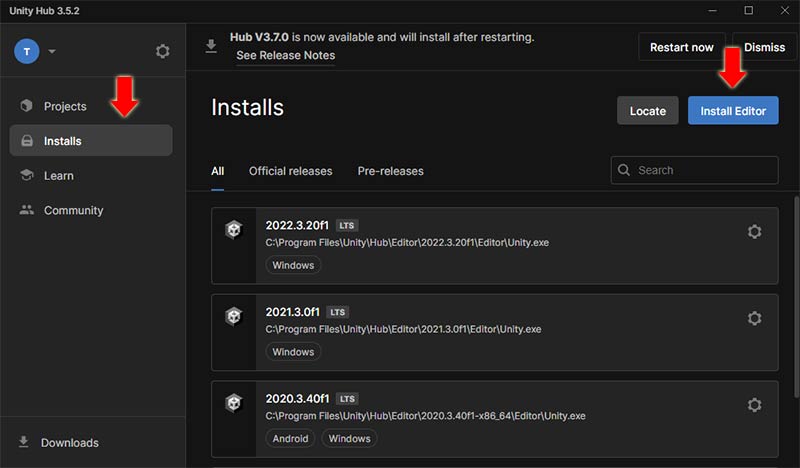
With a license activated, you can now install Unity on your computer. Exit the license management page, and head to the Installs tab, then click on the Install Editor button.
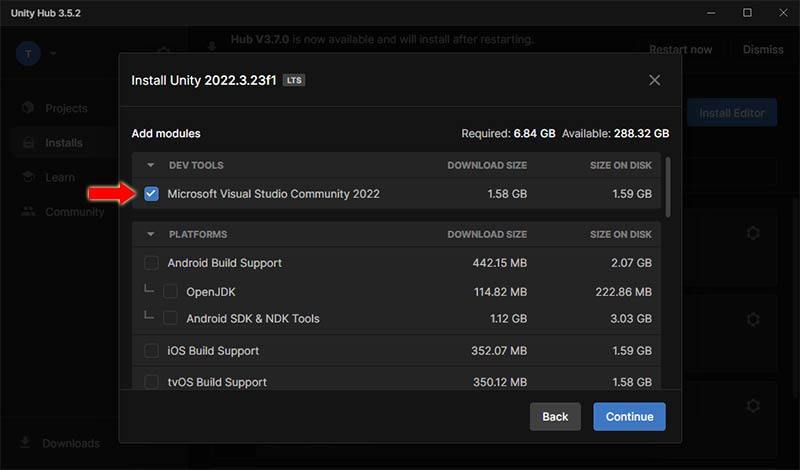
After selecting the version of Unity you want to install, you will be asked which additional modules you want to install. You will need to make sure that you install the Visual Studio module, as you will need it as your code editor.
A few things to note about the installation:
- You can install any of the listed versions of Unity, but the version under the Recommended Release header is, for obvious reasons, the most recommended one.
- When inside the Add modules to your install prompt, you can uncheck all of the modules except the Microsoft Visual Studio one, which allows you to write scripts for Unity. Technically, you can also write Unity scripts without Visual Studio, but Unity’s integration into Visual Studio’s IntelliSense is very helpful, especially for new coders.
Once installation starts, you will see your chosen version of Unity appear on your Installs tab. If you want to install more versions of Unity, please feel free to do so. Usually, when working on a project, development teams will all use the same version of Unity for the project, as different versions of Unity have slightly ways of processing and saving files.
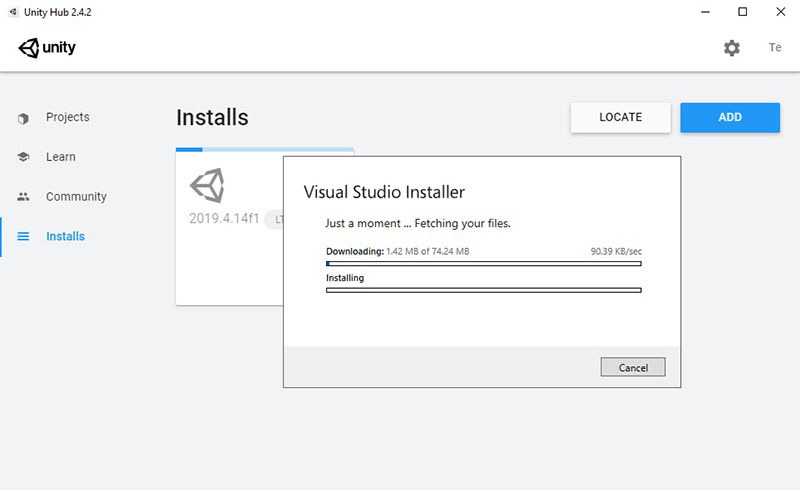
Midway through, you should also see the Visual Studio Installer pop up, if you’ve chosen to install it.
Once the installer runs its course, you should be able to start new projects or open existing projects using the newly-installed Unity Editor version.