
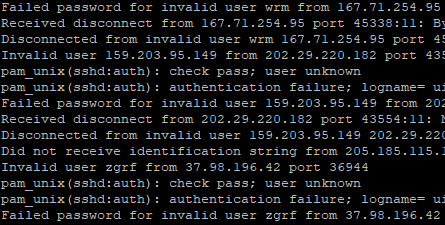
Have you recently spun up a new Ubuntu Droplet on DigitalOcean? The other day, when I checked my authentication logs in /var/log/auth.log, I came across several login attempts with random usernames.
We often take security for granted, but it becomes something of great concern once you start to manage servers of your own. If you were to leave your Droplet as it is, it is only a matter of time before hackers guess your login credentials and gain access to your system. Hence, here are some basic security measures you should set up to prevent others from breaking in:
1. Disabling root logins
Upon creating a new Droplet, you will see that DigitalOcean creates a root user for you by default. This user has access to everything in the Droplet, which makes it a prime target for hackers. Once compromised, they will have free reign to do whatever they want on your droplet. Moreover, even if there were no hackers, because of its broad privileges, you could very easily make devastating changes to your Droplet by accident.
a. Create normal user(s) to access the system
Before we disable root logins, we need to create an alternative way to access the Droplet (otherwise, you’ll lock yourself out!). To this end, we need to create a user. Replace username in the following command with the name of the user:
adduser username
You will then be prompted to fill in your password and other details. Now we need to give the newly-created user sudo (superuser do) privileges to perform administrative tasks on the system:
sudo (short for superuser do) is a command that allows a user to run programs and commands with the security privileges of a superuser (in our case, the root user).
usermod -aG sudo username
Now you can perform administrative tasks by typing sudo before a command. Let us switch to the newly-created user:
su - username
b. Disabling the root login
With our user set up, we can now disable the root login. Open up /etc/ssh/sshd_config with the nano text editor:
sudo nano /etc/ssh/sshd_config
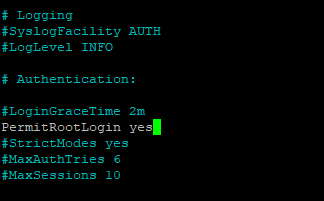
You should see the contents of the file. Use the arrow keys to navigate around the file until you find PermitRootLogin. Change the line to:
PermitRootLogin no
When you are done, close the file with Ctrl + X. You will then be asked if you would like to save your changes. Press Y to save, and you will exit the editor. To apply the changes, we need to restart the sshd daemon with the following command:
sudo service sshd restart
2. Changing the default SSH port
By default, DigitalOcean Droplets (as well as servers from most cloud service providers) are spun up with the SSH port (i.e. Port 22) open. Hence, to access the server, a user must connect to it via SSH at Port 22, and provide a valid username and password.
Since many servers online are left in their default configuration, it is very common to find bots (i.e. computers running automated scripts) randomly performing brute-force attacks on servers across the Internet to try and gain unauthorised access.
Bots are commonly deployed to scan around the Internet for open ports using default configurations (e.g. Port 21 for FTP, Port 22 for SSH). When they find one, they typically launch a brute-force attack, which sees them repeatedly attempt a large number of log-ins by submitting random username and password combinations. If a server does not limit the number of login attempts from a unique machine, bots can make a large number of guesses in a very short time. The time it takes for a bot to make a correct guess depends on the password strength of the user itself.
To avoid a large number of these bots, you can change your default SSH port to a number other than 22. To do so, open sshd_config again:
sudo nano /etc/ssh/sshd_config
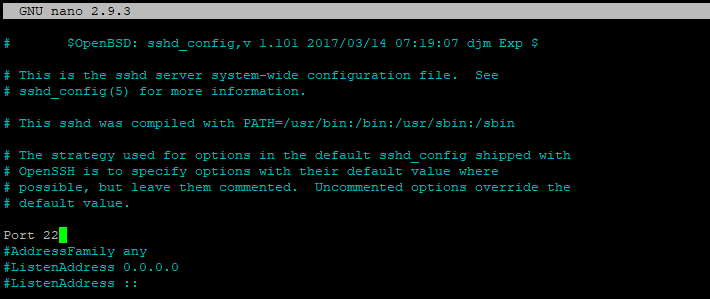
sshd_config.In the file, change the number in the line Port 22 to any value between 1024 and 32767. For the purposes of this tutorial, we will be changing it to the following:
Port 20242
Make sure the line is not commented out with #. If it is, remove it or your changes will not be applied. Exit and save as we had previously done, and restart the sshd daemon to apply the changes.
sudo service sshd restart
When changing your port number, the choice of the number can have drawbacks, so choose a number wisely. Port numbers less than 1024 are privileged ports, meaning that it restricts non-root users and processes from opening them. This might make your server more secure, but there is a chance it might conflict with another process. Port numbers above 1024 prevent this, but can open up your server to Denial of Service (DoS) attacks.
a. Setting up a firewall
After changing the port, we will need to block connections from other ports. This can be done by configuring the system’s Uncomplicated Firewall (UFW). To start, let us deny all incoming requests by default while allowing applications in the server to connect outside of it:
sudo ufw default deny incoming
sudo ufw default allow outgoing
As of now, the UFW is configured to deny all incoming connections. This would also lock us out from our Droplet. Hence, we need to set down rules for the firewall to accept the types of connections we want. For starters, let us allow connections on our port. Type the following command with the port number that you have set:
sudo ufw allow 20242
You need to allow all connections that your server needs to respond to. This depends on what you use your server for. Here are some common ones:
| For web applications | sudo ufw allow http |
| For unencrypted file transfers(not recommended) | sudo ufw allow ftp |
When you are happy with the configuration, turn on the firewall:
sudo ufw enable
If all goes well, you should only be able to access your Droplet from the port you specified.
3. Preventing brute force access
Changing ports can only make the server more difficult to access. If someone tried hard enough, it will only be a matter of time before they break into your server. How these attacks work is that they use bots to rapidly generate random login credentials until they manage to guess the correct ones to get in. To prevent them from doing this, we need to limit the number of times one can try logging into a user before they get locked out.
We can achieve this by using Pluggable Authentication Modules (PAM) to configure the authentication on the server. This can be done by accessing /etc/pam.d/common-auth.
sudo nano /etc/pam.d/common-auth
When you open the file, you should see following line:
auth required pam_permit.so
Right now it is set to pam_permit.so, which means that access is always granted even if you fail a login attempt. We want to change that and use the pam_tally2.so module, which will allow us to deny access to the user if they make too many failed log-in attempts. To this end, add the following line near the top part of the file (before the other configurations):
auth required pam_tally2.so deny=3 unlock_time=2400
| deny=3 | The number of attempts before the account is locked out. In this case, the user will be locked out after 3 tries. |
| unlock_time=2400 | How long the user will be locked out for, in seconds. In this particular instance, the user will be locked out for 40 minutes. If you do not use this option, the user will be locked out indefinitely until you manually unlock it for the user. |
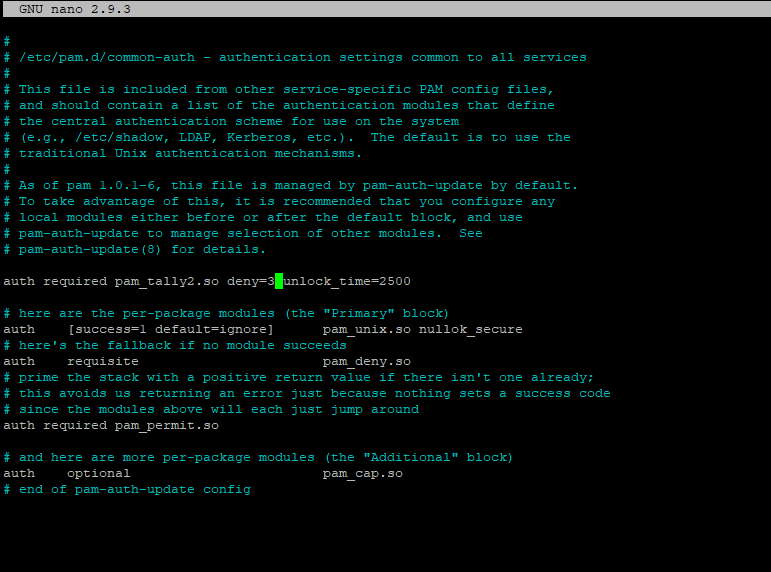
/etc/pam.d/common-auth should look like.Exit and save as we had previously done, and restart the sshd daemon to apply the changes.
sudo service sshd restart
You can test to see if it works by deliberately keying in the wrong password to your username. You should then be able to see the failure tally by typing in the following command:
sudo pam_tally2 -u username
4. Conclusion
I hope the 3 simple tips I shared above have taught you a little bit about some of the things you can do to secure your server. In truth, there is much more that can be done, but that will be a topic for another day.