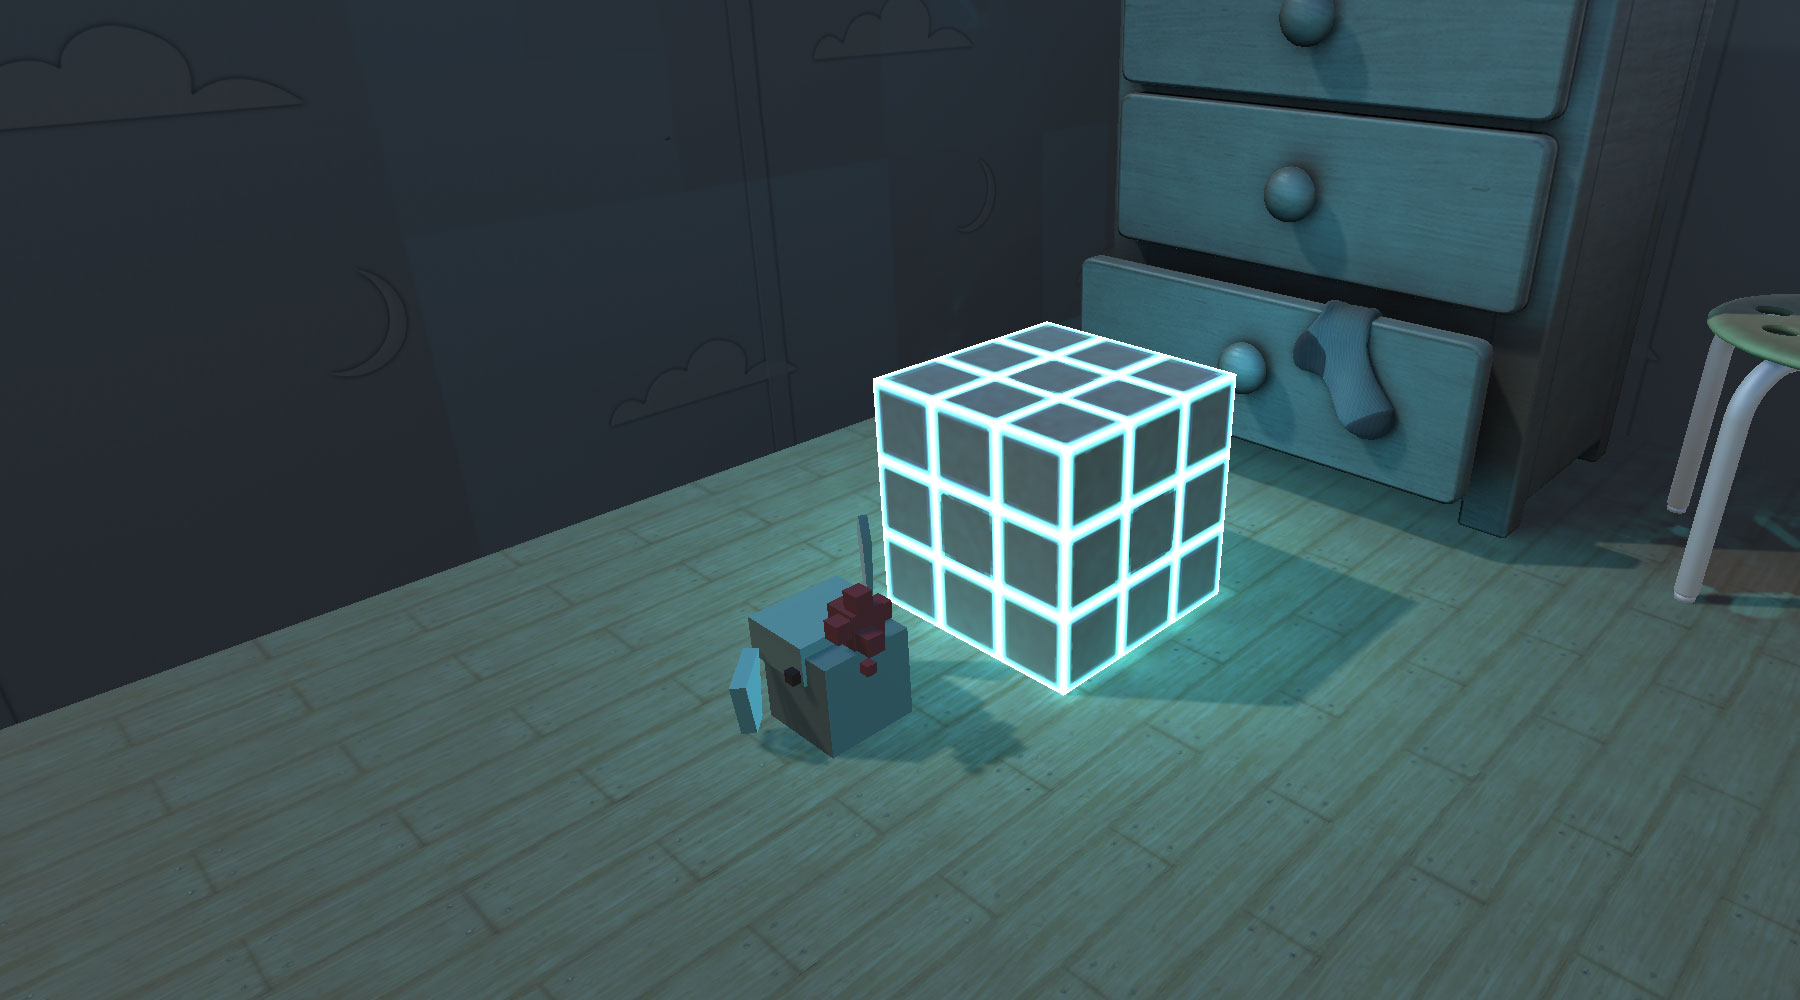
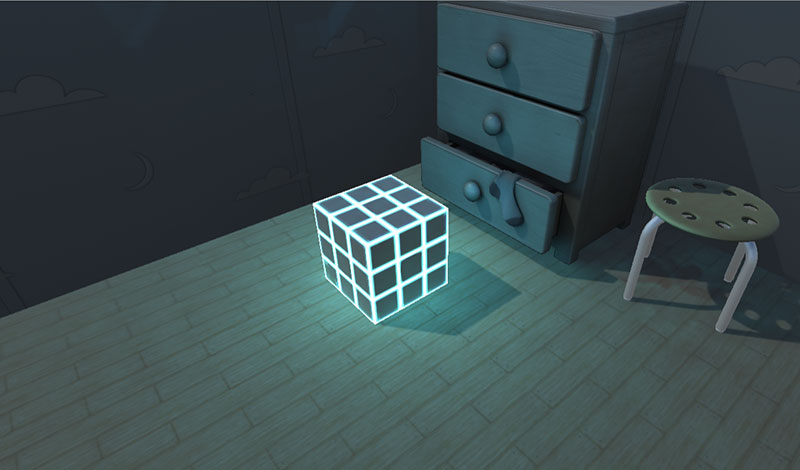
Emission maps (also known as emissive maps) are textures that can be applied to materials to make certain parts of an object emit light (like the cube in the image above). In Unity, lights from emission maps don’t start affecting the scene as soon as you place them on the material. There are a lot of settings you have to get right in your scene and material settings to get the emission maps working right.
In this article, we will be exploring how to configure emissives for Unity’s Built-in Standard Shader. If you are using Unity’s newer render pipelines, this article may not be for you.
Setting the emission map
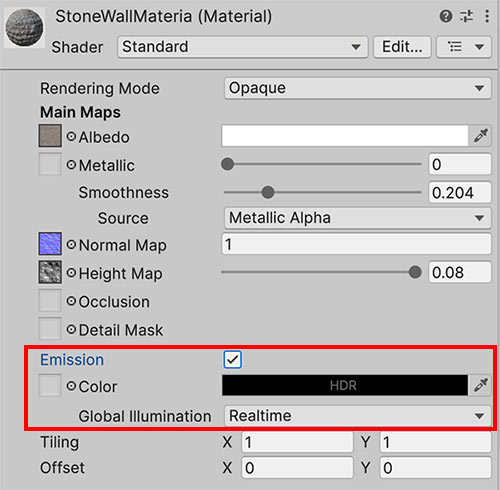
For starters, the image below shows where you can turn on and set the emission map for a material.
Do take note of a few things:
- Emission maps are only available on materials using certain shaders, so you will not find an emission map on all materials. You can set a material’s shader using the dropdown above Rendering Mode (see image above).
- We will be configuring emissives for Unity’s Built-in Standard Shader. The script included in this article may not work if you are using a different shader.
- Emissive maps should be mostly black. Only the parts of an object that emit light should have colour. If your object only emits a single-coloured light, consider using a black-white emission map, as it allows you to tint the colour of the light using the material’s settings. You can refer to an example further down this article.
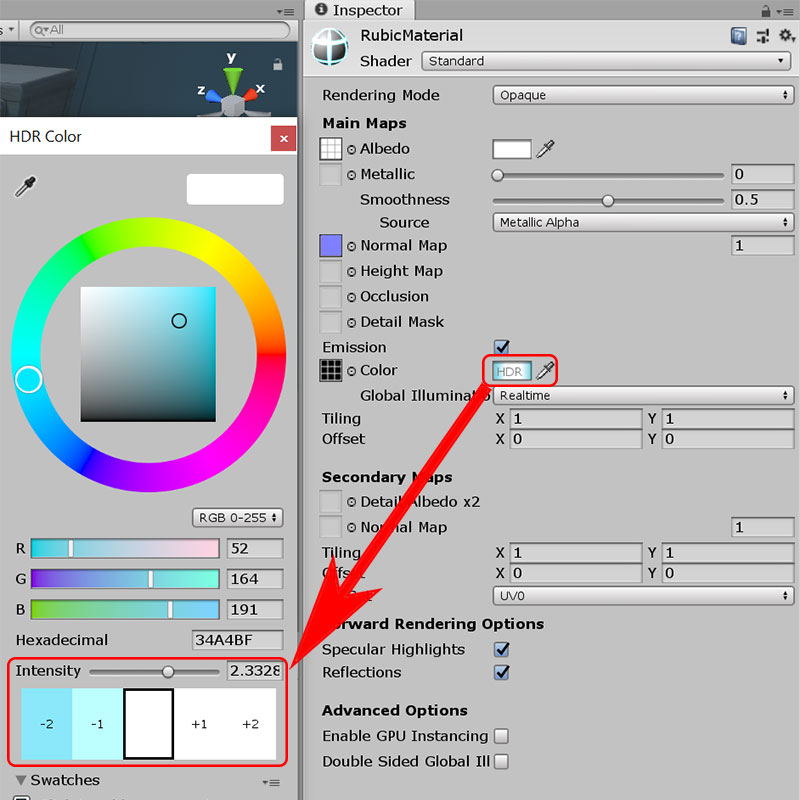
- On top of adjusting the emission map’s colour, you can also adjust the intensity of light coming from emissive areas. See the image below.
Setting static flags and enabling GI
Once the material is set up and applied on a GameObject, you will find that your object emits light, but the light does not seem to affect the rest of the objects in the scene.

For reference, here are the texture maps that have been used to create the material on the cube (feel free to download and try them out for yourself).


To get the emissive light to affect the rest of your scene, you need to mark all the GameObjects that you want lit as Static, including the emissive GameObject. If you don’t know how to do this, see this article for more information.
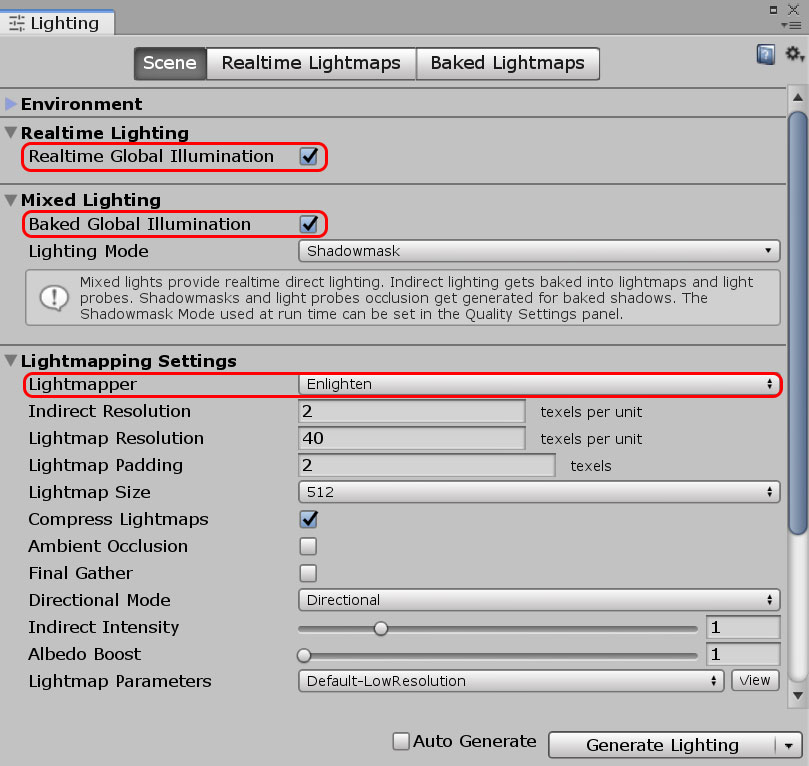
You will also need to make sure that the respective global illumination flags in the Lighting window are checked:
- For baked emissives, Baked Global Illumination needs to be checked.
- For realtime emissives, Realtime Global Illumination needs to be checked. If unchecked, realtime emissives will behave like baked emissives.
- If your light probes don’t seem to work with realtime emissives, consider using Enlighten as the Lightmapper.
Once done, you will need to Generate Lighting (i.e. bake lighting) for the scene.
Realtime vs. Baked emission
Under the material’s emission settings, you should see a dropdown that says Global Illumination. In the dropdown, there are 2 options: Realtime and Baked. Depending on what option you choose, the result of the generated emissive lighting will be slightly different.
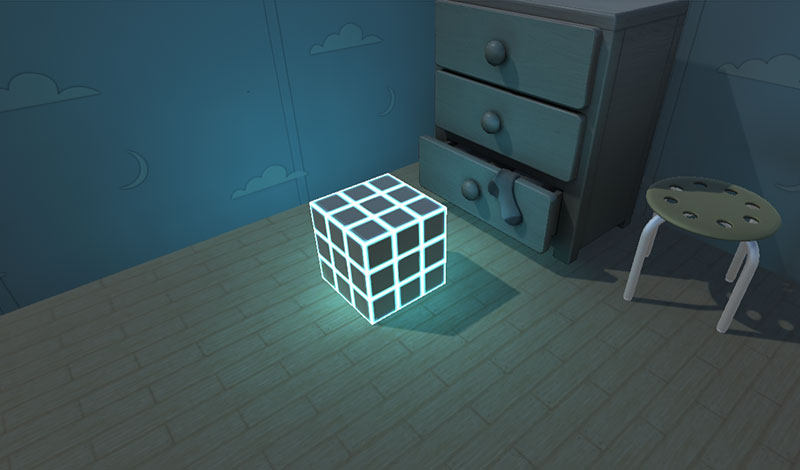
The baked emissive lighting will look more intricate and realistic, compared to the realtime one:
Although realtime emissive lighting looks less realistic, you have the option of turning it on and off during runtime with a bit of code.
The script below was used to activate and deactivate the emissive lighting in the image above. Specifically, the bolded portions show the parts that are responsible for activating and deactivating emissive lighting.
using System.Collections;
using UnityEngine;

[RequireComponent(typeof(Renderer))]
public class DynamicEmissive : MonoBehaviour {

    new Renderer renderer; // new hides the parent <renderer> property.
    Material material;
    Color emissionColor;

    void Start() {
        // Gets access to the renderer and material components as we need to
        // modify them during runtime.
        renderer = GetComponent<Renderer>();
        material = renderer.material;

        // Gets the initial emission colour of the material, as we have to store
        // the information before turning off the light.
        emissionColor = material.GetColor("_EmissionColor");

        // Start a coroutine to toggle the light on / off.
        StartCoroutine(Toggle());
    }

    IEnumerator Toggle() {
        bool toggle = false;
        while(true) {
            yield return new WaitForSeconds(1f);
            Activate(toggle, Random.Range(0.5f,2f));
            toggle = !toggle;
        }
    }

    // Call this method to turn on or turn off emissive light.
    public void Activate(bool on, float intensity = 1f) {
        if(on) {

            // Enables emission for the material, and make the material use
            // realtime emission.
            material.EnableKeyword("_EMISSION");
            material.globalIlluminationFlags = MaterialGlobalIlluminationFlags.RealtimeEmissive;

            // Update the emission color and intensity of the material.
            material.SetColor("_EmissionColor", emissionColor * intensity);

            // Makes the renderer update the emission and albedo maps of our material.
            RendererExtensions.UpdateGIMaterials(renderer);

            // Inform Unity's GI system to recalculate GI based on the new emission map.
            DynamicGI.SetEmissive(renderer, emissionColor * intensity);
            DynamicGI.UpdateEnvironment();

        } else {

            material.DisableKeyword("_EMISSION");
            material.globalIlluminationFlags = MaterialGlobalIlluminationFlags.EmissiveIsBlack;

            material.SetColor("_EmissionColor", Color.black);
            RendererExtensions.UpdateGIMaterials(renderer);

            DynamicGI.SetEmissive(renderer, Color.black);
            DynamicGI.UpdateEnvironment();

        }
    }
}
Feel free to adapt the above script for your own purposes. Some comments have been included in the script to explain how it works.
Affecting dynamic (i.e. non-static) objects
Regardless of which emission mode you are using, emissive lighting will only affect static objects by default. For dynamic objects to be affected by emissive lighting, they will need to be within a light probe group that covers areas affected by emissive lighting.

Even realtime emissive lights need to be baked and use light probe groups to affect dynamic objects, because Unity uses precomputed realtime global illumination. Yes, it’s a bit of a contradiction, but what it means is that Unity uses a lot of complicated mathematics to approximate global illumination realtime instead of actually doing realtime global illumination (because it’s damn expensive).
Our Unity Emission Lighting Checklist™
A lot to digest? Use this simple checklist to see what you’ve missed out:
| S/N | Description | Check |
|---|---|---|
| 1 | Enabled Emission in a material and assigned an emission colour / map. | |
| 2 | Ensured that the Emission intensity on the material is not 0, and Emission colour is not black. | |
| 3 | Environment objects to be lit are marked Static. | |
| 4 | Emissive object is marked Static. | |
| 5 | Baked and / or Realtime Global Illumination is checked in the Lighting window before baking. | |
| 6 | Light probes are laid out across the parts of the scene where emissive lighting is present. | |
| 7 | If using realtime emissives, ensured that Enlighten is the lightmapper used. |
If only every tutorial you ever watched, or read, would take you by the hand and assure that you wouldn’t fall, like this one did. But they don’t. They don’t. Kudos to you on your exceptional teaching abilities.
Thank you Barry. I just saw this comment and I really appreciate it!
Thanks a lot!