In the 4th part of this series, we dive into one of Git’s most powerful features—branching.
When working on projects, it’s common to accidentally overwrite someone else’s work or struggle with testing new ideas without affecting the main project. Branches act as a safe workspace, letting you build new features without worrying about breaking your existing game build.
In this article, we’ll explore what branches are, how to create and manage them, and how you can use them for your own development workflow.
1. Introduction
In Git, a branch is basically a copy of your project that exists alongside the main branch, where all your commits usually go. Changes you make on a branch don’t affect the project (i.e. the main branch) until you merge them back.
Branches can be used to work on new features, test ideas, or even fix bugs without affecting the stability of the existing project. A common issue in any kind of development work is that, sometimes, the work you do can accidentally cause the current build to break.
By doing your work in a branch, you ensure that any development work you do will not affect the usability of your project. Even if you break your game in your branch, you can still return back to the main branch at any time for a playable or usable version.
It’s also great for collaboration. Multiple team members can work on different branches simultaneously without stepping on each other’s toes, making teamwork much smoother.
2. Creating a Branch
To create a branch, you’ll first need to have an existing GitHub repository to work with. If that’s not the case for you, you’ll want to start this series from the beginning:
a. Creating a new branch
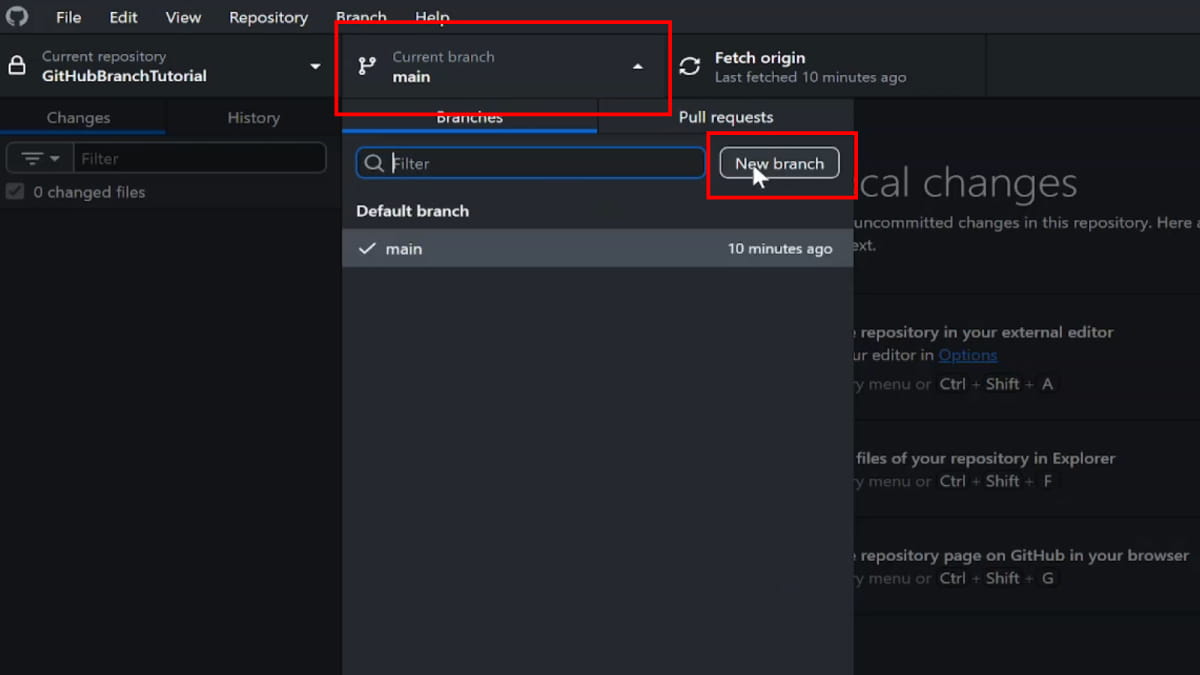
Creating a new branch in GitHub Desktop is simple. Find the Current branch dropdown on the interface and click on it, and select the branch that you want to branch from (if it’s the first time you are branch, you can only branch from main).
Once done, click on New branch:
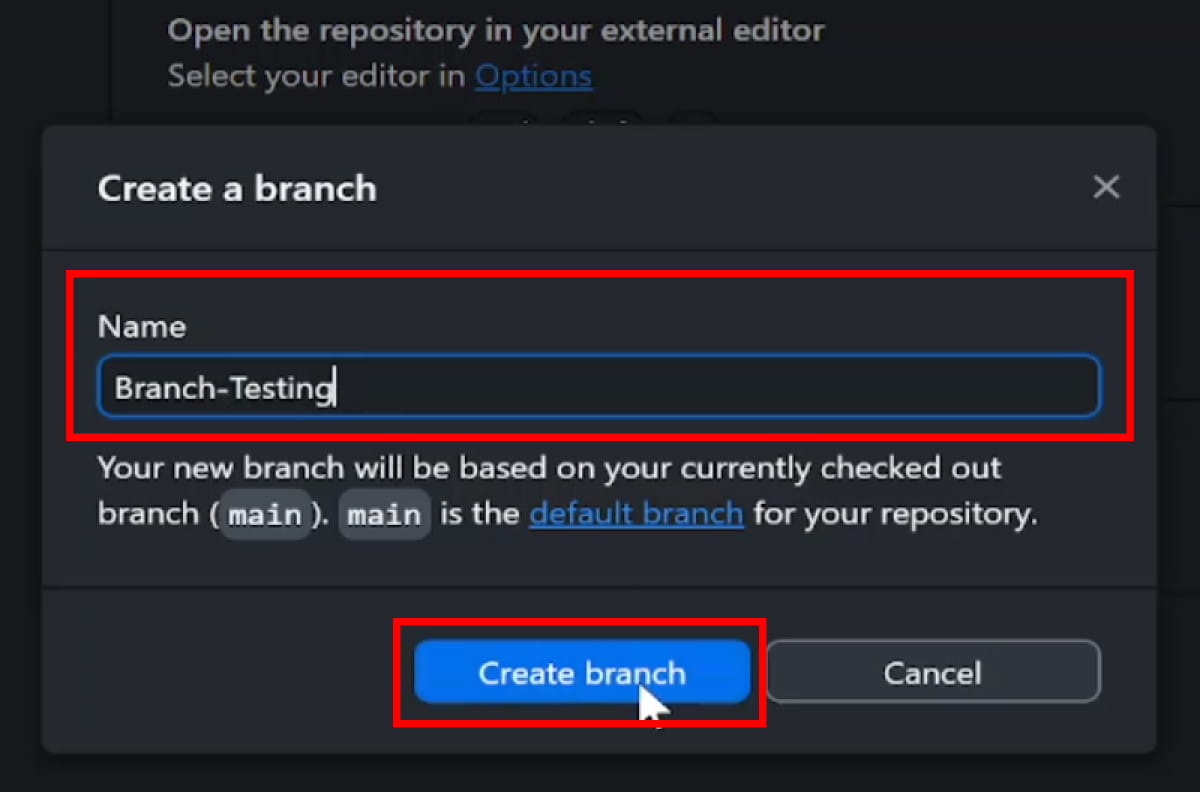
Then, type in the name of the branch, and click on Create branch.
Once the branch is created, you can use it like any regular repository. Any changes you make will be tracked, and you can make commits whenever you are done with your work.
b. Switching between branches
After your new branch is created, you can freely switch between both branches at any time by using the Current branch dropdown.

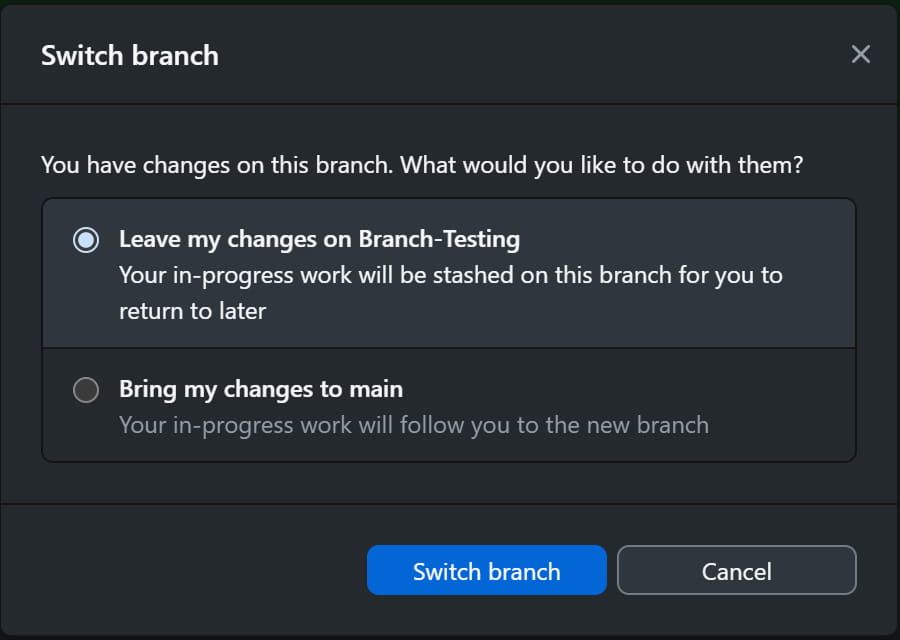
Do note, however, that if you have outstanding, uncommited changes when you switch branches, you will be asked if you want to bring the changes to the branch you are switching to, or to leave the changes in your previous branch.
Any commits that you make in the new branch will not apply to the previous branch.
c. Pushing and publishing commits
The first time you make a branch, the option to push your commits onto the repository will not be available. Instead, you will be prompted to Publish branch.
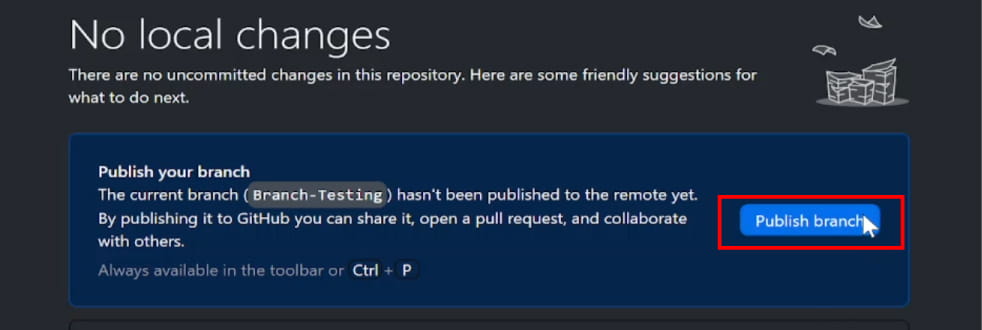
This option is no different from a push. It simply creates the branch in the remote repository (i.e. on GitHub) as well, so that there is a place for GitHub to push your changes.
d. Multiple branches and branch history
You can create as many branches as you want in your repository, from any branch in your repository. Once you have created a branch, the next time you do so, you can choose to branch from any existing branch that currently have:

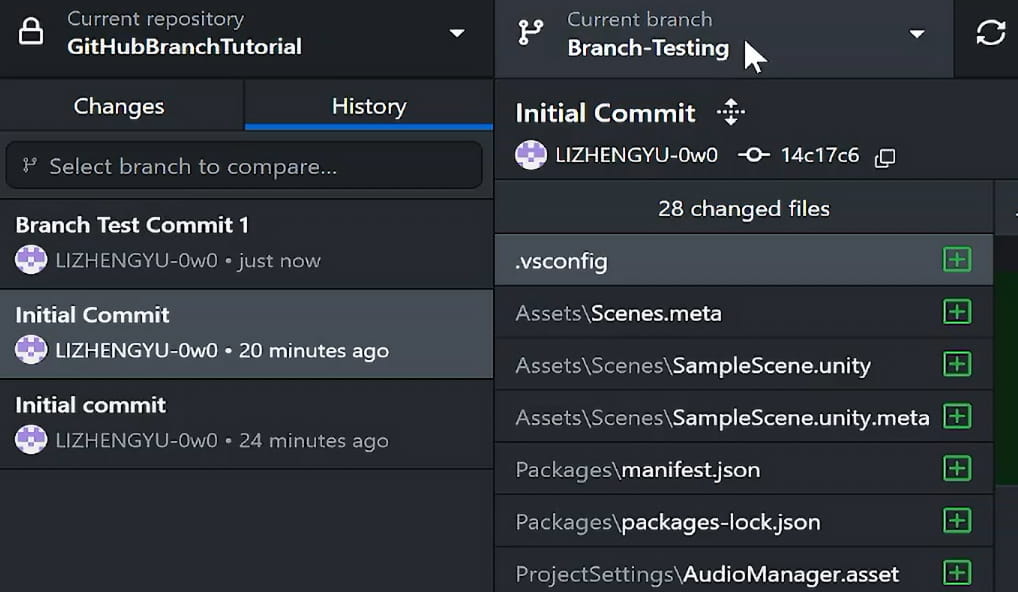
New branches that you create will inherit the entire history of the branch that you are creating it from.
e. Updating the main branch
While you are working on your new branch, you can still commit and push onto your main branch.
This is not ideal, however, because doing so means that when you merge the branches together later, you may run into a merge conflict. The merge conflict is not guaranteed to happen—if the differences are small, Git will be able to automatically resolve any conflicts for you.
When branching, don’t be afraid to update the main branch if necessary. Sometimes, you may need to deploy a bug fix on the main branch while your new feature branch is being developed.
3. Merging branches
Once you’re happy with the work you have done in your branch, and are ready to apply the changes back to your project, you will need to merge your branches.
There are 2 ways to do so:
a. Pull request on GitHub
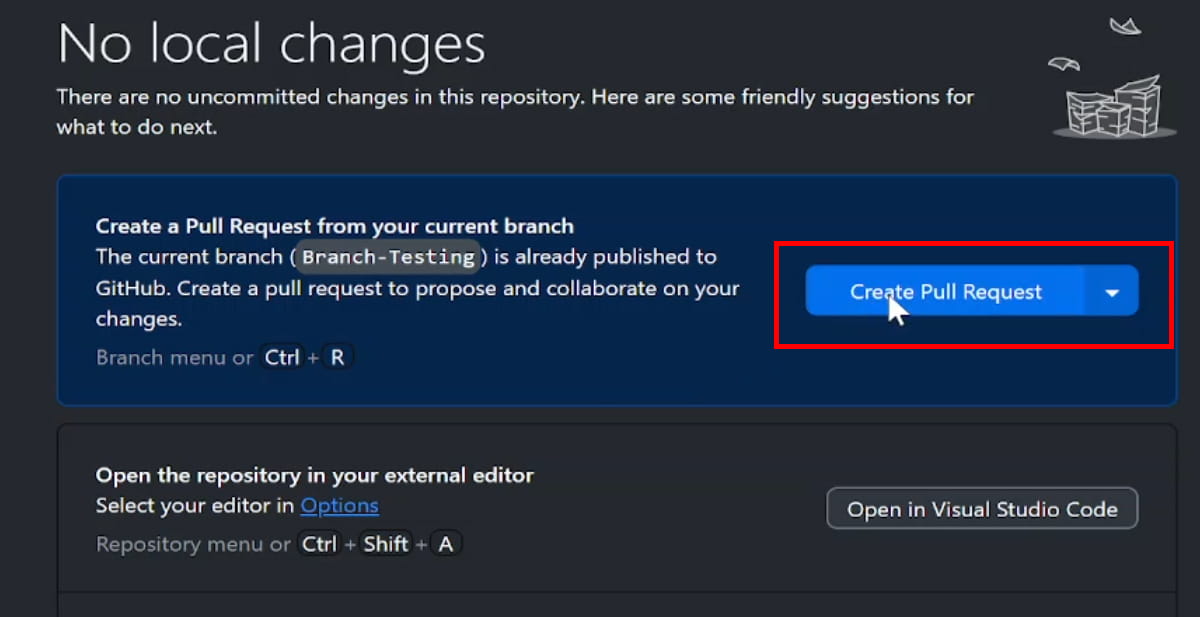
The easier of the 2 ways is to start a pull request on GitHub. To do so, create a pull request from your branch:
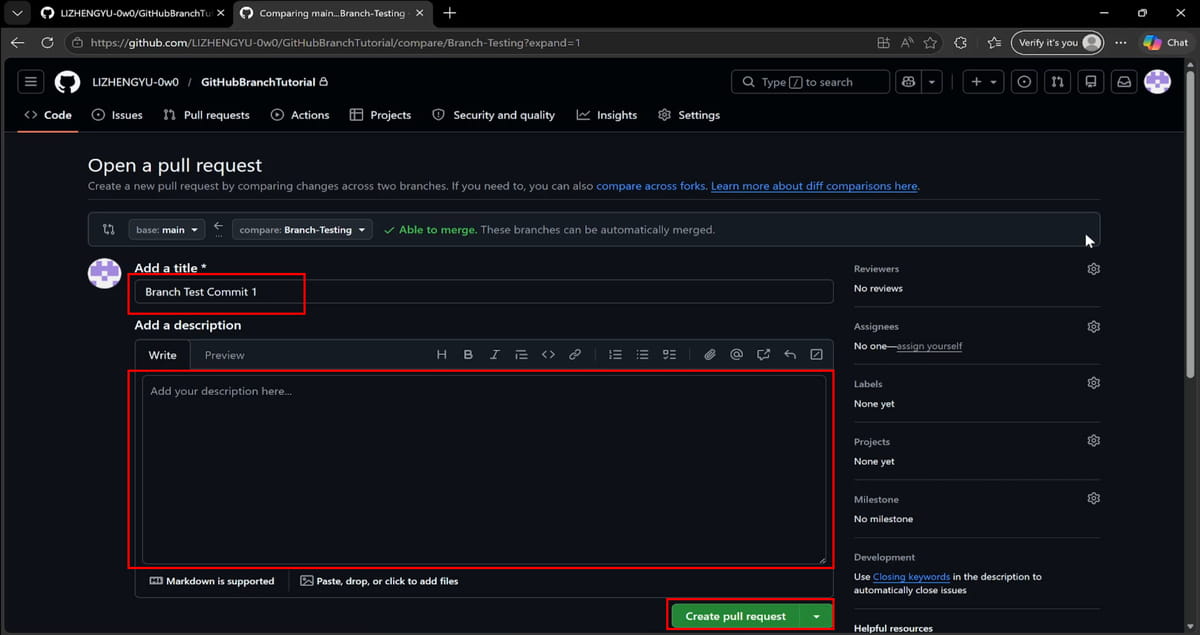
This will lead you to the repository on the GitHub website and bring you to the Open a pull request page.
Ensure that the base branch (where you want to merge into) and the compare branch (where the changes are from) are correct. Then, fill in the title and description fields and click on Create pull request.
GitHub will show you one of 2 things, either:
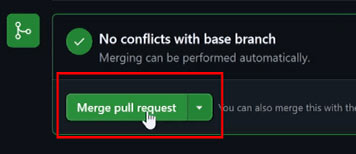
- This branch has no conflicts with the base branch, which is the best case scenario. If you get this, rejoice and proceed to click on Merge pull request and complete the pull request.
- This branch has conflicts that must be resolved. If you get this, you will need to resolve the merge conflict between the branches.
Once the pull request has been done, you will need to go back to GitHub Desktop, and click on Fetch origin, followed by Pull origin to see the newly-merged branch in your computer.

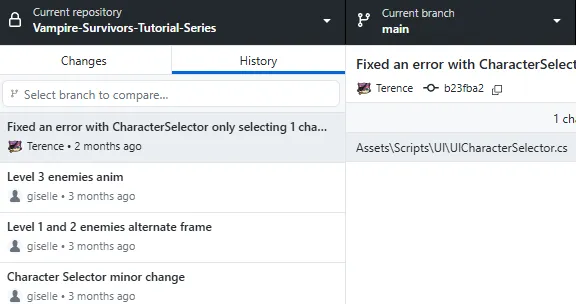
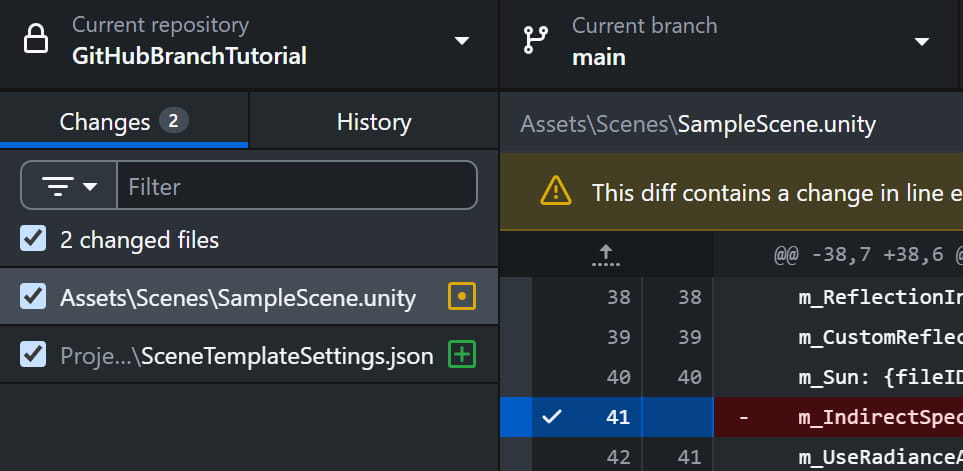
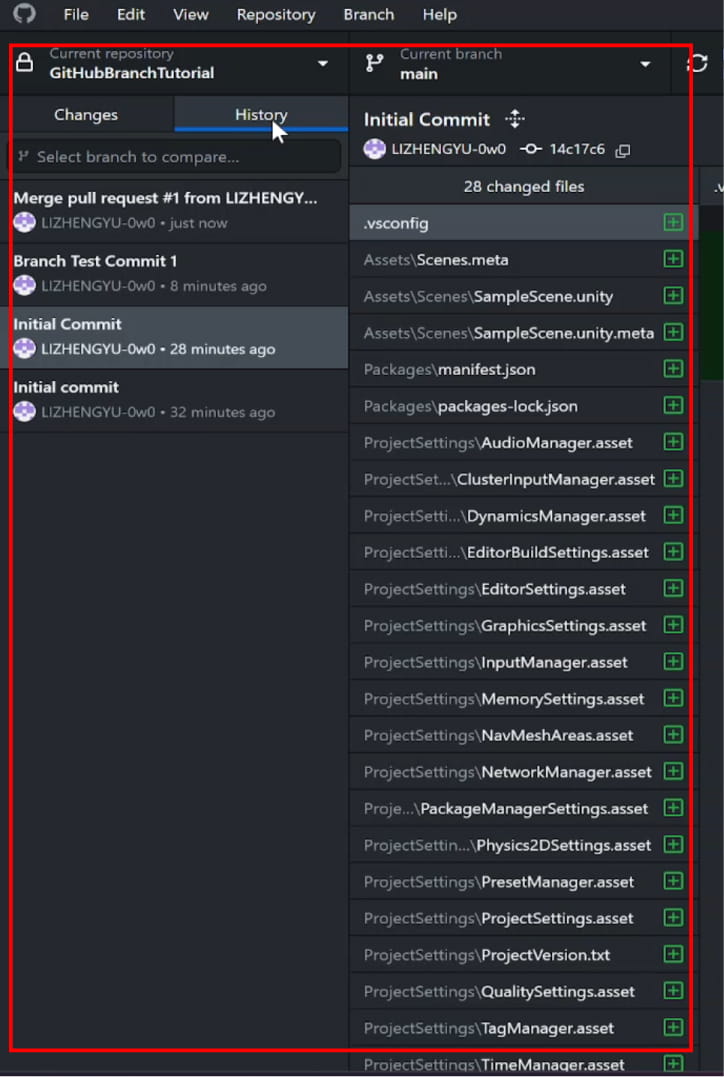
To check that the merge has been properly applied, you can go to the History tab in your main branch to verify that the branched commits are now in there, together with the pull request commit.
b. Command line git merge
If you’d like to merge the branches without the extra “Merge pull request” commit, you can also merge your branches through the Git command line. However, that requires that you have Git installed on your computer. If you don’t have it, you’ll first need to download and install it.
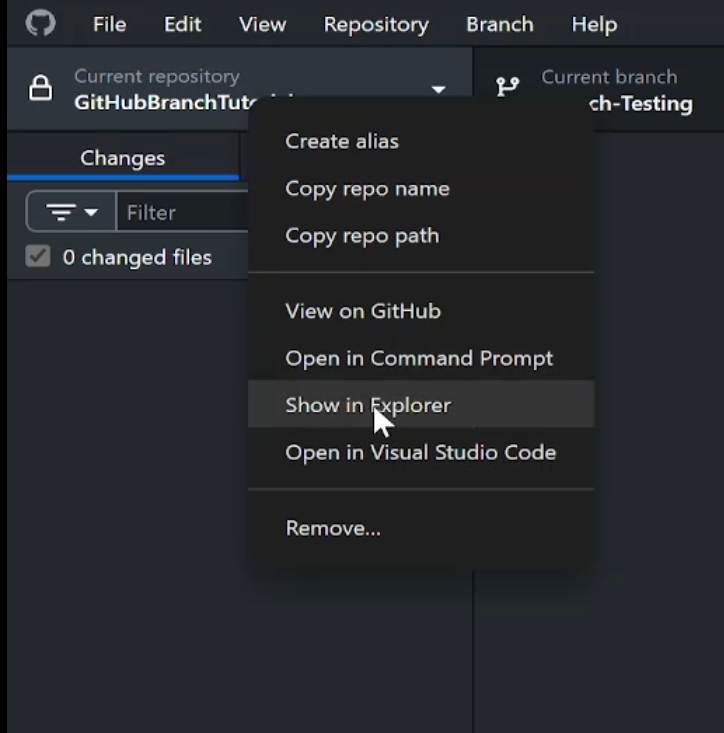
Once done, open your project folder by right-clicking on the repository dropdown, then selecting Show in Explorer (or Show in Finder for macOS):
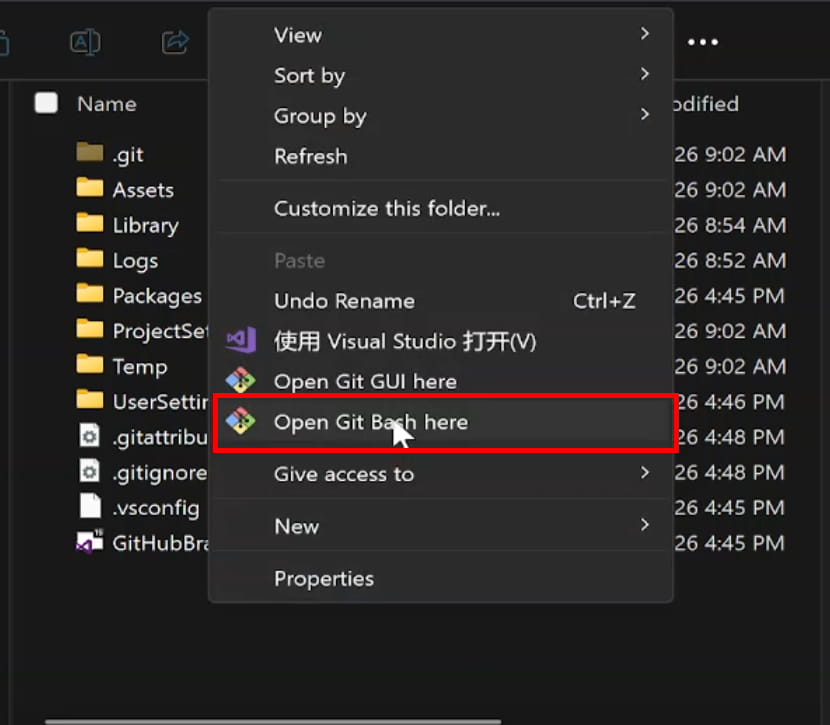
Then, right-click and select Git Bash Here (you’ll need to install the Git command line to get this):
This will open up the Git command line, which will allow you to do many of the same things that GitHub Desktop allows you to do, plus many more things that GitHub Desktop is unable to do.
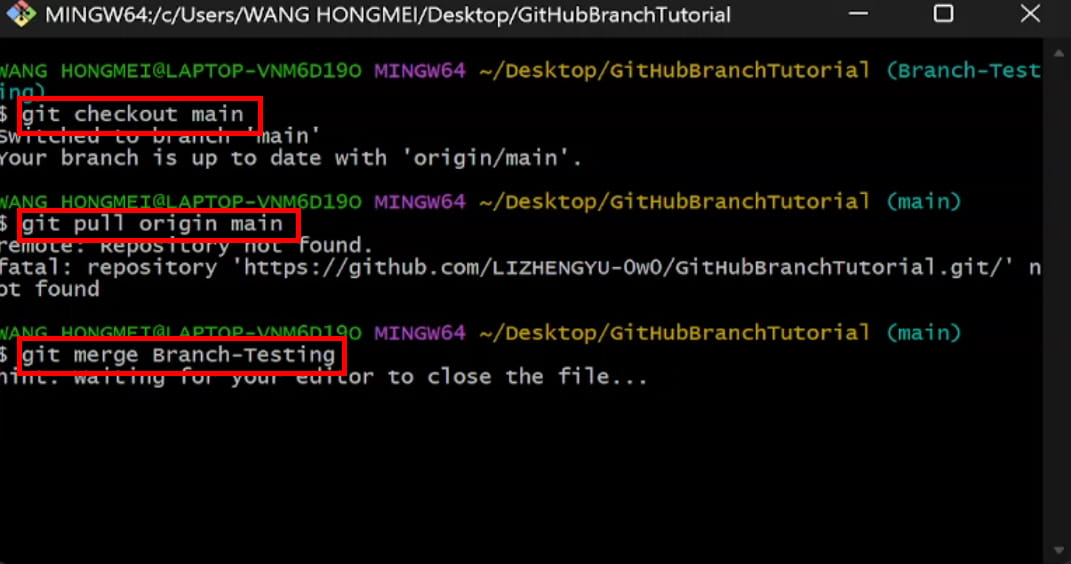
To begin the merge, you’ll need to first go to the branch you want to merge into (in our case, the main branch):
git checkout main
As a best practice, it is always best to do a pull from origin before you merge, in case there are any incoming changes. Otherwise, if there are pulls after you merge, you’ll need to do another pull request.
git pull origin main
To do the actual merge:
git merge your-branch-name
If there are no merge conflicts, the commits from the branch will be added into your main branch (or any other branch you choose to merge into):
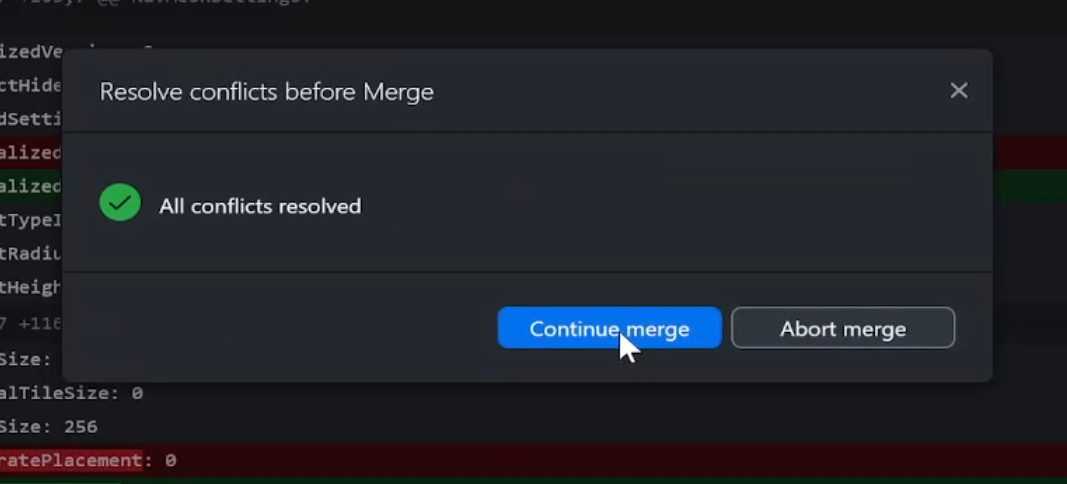
Otherwise, Git will tell you that “Automatic merge failed; fix conflicts and then commit the result”, and create a merge conflict. If that happens, you can open up GitHub Desktop to see the merge conflicts, and proceed to resolve them.
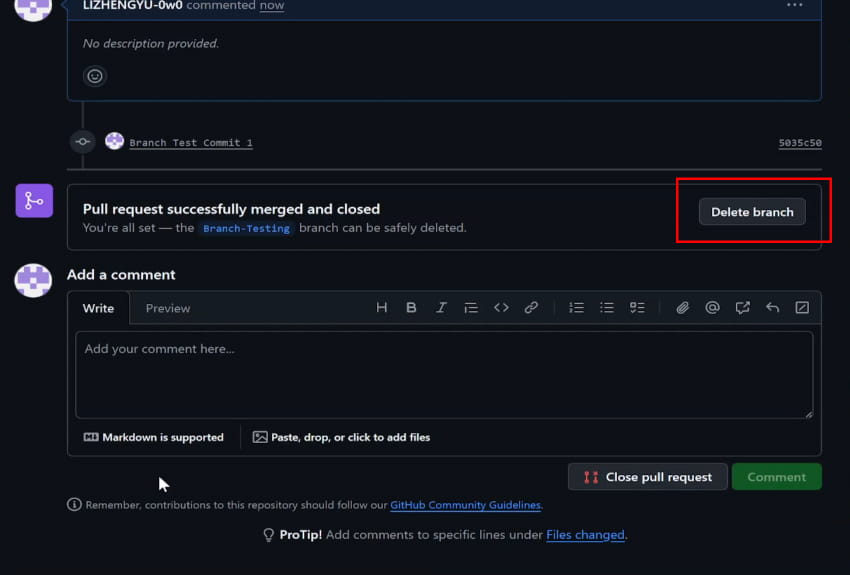
c. Deleting your branch
Once you are done merging your branch, you are recommended to delete it to prevent clutter. Otherwise, things can get messy really fast if you branch a lot!
4. Conclusion
In game development, branching is a very important feature that developers are strongly recommended to make use of. You’ll never know when a new piece of code you are adding will break your entire codebase and cause your game to become unplayable.
Branching helps to ensure that you always have a stable, playable build of your game ready for presentation to prospects, playtesters or your existing clients.