Subtle background animations always help to set the mood of the game. It might only be something simple as a slowly pulsing glow, but it adds to the ambience of the digital city that Terminus is set in.
This article takes a deeper look into some parts of my animated shader tutorial on Youtube, where I went through the creation of a shader used in one of my team’s recent projects.
1. SubShader tags
Subshaders use tags to tell how and when they expect to be rendered to the rendering engine.
Unity manual – ShaderLab: SubShader Tags
In our Shader, we used 2 types of tags: Queue and RenderType.
a. Queue
Queue handles the “when” in the rendering process, telling the engine which layer that the object should be rendered on. The “layer” I am referring to is similar to how 2D sorting layers work, where sprites on the top layer [default layer] will appear behind sprites in layers below it (with sprites in the midground layer appearing at the forefront of the screen).
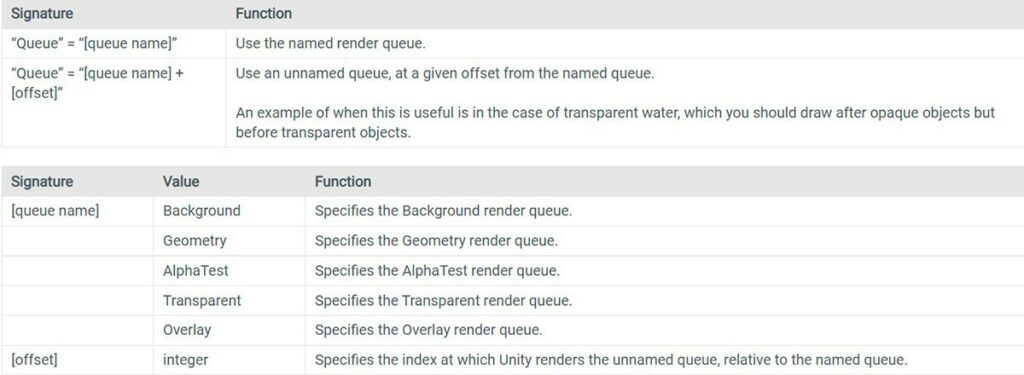
Similarly, the offset value in “queue” is similar to the “order in layer”, with the higher value rendered last in that layer. In my case, I used “Queue = Geometry”, also known as the default Queue type. It only renders opaque objects in the scene. Here are the other types of queue provided in the unity manual:
To provide an illustration of how the different queues come into play, I am using the 2 images below. In Hitman 3, the non-interactable background is most likely rendered using the “background” queue or equivalent.

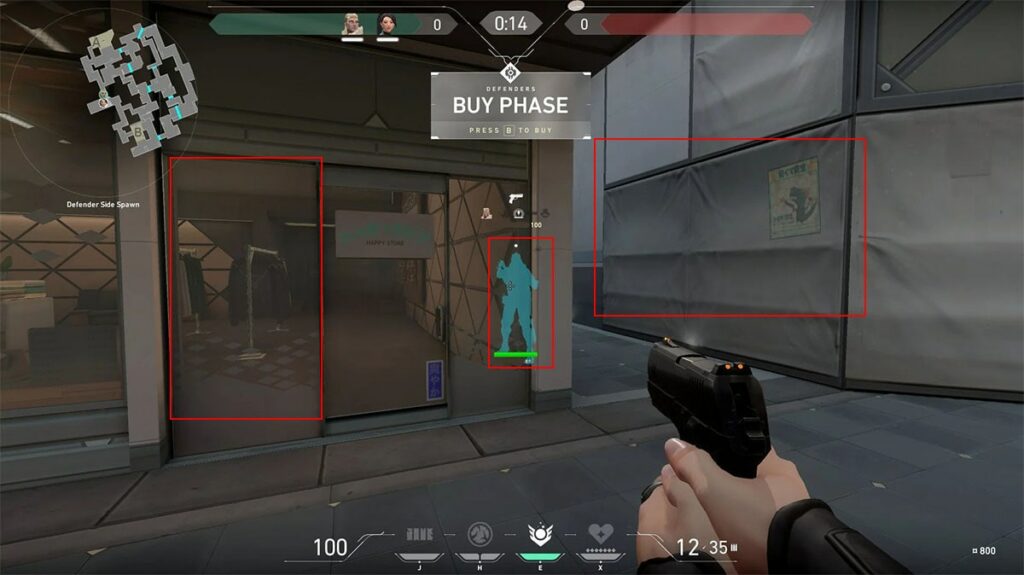
While in Valorant, these are the queue types:
- The opaque interactable building and environment — “geometry”
- Glass panes — “transparent”
- Enemy outline — “overlay”
b. RenderType
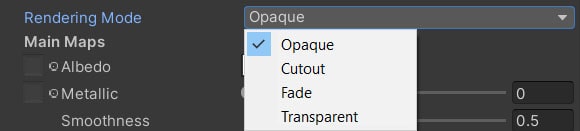
The other tag is RenderType, which handles the “how” in rendering. However, unlike Queue, RenderType does not have a definite list of types to choose from, instead it depends on the individual source file of the shader. However, there are 4 that will always work in unity, and you also see them in the rendering mode drop down list whenever you create a default unity material.
In our shader, we utilised Opaque as the base rendering type, since our object is opaque. However, we used Fade as part of the “Pass” block. Pass blocks are considered one of the fundamental blocks of shader creation and are used for rendering things that are not affected by light; it usually appears when you create an unlit shader template. In my case, I utilised the pass block to generate an overlay that blocks the material’s emission.
We used “Fade” instead of “transparent” for one main reason. “Fade” only deals with the transparency value of the object, with the ability to “entirely fade an object out” (quoted from unity manual). This means that unlike the transparent render type, it does not take into consideration the highlights and reflections (transparent render type is typically used to render objects like glass). Thus, by using the gradient map that we had, it fades out the emission.
For transparency, black is opaque and white is transparent. The opaque part of the gradient map blocks all emission, with the textures lined up with the centre portion of the map having a brighter glow.

2. Vertex and fragment shader
This is linked to the above section, in the way it is animated.
Taking a look at the script, you might be wondering:
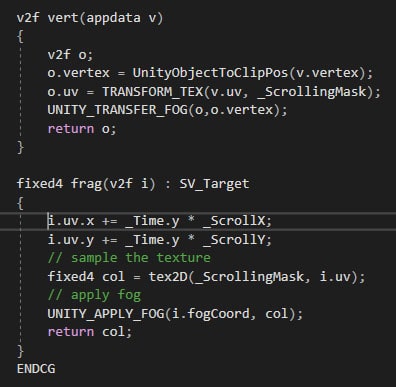
Why are we moving the UV under the fragment instead of the vertex shader?
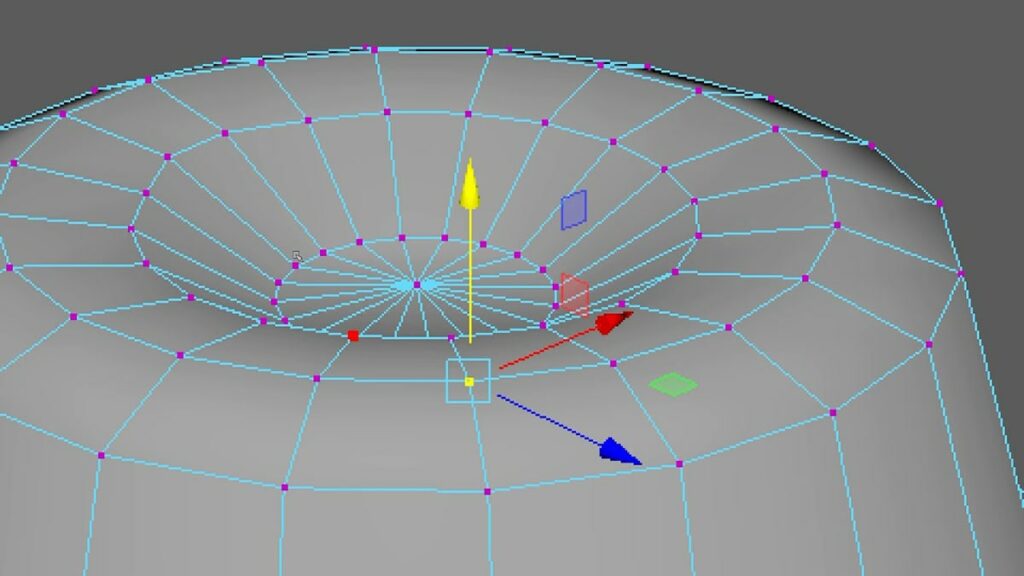
This is because the vertex shader is “executed for each vertex in the scene”. If you had done 3D modelling before, you might be familiar with this, where vertices are the edges of a face in a model. This shader does not handle each pixel on the face, only the shape of the object.
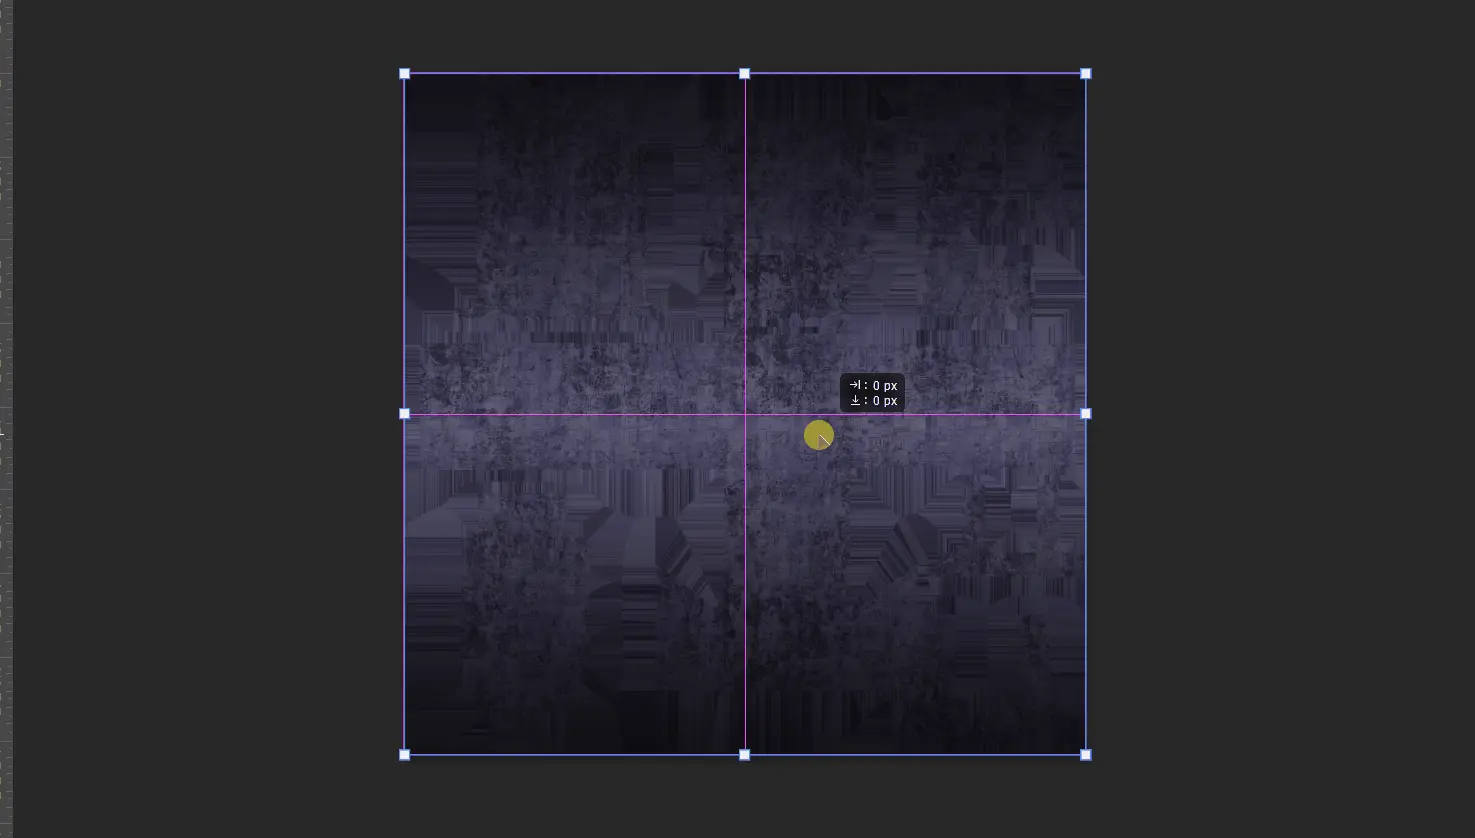
This leads to the fragment shader, also known as a pixel shader. This is the shader that handles each pixel colour on the object. Thus when we move the uv in this shader, it matches the overlay pixel to a different texture pixel each time to make the animated effect, similar to the example below.
3. _Time
In both the animation above and the emission formula, I used _Time.y to calculate the timing. _Time refers to the time since the level was loaded and is one of Unity’s built-in shader values. We used Time.y because it is the position of the unaltered value that was provided to us.
The Time value was defined as such in the manual: Time (t/20, t, t*2, t*3)
4. Emission formula
Lastly, I will be explaining how the pulsation works, which is handled by the highlighted portion in the formula.
mission.rgb * _EmissionColor * (_EmissionIntensity + abs(frac(_Time.y * (1 / _EmissionGlowDuration)) - 0.5) * _EmissionGlow)
As mentioned in the video, _EmissionIntensity is the base intensity of the emission. The pulsating comes from the additional value that was added to this base value. For this example, I will be taking _EmissionGlowDuration as 1. Here is a simplified table of what is happening at each part of the formula:
_Time.y * (1/_EmissionGlowDuration) | frac(_Time.y * (1/_EmissionGlowDuration)) | frac(_Time.y * (1/_EmissionGlowDuration)) - 0.5 | abs(frac(_Time.y * (1/_EmissionGlowDuration)) - 0.5) |
|---|---|---|---|
| 1.0 | 0.0 | -0.5 | 0.5 |
| 1.1 | 0.1 | -0.4 | 0.4 |
| 1.2 | 0.2 | -0.3 | 0.3 |
| 1.3 | 0.3 | -0.2 | 0.2 |
| 1.4 | 0.4 | -0.1 | 0.1 |
| 1.5 | 0.5 | 0 | 0 |
| 1.6 | 0.6 | 0.1 | 0.1 |
| 1.7 | 0.7 | 0.2 | 0.2 |
| 1.8 | 0.8 | 0.3 | 0.3 |
| 1.9 | 0.9 | 0.4 | 0.4 |
| 2.0 | 0.0 | 0.5 | 0.5 |
The explanation for each column is as follow:
- We find the point in the cycle where we are at
- Used frac(), a shader function that returns only the fractional (i.e. the numbers after the decimal point) in the range of 0 – 1
- Take the fractional – 0.5 to get the recurring values from -0.5 to 0.5
- Obtained the absolute values [non-negative value].
This is to get values that are always in a curve, so that there will always be a gradual change in the brightness of the glow. If the values have been linear, from 0.0 – 0.9, there will always be an abrupt reset of the glow to 0 once it reaches the brightest point.
Below is a comparison between the curve and linear glows:
5. Conclusion
In conclusion, these are some parts of the shader that I did not go in depth during the tutorial. I hope this helps you gain a deeper understanding behind the choices made while creating the shader.