Polar movement, i.e. moving objects at an angle, is something that people starting out in games programming often have trouble with. Coordinate systems are easy to understand, and so is moving things left and right or up and down; but what if you want to move at angles that are not parallel to an axis, like 30° upwards, or towards a target? How do you get a vector that represents that direction of movement?
This article requires some basic knowledge about vector math, so it will be helpful to read up Vector math basics for games programming first if you are not familiar with the topic.
Distance between two objects
It’s not exactly “movement”, but understanding how to find the distance between 2 objects is essential to what we are going to explore further down in the article. Unity has a Vector2.Distance() method that removes the need for us to do any vector math:
float distance = Vector2.Distance( transform.position, target.position );
But we’re more interested in understanding the math behind it here. Using Vector2.Distance() is the same as doing the following:
Vector2 difference = transform.position - target.position;
float distance = difference.magnitude;
Essentially, we are:
- Getting the difference vector between the 2 objects, and;
- Getting the magnitude (length) of this difference vector
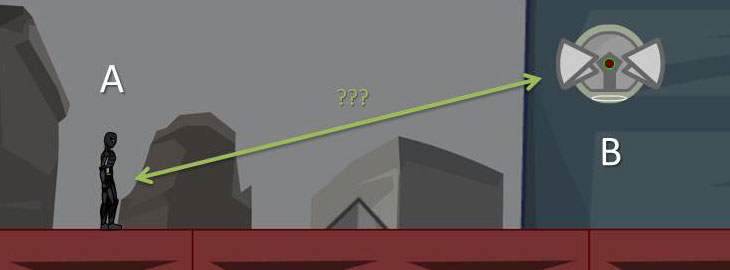
The difference vector is the line drawn between the two objects in the image above. It can point in either direction, because there are 2 possible difference vectors:
- A – B: which gives you a vector that points towards A
- B – A: which gives you a vector that points towards B, in the opposite direction of A – B.
For those looking to impress people at the dinner table, here is how you write it mathematically:
Moving towards a target (linearly)
To move an object towards a target at a particular speed (expressed by moveSpeed in the snippet below), you can use the following line using Vector2.MoveTowards() in your script’s Update() method. In the script below, target is the Transform component of the target you are following, assigned to the same script. You have to declare it as a property of your script and assign it to make it work.
transform.position = Vector2.MoveTowards( transform.position, target.position, moveSpeed * Time.deltaTime );
This will move your object’s position by moveSpeed * Time.deltaTime units at every frame until it reaches its destination. moveSpeed, of course, should be the distance your object can travel in 1 second.
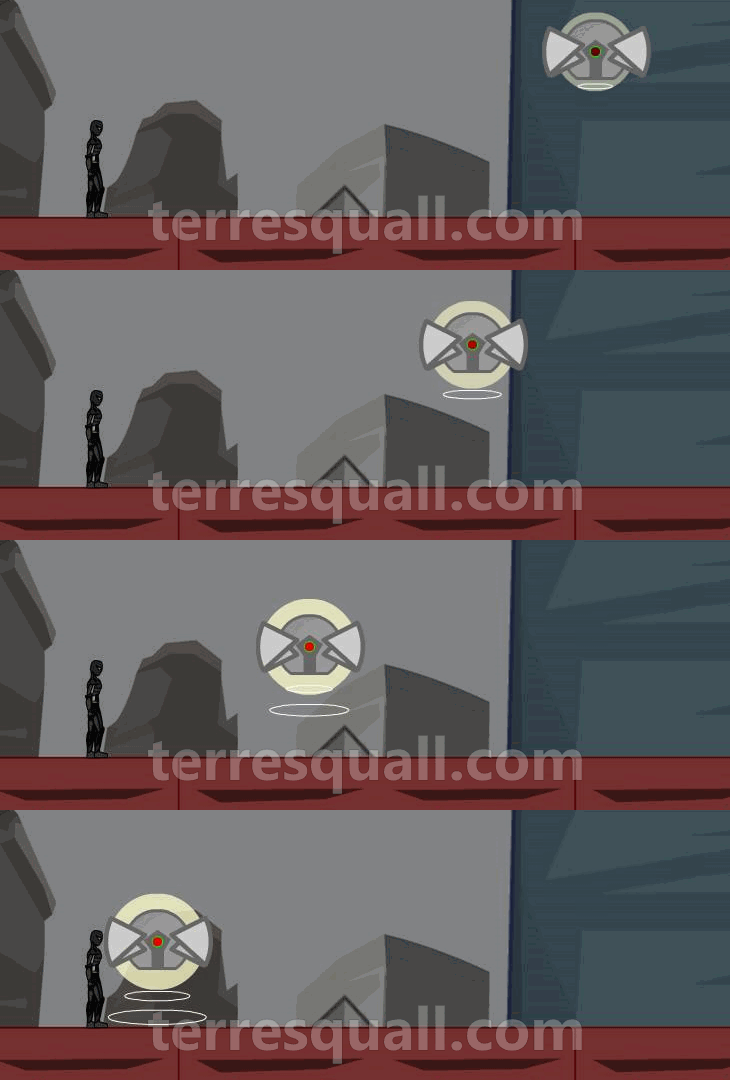
Here’s how to do it if you do the vector math yourself — the code below gives almost the same result.
Vector2 difference = target.position - transform.position;
transform.position += difference.normalized * moveSpeed * Time.deltaTime;
The difference vector is back, except this time, it has to be pointing towards the target. Hence, only target.position - transform.position can work.
What does difference.normalized do?
It normalises the difference vector, giving us a unit vector that points in the same direction as the difference vector. A unit vector is a vector with a magnitude (i.e. length) of 1 unit.
As the image notes, in a unit vector, only the length of the vector is 1. The x and y values are actually the cosine and sine of the vector’s angle, respectively. This is because:
What’s special about a unit vector is that you can set its length very easily by multiplying it with a scalar value, since its length becomes whatever value you multiply it by.
Almost the same as Vector2.MoveTowards
Our code snippet doesn’t actually do the same thing as Vector2.MoveTowards(), because it is possible for our object to move past its target in certain situations. We need an additional line in the snippet of code to prevent it from doing so.
Vector2 difference = target.position - transform.position; float travelDistance = Mathf.Min( difference.magnitude, moveSpeed * Time.deltaTime ); transform.position += difference.normalized * travelDistancemoveSpeed * Time.deltaTime
The additional line of code takes the smaller of the two values between difference.magnitude and moveSpeed * Time.deltaTime. This makes it so that when difference.magnitude is smaller than moveSpeed * Time.deltaTime, we will not overshoot our destination.
Tracks a moving target
Note that both Vector2.MoveTowards and our own written ones follow a moving target if placed in Update(). Your following object will change its trajectory to continue following the target.
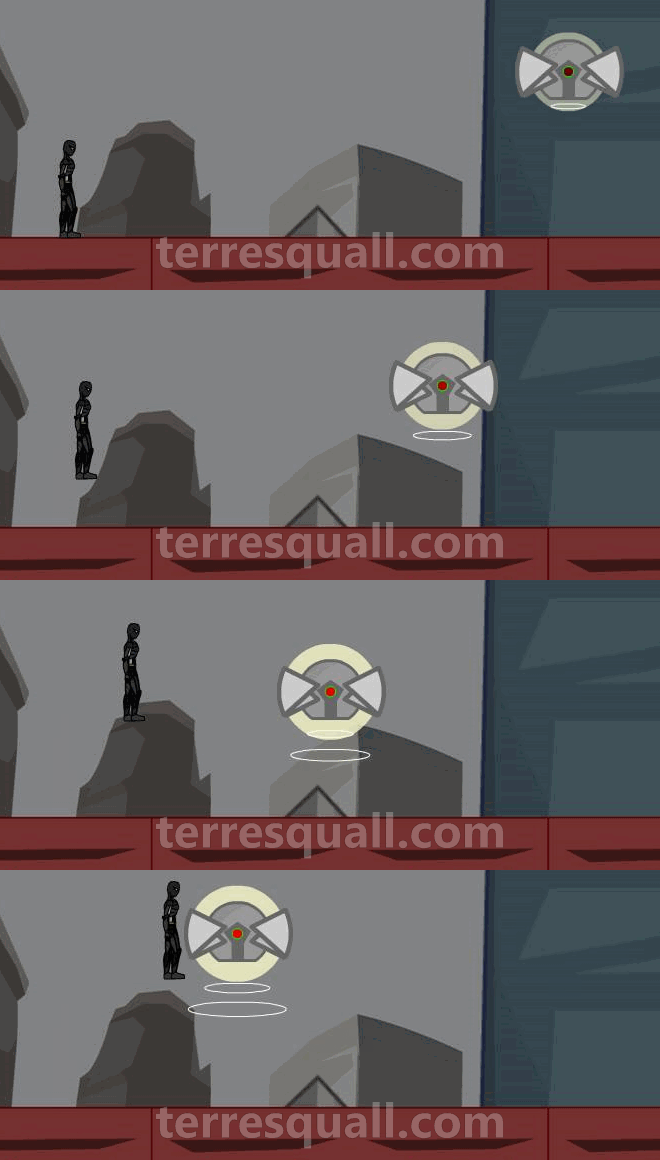
Moving towards a target (easing out)
Besides Vector2.MoveTowards(), we can also use Vector2.Lerp() to move towards a particular target. Again, this goes into your script’s Update() method, and target is a property containing the Transform component of the target being followed.
transform.position = Vector2.Lerp( transform.position, target.position, lerpFactor * Time.deltaTime );
Vector2.Lerp() is different from Vector2.MoveTowards() because it moves faster the further you are from the target, and slows down the nearer it gets. lerpFactor controls how fast the object moves, though it should be greater than 0 and less than 10. If it is less than 0, the object moves backwards; and if it is more than 10, the movement is so fast it will almost look like its teleporting.
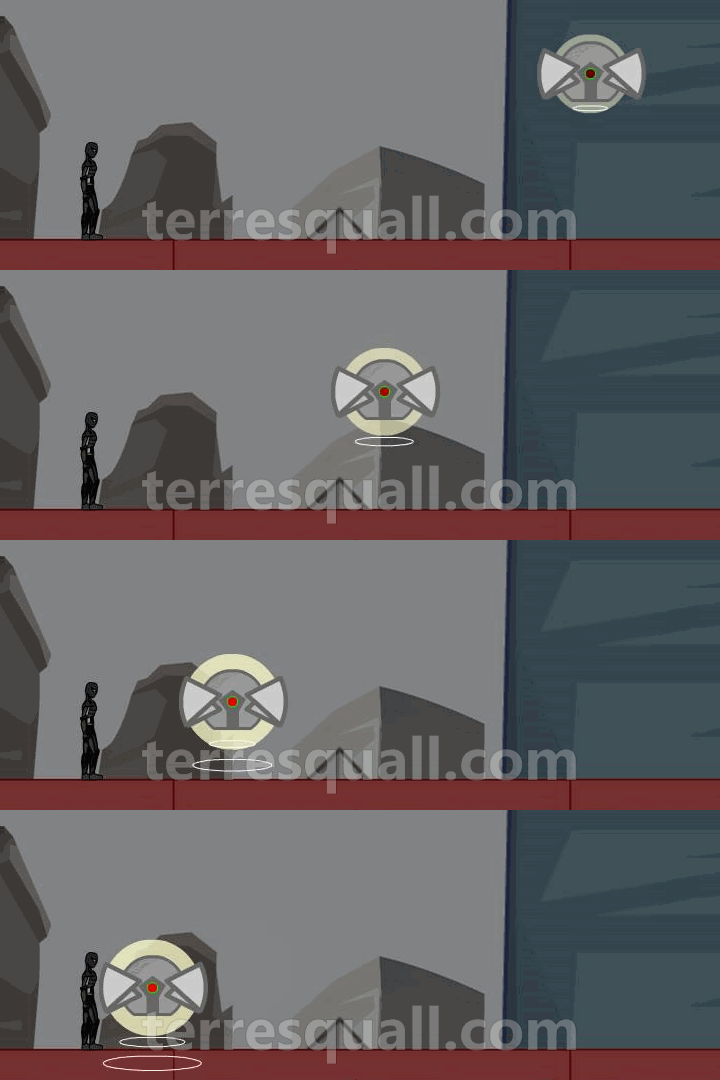
Without using Vector2.Lerp(), this is how to achieve a similar result using plain ol’ vector math:
Vector2 difference = target.position - transform.position;
transform.position += difference * lerpFactor * Time.deltaTime;
As Time.deltaTime (i.e. time between 2 frames) will almost always be hovering between 0.02 to 0.1, lerpFactor * Time.deltaTime will always be less than 1 unless your lerpFactor is very high. This means that the distance moved will always be a percentage of the total distance, which also means the distance moved gets smaller as you travel because the total distance decreases.

Vector2.Lerp moves.To make our code function the same as Vector2.Lerp(), we have to cap lerpFactor * Time.deltaTime to be between 0 and 1. This prevents it from overshooting its destination or moving backwards when lerpFactor is below 0.
Vector2 difference = target.position - transform.position;
transform.position += difference * Mathf.Min( 1, Mathf.Max( 0, lerpFactor * Time.deltaTime ) );
Tracking also included
If you put either piece of code in Update(), it will cause our object to track the target too. Our object will maintain its non-linear movement though.
Moving at an angle
To move an object at a specified angle, we’ll have to use some trigonometry. Remember how the x and y values of a unit vector can be found by using cosine and sine respectively? So if you want to get a vector pointing 30° upwards (and to the right):
float angleRadians = 30 * Mathf.Deg2Rad;
Vector2 direction = new Vector2( Mathf.Cos(angleRadians), Mathf.Sin(angleRadians) );
Note that Mathf.Cos() and Mathf.Sin() takes angles in radians, so you have to remember to convert the angles with Mathf.Deg2Rad.
You can then multiply the direction vector — which is a unit vector — with a float value to set the length of the vector.
transform.position += direction * distance;
transform.position += direction * moveSpeed * Time.deltaTime
Alternatively, you can also set the length of the vector when creating the vector:
float angleRadians = 30 * Mathf.Deg2Rad;
Vector2 direction = new Vector2( Mathf.Cos(angleRadians) * distance, Mathf.Sin(angleRadians) * distance );
Unfortunately, Unity doesn’t seem to have helper methods for this. At least, not that I know of.
Should we use Unity’s shortcuts?
With convenience methods like Vector2.MoveTowards() and Vector2.Distance() already made for us, you might be wondering why we should bother to learn vector math behind them. In some cases, it can actually optimise our code. Consider the example below:
void Update() {
    // Only start moving towards the target if it is within our acquisition range.
    if ( Vector2.Distance( target.position, transform.position ) < acquisitionRange ) {
        transform.position = Vector2.MoveTowards( transform.position, target.position, moveSpeed * Time.deltaTime );
    }
}
If we avoided using Unity’s helper methods, we could have done it this way.
 void Update() {
    // Only start moving towards the target if it is within our acquisition range.
    Vector2 difference = target.position - transform.position;
    if ( difference.sqrMagnitude < acquisitionRange * acquisitionRange ) {
        transform.position += difference.normalized * travelDistance;
    }
}
This new piece of code has 2 main advantages over the previous piece of code:
- The same difference vector is used to measure distance and move us towards the target. If we used
Vector2.Distance()andVector2.MoveTowards, the same difference vector would’ve been computed twice separately. - By not using
Vector2.Distance(), we had the advantage of comparing the squares of distances instead. Recall that to find a vector’s length, we need to get the square root of x2 + y2. Since square roots are relatively more expensive to compute than multiplication, this optimises the code.
So there are benefits to not using Unity’s math helper methods. It may be time-consuming to learn the vector math initially, but in the long run, you will have greater control over your code. This not only opens up opportunities for optimisation, but also gives you the capability to really make your game the way you want it.
