This article is to help answer a question regarding our Vampire Survivors game. The question was, ” How do u get different sprites for your characters?”. In this article, we will go through how to do so.
1. Replacing Animations
To implement different sprites for our characters, we first need to replace our current set of animations.
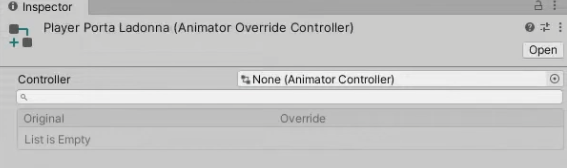
First make a new Animator Override Controller.
An Animator Override Controller will have the same logic as an Animator Controller, the only difference is the animations.
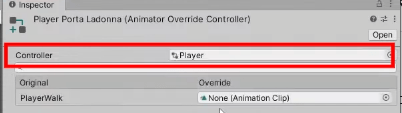
Open up the Animator Override Controller and assign the Player Animator Controller to it.
We need to replace the Animator Controller on the Player with the new Animator Override Controller that we made. This is because we need to make a new animation.

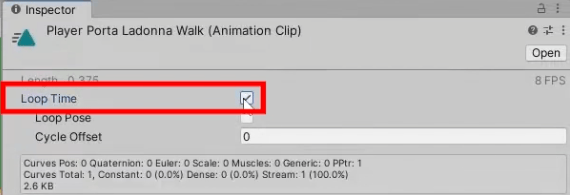
Make a new animation to use. Make sure to set the loop time of the animation to active.
The new animation has to be assigned to the Animator Override Controller.
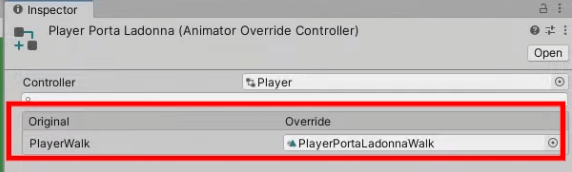
Assign the frames for your animation. For the animation, drag the walk sprites in to your animation. Make sure you apply it to the correct animation and change the sample rate to 8.
Now that the new animation has been made, restore the original Animator Controller back to the Player.
For every character you want to have, you have to create a new Animator Override Controller and create new animations for the character. The amount of animations you create depends on how many animations you have for your character.
2. Changing of Sprites in Game
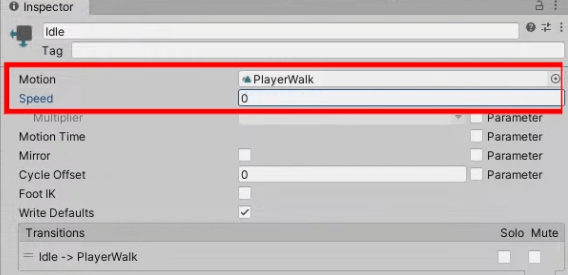
We first need to fix the Idle animation in our Player Animator Controller as it is causing some bugs for our character sprite.
If you have been following our series, you would know that the Idle animation is actually missing one. To fix the issue, just add our Player Walk animation to the Idle animation and change the speed to 0. This makes it so the Idle animation will only show the first frame of our Player Walk animation.
Now if you replace your Animator Controller in your game, the sprites will change. We will now this do this change using scripts.
Let’s add something to the CharacterData script first.
CharacterData.cs
using UnityEngine;

[CreateAssetMenu(fileName = "Character Data", menuName = "2D Top-down Rogue-like/Character Data")]
public class CharacterData : ScriptableObject
{
    [SerializeField]
    Sprite icon;
    public RuntimeAnimatorController animator;
    public Sprite Icon { get => icon; private set => icon = value; }

    [SerializeField]
    new string name;
    public string Name { get => name; private set => name = value; }

    [SerializeField]
    WeaponData startingWeapon;
    public WeaponData StartingWeapon { get => startingWeapon; private set => startingWeapon = value; }

    [System.Serializable]
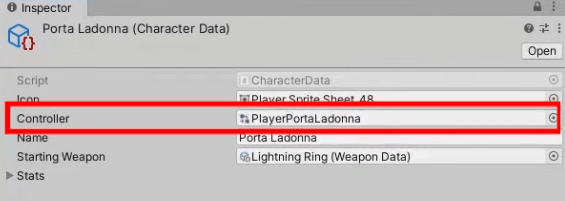
This change will allow us to assign a new Animator Controller to our characters. Assign the Animator Controller you made to the Porta Ladonna character.
Next, we need to edit the PlayerStats script, as it is responsible for assigning the Animator Controller to our Player.
PlayerStats.cs
using System;
using System.Collections.Generic;
using UnityEngine;
using UnityEngine.UI;
using TMPro;

public class PlayerStats : MonoBehaviour
{

    CharacterData characterData;
    public CharacterData.Stats baseStats;
    [SerializeField] CharacterData.Stats actualStats;

    public CharacterData.Stats Stats
    {
        get { return actualStats; }
        set
        {
            actualStats = value;
        }
    }
    public CharacterData.Stats Actual
    {
        get { return actualStats; }
    }

    float health;

    #region Current Stats Properties
    public float CurrentHealth
    {

        get { return health; }

        // If we try and set the current health, the UI interface
        // on the pause screen will also be updated.
        set
        {
            //Check if the value has changed

            if (health != value)
            {
                health = value;
                UpdateHealthBar();
            }
        }
    }
    #endregion

    [Header("Visuals")]
    public ParticleSystem damageEffect; // If damage is dealt.
    public ParticleSystem blockedEffect; // If armor completely blocks damage.

    //Experience and level of the player
    [Header("Experience/Level")]
    public int experience = 0;
    public int level = 1;
    public int experienceCap;

    //Class for defining a level range and the corresponding experience cap increase for that range
    [System.Serializable]
    public class LevelRange
    {
        public int startLevel;
        public int endLevel;
        public int experienceCapIncrease;
    }

    //I-Frames
    [Header("I-Frames")]
    public float invincibilityDuration;
    float invincibilityTimer;
    bool isInvincible;

    public List<LevelRange> levelRanges;


    PlayerInventory inventory;
    PlayerCollector collector;
    public int weaponIndex;
    public int passiveItemIndex;

    [Header("UI")]
    public Image healthBar;
    public Image expBar;
    public TMP_Text levelText;

    PlayerAnimator playerAnimator;

    void Awake()
    {
        characterData = CharacterSelector.GetData();
        if (CharacterSelector.instance)
            CharacterSelector.instance.DestroySingleton();

        inventory = GetComponent<PlayerInventory>();
        collector = GetComponentInChildren<PlayerCollector>();

        //Assign the variables
        baseStats = actualStats = characterData.stats;
        collector.SetRadius(actualStats.magnet);
        health = actualStats.maxHealth;

        playerAnimator = GetComponent<PlayerAnimator>();
        if(characterData.controller)
            playerAnimator.SetAnimatorController(characterData.controller);
    }
For the code to work, we need a new function under the PlayerAnimator script.
PlayerAnimator.cs
public void SetAnimator(RuntimeAnimatorController c)
{
      if(!am) am = GetComponent<Animator>();
      am.runtimeAnimatorController = c;
}
Make sure your button functions when choosing your characters are correct and change your Icons for your characters to fit your game.
3. Conclusion
That is it for this part! This was a short segment on how to have different sprites for your characters. You can continue to look forward to new parts of this series in the future.