As part of a school assignment in the past year, my team and I created Apoca Force, a tower defense game where WAIFUs (World Apocalypse Intercepting Frontline Units) are deployed onto a battlefield to combat an undead horde. In this game, WAIFUs serve as the eponymous towers of the genre, but with a twist — by spending some resource, they can be moved after they are deployed.
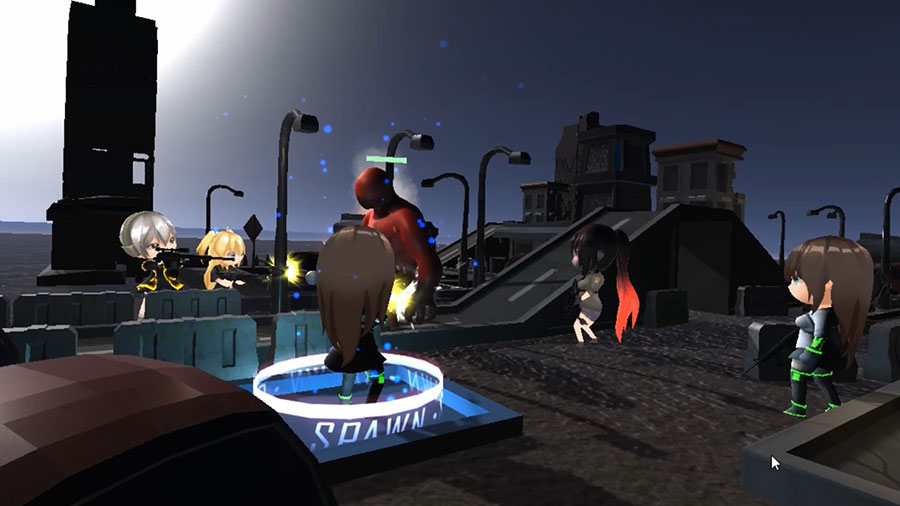
To denote the areas that WAIFUs can walk on, we created an interface that highlighted walkable areas on the map when players decide to move their WAIFUs. This is what we ended up with:
Enjoyed this article? Then check out this other article about how we drew stat graphs for our WAIFUs on our UI interface.
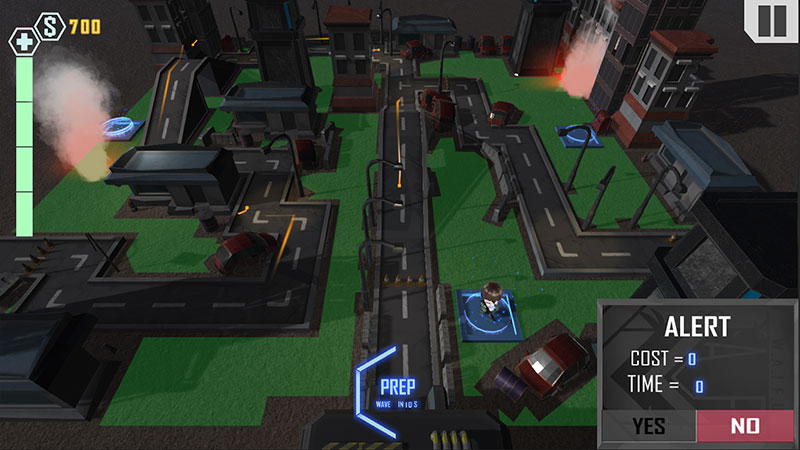
Getting started
As the game’s navigation system was built on Unity’s NavMesh system, we actually already have meshes representing the WAIFUs’ walkable areas. The problem, however, is that there is no option in Unity to show these meshes in-game.
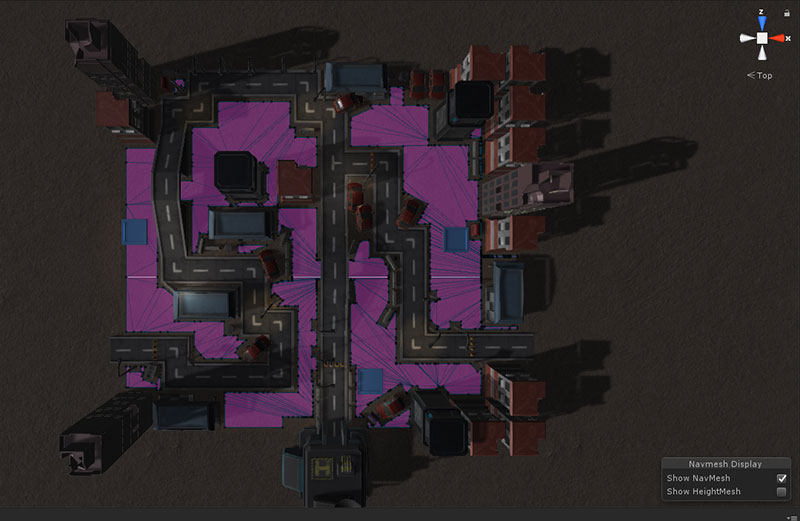
Thus, if we want to display the meshes on the NavMesh, we will have to create our own. Fortunately for us, we can use Unity’s NavMesh.CalculateTriangulation() method to generate a mesh that we can then assign to a MeshFilter component on a dummy GameObject.
The dummy GameObject we created to contain the generated mesh has these components attached:
- Show Navmesh: Our custom script, which uses the data from
NavMesh.CalculateTriangulation()to generate a mesh based on it. - Mesh Filter: Unity-native component that holds the generated mesh data and works alongside the Mesh Renderer component. In our case, it is going to hold the mesh data generated by Show Navmesh, which is why it is empty by default.
- Mesh Renderer: Unity-native component that draws the mesh contained in the Mesh Filter with material(s) on it.
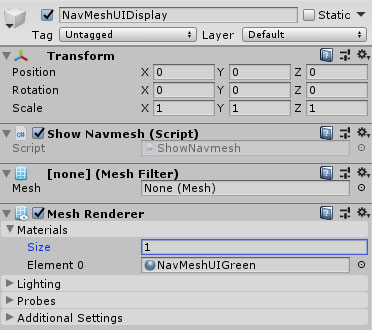
Make sure that your dummy GameObject is set to position (0, 0, 0). Otherwise, the generated mesh will not be accurately positioned.
Writing ShowNavmesh.cs
As NavMesh.CalculateTriangulation() provides all the data we need, writing the code to draw out the mesh is a pretty straightforward affair — we just need to assign its data to the right places.
ShowNavmesh.cs
using UnityEngine;
using UnityEngine.AI;

public class ShowNavmesh : MonoBehaviour
{
	void Start()
	{
		ShowMesh();
	}

	// Generates the NavMesh shape and assigns it to the MeshFilter component.
	void ShowMesh()
	{
		// NavMesh.CalculateTriangulation returns a NavMeshTriangulation object.
		NavMeshTriangulation meshData = NavMesh.CalculateTriangulation();

		// Create a new mesh and chuck in the NavMesh's vertex and triangle data to form the mesh.
		Mesh mesh = new Mesh();
		mesh.vertices = meshData.vertices;
		mesh.triangles = meshData.indices;

		// Assigns the newly-created mesh to the MeshFilter on the same GameObject.
		GetComponent<MeshFilter>().mesh = mesh;
	}
}
The highlighted portions above mark out the most important parts of the code. Essentially, NavMesh.CalculateTriangulation() gives us a NavMeshTriangulation object, which contains the vertices (i.e. vertex data) and triangles used to create the NavMesh.
Since vertices and triangles are the basic building blocks of a mesh, we then create a new Mesh object, and assign the retrieved vertices and triangles. Finally, we assign this Mesh object to the MeshFilter component on the same GameObject to get the mesh to show up in the game.
Creating a material for the mesh
Remember that for your dynamically-generated mesh to show up, you have to attach at least 1 material to the Mesh Renderer component. For reference, we used the UI/Default shader for our material and set the Tint property to the colour we wanted for the highlight.
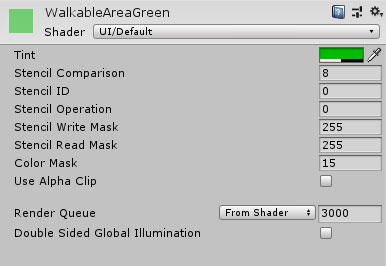
By assigning this material to the Mesh Renderer component of our dummy GameObject, the code will generate a mesh that appears on top of our walkable areas, as shown in the image below.
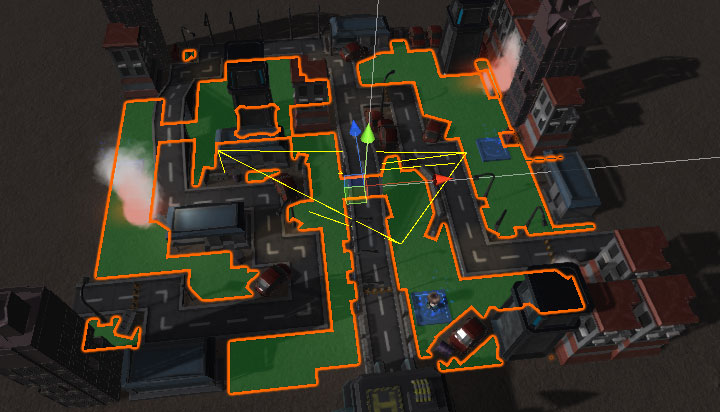
Note: If you are using NavMeshes that have height maps, do take note that the generated mesh will not look the same as the one shown in the Editor.
Rendering different NavMesh areas
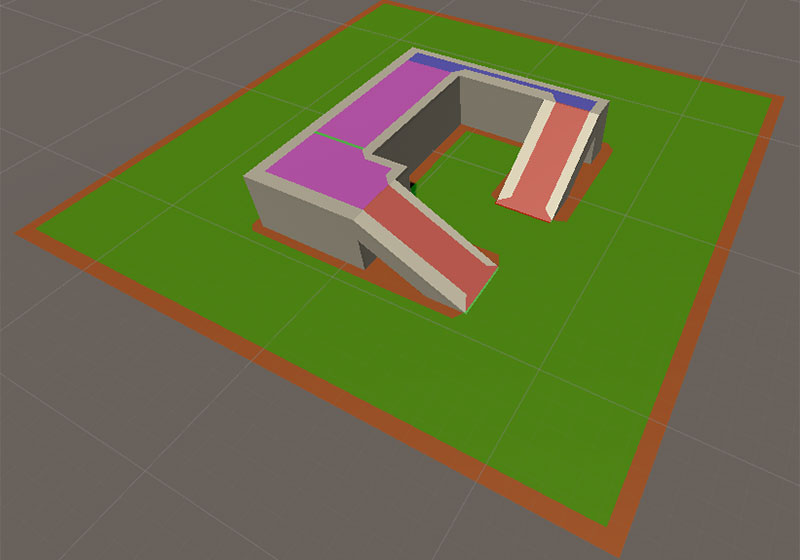
When building a NavMesh, it is possible to assign different Navigation Areas to different parts of the navigable environment. This will create a NavMesh that consists of multiple different-coloured areas.
Navigation Areas can be used in many ways, but are primarily designed to control which paths agents on the NavMesh choose to take to get to their destination. Read Unity’s documentation on Navigation Areas to learn more about them.
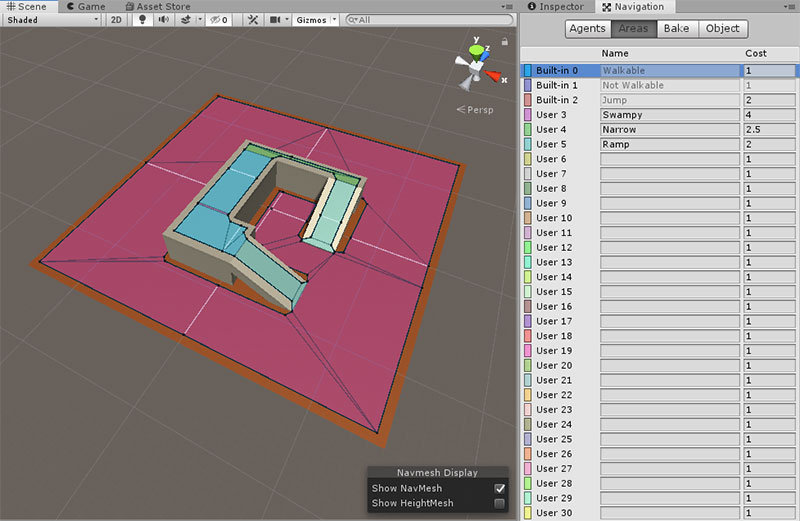
Unfortunately, if we were to run our current ShowNavmesh.cs script to generate a display mesh for such a NavMesh in-game, the different areas in the mesh will not be reflected, as our code for generating the mesh does not differentiate between these areas.
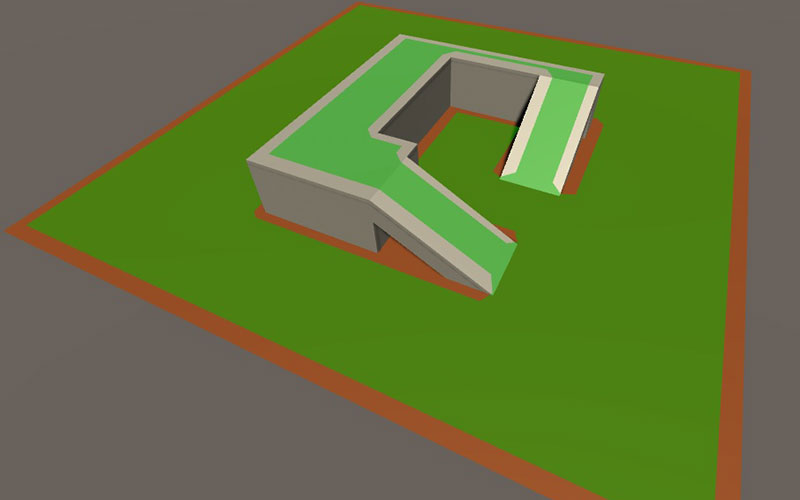
To get around this, we are going to have to upgrade our code. If you refer back to the definition of the NavMeshTriangulation object, you will find that it has a NavMeshTriangulation.areas property — an int array which contains as many items as there are triangles in the NavMesh, telling us which Navigation Area each of the mesh’s triangle belongs to.
What we have to do is make use of this information to assign our mesh triangles to different submeshes, so that a separate material can be assigned to each of them.
ShowNavmesh.cs
using UnityEngine;
using UnityEngine.AI;

public class ShowNavmesh : MonoBehaviour
{
	void Start()
	{
		ShowMesh();
	}

	// Generates the NavMesh shape and assigns it to the MeshFilter component.
	void ShowMesh()
	{
		// NavMesh.CalculateTriangulation returns a NavMeshTriangulation object.
		NavMeshTriangulation meshData = NavMesh.CalculateTriangulation();

		// Organise the NavMeshTriangulation data into Dictionary key-value pairs.
		// In this Dictionary, each area in the NavMesh will have its own list of triangles
		// that belong to the area. Each of these lists of triangles will be rendered as
		// a submesh later below.
        	Dictionary<int,List<int>> submeshIndices = new Dictionary<int,List<int>>();

		// <meshData.areas> is an int[] that contains an entry for every triangle in
		// <meshData.indices>. The entry helps to identify which Navigation Area each
		// triangle belongs to.
        	for(int i = 0;i < meshData.areas.Length;i++) {
            		// If a list hasn't already been created for this area index, do so.
           		if(!submeshIndices.ContainsKey(meshData.areas[i])) {
                		submeshIndices.Add(meshData.areas[i],new List<int>());
            		}

			// Because a triangle contains 3 points, <meshData.indices> will always be exactly 3 times
			// the size of <meshData.areas>. Each index on <meshData.areas> identifies 3 items in <meshData.indices<,
			// so we have to identify the 3 items that each <meshData.areas< item is referring to.
            		submeshIndices[meshData.areas[i]].Add(meshData.indices[3 * i]);
            		submeshIndices[meshData.areas[i]].Add(meshData.indices[3 * i + 1]);
            		submeshIndices[meshData.areas[i]].Add(meshData.indices[3 * i + 2]);
        	}

		// Create a new mesh and chuck in the NavMesh's vertex and triangle data to form the mesh.
		Mesh mesh = new Mesh();
		mesh.vertices = meshData.vertices;
		mesh.triangles = meshData.indices;

		// Tell our mesh how many submeshes it contains, and use SetTriangles() to assign
		// triangles to the different submeshes in the mesh object.
		mesh.subMeshCount = submeshIndices.Count;
		int index = 0;
		foreach(KeyValuePair<int,List<int>> entry in submeshIndices) {
			mesh.SetTriangles(entry.Value.ToArray(),index++);
        	}

		// Assigns the newly-created mesh to the MeshFilter on the same GameObject.
		GetComponent<MeshFilter>().mesh = mesh;
	}
}
Essentially, the additions to ShowNavmesh.cs do the following:
- Reorganises the
NavMeshTriangulationdata into a Dictionary that pairs each area index inmeshData.areasto a set of triangles belonging to the area. - Sets the
subMeshCountproperty of our generated mesh to be equals to the number of areas in our NavMesh. - Assigns each of our submesh triangles separately to the mesh using the
SetTrianglesmethod.
Once that is done, you will need to attach multiple materials to the Mesh Renderer component of your dummy GameObject — one for each submesh that you have.
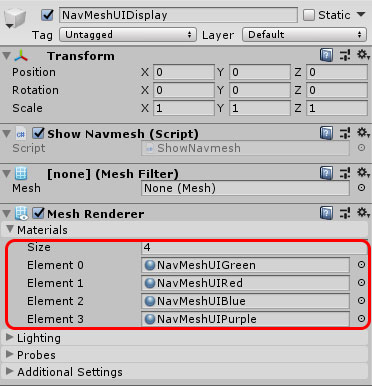
This will give each of your submeshes a different look, so that each of the areas in the mesh will be properly demarcated.
Conclusion
This article was just a simple proof-of-concept to show how the Unity’s Editor NavMesh can be displayed in-game. Much more functionality can actually be coded into ShowNavmesh.cs, to do things like showing and hiding specific areas onto the NavMesh, or updating dynamically during runtime if the NavMesh changes — these will have to be the topic of a future article, however.
Please feel free to contribute to this article in the comments section if you find any mistakes, or have any suggestions to improve the content in this article!
Finally, for convenience (or those of you just here for the copypasta), below is what the ShowNavmesh.cs should look like at the end.
ShowNavmesh.cs
using UnityEngine;
using UnityEngine.AI;

public class ShowNavmesh : MonoBehaviour
{
	void Start()
	{
		ShowMesh();
	}

	// Generates the NavMesh shape and assigns it to the MeshFilter component.
	void ShowMesh()
	{
		// NavMesh.CalculateTriangulation returns a NavMeshTriangulation object.
		NavMeshTriangulation meshData = NavMesh.CalculateTriangulation();

		// Organise the NavMeshTriangulation data into Dictionary key-value pairs.
		// In this Dictionary, each area in the NavMesh will have its own list of triangles
		// that belong to the area. Each of these lists of triangles will be rendered as
		// a submesh later below.
        	Dictionary<int,List<int>> submeshIndices = new Dictionary<int,List<int>>();

		// <meshData.areas> is an int[] that contains an entry for every triangle in
		// <meshData.indices>. The entry helps to identify which Navigation Area each
		// triangle belongs to.
        	for(int i = 0;i < meshData.areas.Length;i++) {
            		// If a list hasn't already been created for this area index, do so.
           		if(!submeshIndices.ContainsKey(meshData.areas[i])) {
                		submeshIndices.Add(meshData.areas[i],new List<int>());
            		}

			// Because a triangle contains 3 points, <meshData.indices> will always be exactly 3 times
			// the size of <meshData.areas>. Each index on <meshData.areas> identifies 3 items in <meshData.indices<,
			// so we have to identify the 3 items that each <meshData.areas< item is referring to.
            		submeshIndices[meshData.areas[i]].Add(meshData.indices[3 * i]);
            		submeshIndices[meshData.areas[i]].Add(meshData.indices[3 * i + 1]);
            		submeshIndices[meshData.areas[i]].Add(meshData.indices[3 * i + 2]);
        	}

		// Create a new mesh and chuck in the NavMesh's vertex and triangle data to form the mesh.
		Mesh mesh = new Mesh();
		mesh.vertices = meshData.vertices;

		// Tell our mesh how many submeshes it contains, and use SetTriangles() to assign
		// triangles to the different submeshes in the mesh object.
		mesh.subMeshCount = submeshIndices.Count;
		int index = 0;
		foreach(KeyValuePair<int,List<int>> entry in submeshIndices) {
			mesh.SetTriangles(entry.Value.ToArray(),index++);
        	}

		// Assigns the newly-created mesh to the MeshFilter on the same GameObject.
		GetComponent<MeshFilter>().mesh = mesh;
	}
}

This is isn’t working for me can you tell, why,
I created shownavmesh script,
i created empty gameobject, and attached mesh renderer component, and attached to material to it,
and i attached script to game object, can run the game , now it doesn’t showing anything.
Hi Rajesh, did you miss out attaching a Mesh Filter component?
Wow! very smart! thank you very much for sharing this. I plan on using this.
Excellent article! The documentation on NavMeshTriangulation is not very detailed, so this article is a very helpful contribution.
This is excellent! Thanks for sharing.