
If you’re working on a Unity project with the free Unity license, you’re only allowed to have a maximum of 3 people (and a storage limit of 1GB) on Unity Collaborate Plastic SCM. While you can work around the headcount limitation by adding and removing members when needed, it can be quite a hassle. Hence, for those without a budget for a paid Unity plan, a cheap and easy way to go around both the personnel and storage limit is to use GitHub Desktop for collaboration.
GitHub Desktop is a user-friendly way for people to use Git (normally accessed through a command line interface). For folks without much experience with source control, GitHub Desktop is a godsend — it allows you to reap the benefits of Git source control without the need to learn about its intricacies.
- Installing and logging in
- Setting up the repository
- How teammates connect to the repository
- Fetching and making updates
- Wrapping up
1. Installing and logging in
To install GitHub Desktop, you can download the application from their home page.
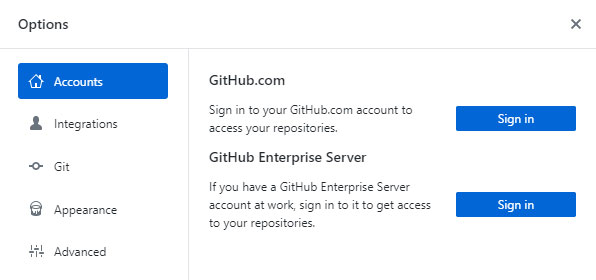
Once that is done, you need to sign up for a GitHub account so that you can log in to GitHub Desktop. If you are not prompted to log in after opening GitHub Desktop, go to File > Options and you should get this pop-up that you can use to sign in.
2. Setting up the repository
Once you have logged in to your GitHub account, you will need to set up your repository and push some content on to it.
a. Creating a GitHub repository
To be able to commit your Unity project onto GitHub, you’ll first have to create a repository on GitHub. You can do this either on the GitHub website, or from within GitHub Desktop itself.
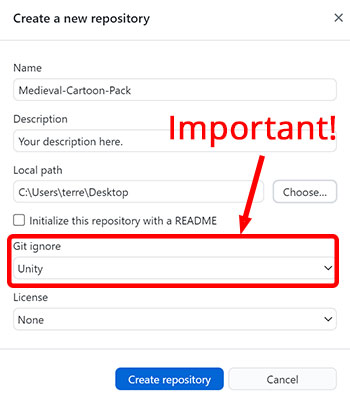
Since doing it from within GitHub Desktop is the easier way, we will be creating our repository from GitHub Desktop. Go to File > New repository. Then,
- Give your repository a name;
- Select a place on your computer to save it to (it’s just a temporary location, so I recommend putting it on your Desktop), and;
- Select Unity under the Git ignore dropdown. This is important, as it ensures that only the essential project files are committed into your repository.
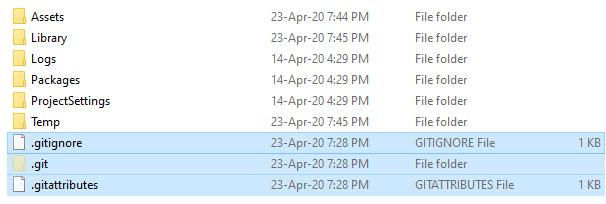
When your repository is created, you should get a folder with the following contents:

.git folder is hidden by default.If you do not see the .git folder, you will need to reveal hidden files on your computer.
b. Moving Git files into Unity
To turn your Unity project into a Git repository, you will need to transfer the 3 files above into your Unity project folder.
Note that your Unity project folder is not where the Assets folder is. It is the folder above that.
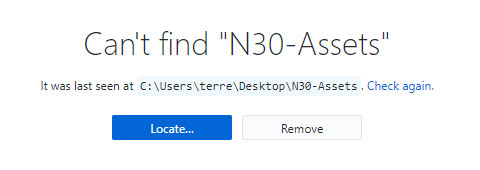
With the Git files removed, GitHub Desktop will say that it can no longer find your newly-created repository. Click on Locate, and select your Unity project folder (where you moved your Git files to).
If you’ve done everything right so far, you should see a list of all your Unity project files on the left side of GitHub Desktop, as shown below:

c. Configuring Git ignore
Now, before you press the blue Commit to master button, you want to make sure that your .gitignore file is properly configured and in effect. .gitignore controls which files from your Unity project are uploaded onto the Git repository. Unity keeps a lot of user-specific generated files that you don’t want to upload onto the repository, because these files are:
- Updated every time you open the project, and;
- Cannot be used by other users.
If you have selected Unity under the Git ignore dropdown when creating your repository earlier, GitHub Desktop should only track and commit files from the following folders in your project:
- Assets
- Packages
- ProjectSettings
.gitignore is working properly, you should not see files from the Library, Logs and UserSettings folder in the tracked files.If you see files from either the Library, Logs or UserSettings folder being tracked by GitHub, this means your .gitignore file has not been properly configured. In this case, you will want to open the .gitignore file on a text editor like Notepad, and replace the contents with the following:
.gitignore
# This .gitignore file should be placed at the root of your Unity project directory
#
# Get latest from https://github.com/github/gitignore/blob/main/Unity.gitignore
#
/[Ll]ibrary/
/[Tt]emp/
/[Oo]bj/
/[Bb]uild/
/[Bb]uilds/
/[Ll]ogs/
/[Uu]ser[Ss]ettings/

# MemoryCaptures can get excessive in size.
# They also could contain extremely sensitive data
/[Mm]emoryCaptures/

# Recordings can get excessive in size
/[Rr]ecordings/

# Uncomment this line if you wish to ignore the asset store tools plugin
# /[Aa]ssets/AssetStoreTools*

# Autogenerated Jetbrains Rider plugin
/[Aa]ssets/Plugins/Editor/JetBrains*

# Visual Studio cache directory
.vs/

# Gradle cache directory
.gradle/

# Autogenerated VS/MD/Consulo solution and project files
ExportedObj/
.consulo/
*.csproj
*.unityproj
*.sln
*.suo
*.tmp
*.user
*.userprefs
*.pidb
*.booproj
*.svd
*.pdb
*.mdb
*.opendb
*.VC.db

# Unity3D generated meta files
*.pidb.meta
*.pdb.meta
*.mdb.meta

# Unity3D generated file on crash reports
sysinfo.txt

# Builds
*.apk
*.aab
*.unitypackage
*.app

# Crashlytics generated file
crashlytics-build.properties

# Packed Addressables
/[Aa]ssets/[Aa]ddressable[Aa]ssets[Dd]ata/*/*.bin*

# Temporary auto-generated Android Assets
/[Aa]ssets/[Ss]treamingAssets/aa.meta
/[Aa]ssets/[Ss]treamingAssets/aa/*
After modifying the file, check GitHub Desktop again. The list of files to be committed will now update. A good way to check if your .gitignore is working properly is to check if there are files in the Library folder being tracked — you should not be committing files from that folder in your project because they are user-specific.
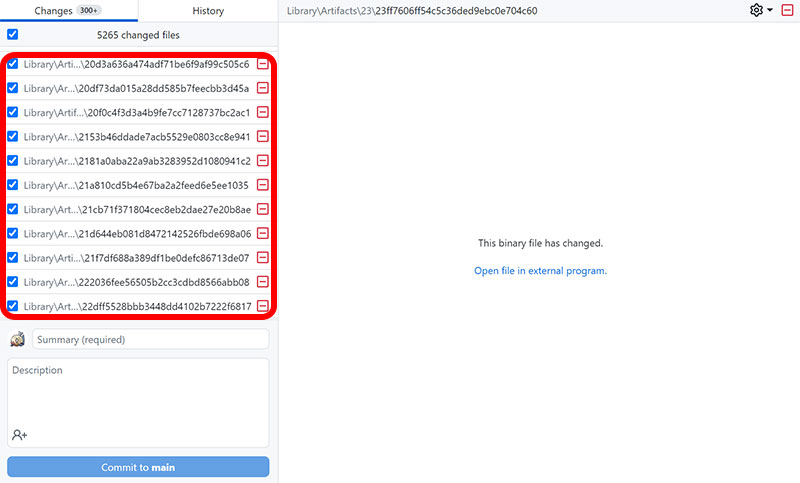
.gitignore is working properly, GitHub Desktop should not be tracking your Library folder files.If your .gitignore file is configured to ignore these files, but they are still showing up under your Changes tab, check out this article:
d. Committing your project
To commit your project onto your repository, you will need to fill in the Summary field, then press the Commit to master button. After that, press the Publish to repository button on the top right.
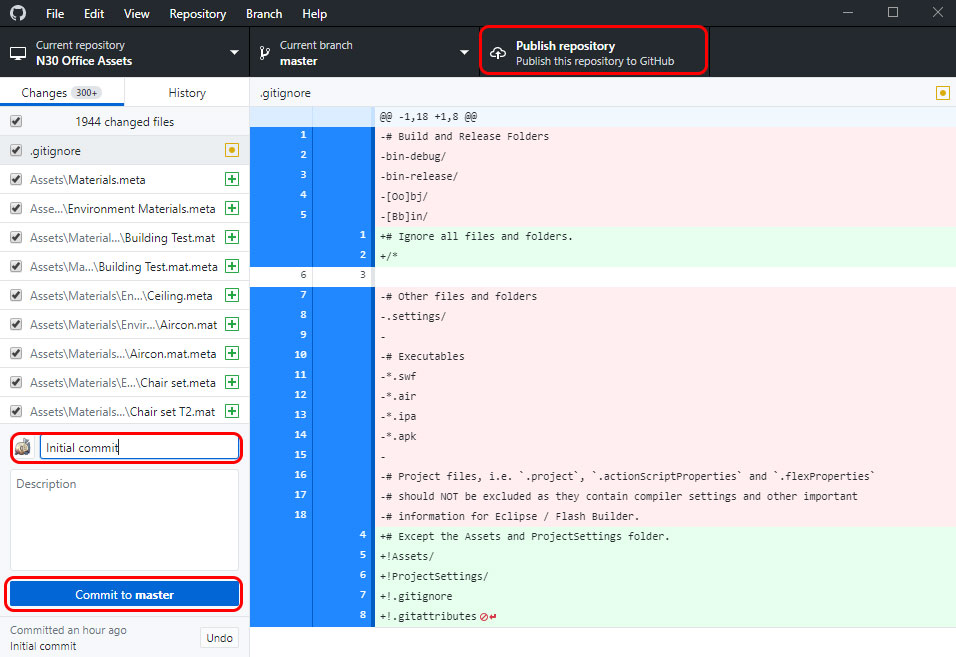
You (and your collaborators) will have to go through this same process every time you make changes to the project. After the first commit, however, the Publish repository button will become Push origin. Both buttons do the same thing.
3. Wrapping up
And that wraps up this part! In the next part, we will be covering how to add collaborators to your project, so that can start using your repository to synchronise work among your teammates.
Although source control is a relatively simple concept, it takes a fair bit of trial and error to grasp. If this is your first time setting up a repository, I recommend doing frequent backups of the project (just ZIP up your Unity project folder and store it somewhere). It’s not uncommon for files to be lost due to careless commits, or for changes to be overwritten because another collaborator forgot to do a fetch before starting work.
This was super helpful. Thanks!